Creating a new NPC
For this tutorial, we will go over how to create a new NPC that will be used as a target.
Building off our Bank mission, let's make a new target named Target McTargetface. First we'll need to update the manifest.json file to add some localisation strings.
Updating the Manifest file
Our new NPC needs to have a name and description added to the manifest file so that the menus will be able to display them, and we need to add a new entry to the packagedefinition.
Open up the manifest.json file and add the following lines under the localisation > english section:
    "NPC_TARGET_MCTARGETFACE_NAME": "Target McTargetface",
    "NPC_TARGET_MCTARGETFACE_DESC": "Target McTargetface is the new CEO of the Milton-Fitzpatrick Bank."
In full, it should now look like this:
  "localisation": {
    "english": {
      "UI_HITMAN_CAMPAIGN_DEMO": "Hitman Campaign Demo",
      "UI_STORY": "Story",
      "UI_BANK_DESC": "I need to take out Target McTargetface.",
      "UI_BANK_TITLE": "Bank mission",
      "UI_STARTING_LOCATION_BANK_CEO_OFFICE_DEFAULT_NAME": "CEO's Office",
      "UI_STARTING_LOCATION_BANK_CEO_OFFICE_DESC": "47 has made his way to the CEO's office.",
      "NPC_TARGET_MCTARGETFACE_NAME": "Target McTargetface",
      "NPC_TARGET_MCTARGETFACE_DESC": "Target McTargetface is the new CEO of the Milton-Fitzpatrick Bank."
  },
Press the save button.
Adding Repository entries for the NPC and Outfit
In GlacierKit, open the campaign_demo.repository.json file.
Let's create our outfit repository entry. Click the New item button, select the new item, and set the Editor text to be:
{
  "CommonName": "Outfit Target McTargetface",
  "Description": "Outfit Target McTargetface",
  "Name": "Outfit Target McTargetface",
  "Category": "",
  "HeroDisguiseAvailable": false,
  "Image": "",
  "ImageTransparent": "",
  "IsHitmanSuit": false,
  "TokenID": ""
}
Now let's create our NPC repository entry. Click the New item button and set the Editor text to be:
{
	"CharacterSetIndex": 0.0,
	"Description": "Target McTargetface",
	"Description_LOC": "actor_description",
	"Image": "images/campaign_demo/bank/target_mc_targetface.jpg",
	"Name": "Target McTargetface",
	"Outfit": "[NEW TARGET'S OUTFIT UUID]",
	"OutfitVariationIndex": 0.0,
	"Tile": "images/campaign_demo/bank/target_mc_targetface.jpg"
}
Copy the id of the new outfit repository entry from under the Editor header text and paste it into the Outfit field of the new NPC entry.
We can see that we will need a new image file. In our images/campaign_demo/bank folder let's create a new file named target_mc_targetface.jpg and make it a placeholder picture for the target.

We will also need this repository entry's id UUID under the Editor header text in a moment.
Click the save button.
Updating the Mission contract
Open the content/chunk0/Mission Contracts/mission_bank.contract.json file. Under the Objectives array, add the following object:
{
    "Id": "[NEW GENERATED UUID]",
    "Category": "primary",
    "ObjectiveType": "setpiece",
    "DisplayAsKillObjective": true,
    "ForceShowOnLoadingScreen": true,
    "IsHidden": false,
    "BriefingName": "$($repository [NEW NPC'S UUID]).Name",
    "Image": "images/campaign_demo/bank/target_mc_targetface.jpg",
    "HUDTemplate": { "display": "Eliminate Target McTargetface" },
    "BriefingText": "Eliminate Target McTargetface",
    "SuccessEvent": {
        "EventName": "Kill",
        "EventValues": { "RepositoryId": "[NEW NPC'S UUID]" }
    }
}
Let's generate a new UUID for the new mission contract objective using GlacierKit. Go to the Text tools section and click the copy button next to the Random UUID text field, and paste it into the Id field.
Replace the [NEW NPC'S UUID] value in the BriefingName and SuccessEvent fields with your new NPC's UUID from the repository entry.
Click the save button.
Our new NPC will need a new outfit, and we will need to make a new outfits brick for our NPC's outfit.
Creating a new Outfit file
In GlacierKit, right-click your content/chunk12 folder and click New folder and name it Outfits.
Right-click that new Outfits folder and click New File and name it outfit_target_mctargetface_v0.entity.json. Click on that new file.
Switch to the Metadata tab and change the Entity type dropdown to Template.
Let's set the Factory hash to:
[assembly:/_pro/characters/templates/hitman_campaign_demo/outfit_target_mctargetface_actor_v0.entitytemplate].pc_entitytemplate
and set the Blueprint hash to:
[assembly:/_pro/characters/templates/hitman_campaign_demo/outfit_target_mctargetface_actor_v0.entitytemplate].pc_entityblueprint
Switch to the Tree view.
Copying an existing outfit
Let's copy an outfit from the New York outfits and modify it. For this example, we'll use the Mateo NPC outfit.
Go to the Game content tab and search for outfit_ and check the Separete tree by partition checkbox. Scroll down to the greedy > assembly > _pro > characters > templates > raccoon > char_raccoon_unique.template? folder and expand it. Click on the outfit_raccoon_unique_headofsecurity_m_actor_v0.entitytemplate node and click the Open in editor button.
On the Tree tab, right-click on the root OUTFIT_Raccoon_Unique_HeadOfSecurity_M_Actor_v0 node and click Clipboard > Copy.
Switch back to the outfit_target_mctargetface_v0.entity.json file. Right-click on the Scene and click Clipboard > Paste.
Now it is a child node of the Scene node, but we actually want it at the root. Drag the OUTFIT_Raccoon_Unique_Lieutenant_M_Actor_v0 node to the root of the tree. It will now be on the same level as the Scene node.
We also need to set this node to be the root entity. Click on the new entity, and copy the entity id from under the Editor panel header text.
Switch to the Metadata tab. Replace the value into the Root entity text field with the id you copied.
Switch back to the Tree tab and delete the Scene node.
Click on the OUTFIT_Raccoon_Unique_Lieutenant_M_Actor_v0 node and change the name field to OUTFIT_TargetMcTargetface_Actor_v0.
Modifying an existing outfit
Let's delete Mateo's badge. Expand the OUTFIT_Raccoon_Unique_Lieutenant_M_Actor_v0 node. If we expand the Spine2_Attacher_01 node, we can see that the badge is a child node of that. Right-click the Spine2_Attacher_01 node and click Delete.
Let's also delete Mateo's walkie-talkie. As with the Spine attacher, the Pelvis Attacher has the walkie-talkie as a child node. Right-click the Pelvis_Attacher node and click Delete.
Let's also delete Mateo's goatee. Right-click the Beard_Goatee node and click Delete.
Click through the different outfit piece entities, you will notice several outfit parts have a SColorRGB fields with a color square. Let's change some of them. In the provided example mod, all the customizable colors were set to white (#ffffff).
Let's also switch out his head. Click on the Head_HeadOfSecurity node and change the name to Head_TargetMcTargetface.
Switch to the Game content tab and search for head_. Expand the greedy node and click on head_itlazy (006D0B626E560A34.TEMP) and click on the Open in editor button. On the Metadata tab, copy the Factory hash. Switch back to the outfit_target_mctargetface_v0.entity.json file. On the Head_TargetMcTargetface node, replace the factory field with the copied factory hash.
Switch back to the head_itlazy file and copy the Blueprint hash. Switch back to the outfit_target_mctargetface_v0.entity.json file. On the Head_TargetMcTargetface node, replace the blueprint field with the copied blueprint hash.
Click the save button.
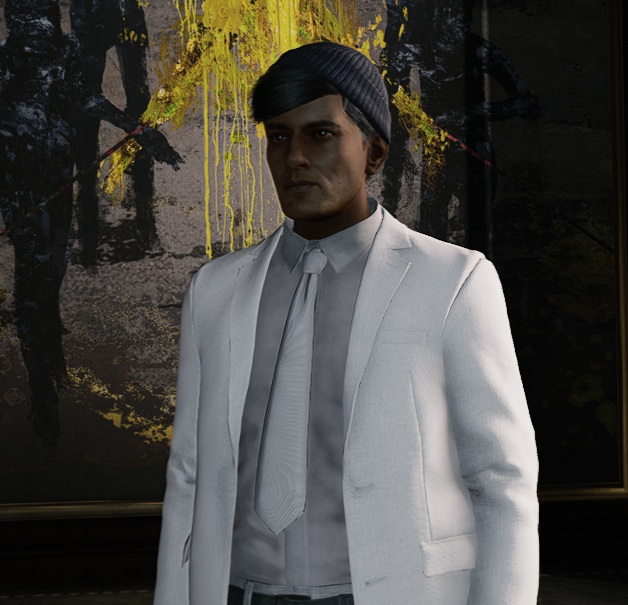
We now have a custom outfit for our new NPC. It has Mateo's suit, but it's all white, it has the lazy IT guy's head, he doesn't have a badge, and he doesn't have a radio. We can modify the outfit more later but for now this will do.
Let's create a Character set for this outfit.
Creating a new Character set file
Back on the Files tab, right-click the conent/chunk12/Outfits folder and click New File and name it charset_target_mctargetface.entity.json. Click on that new file.
Switch to the Metadata tab and change the Entity type dropdown to Template.
Let's set the Factory hash to:
[assembly:/_pro/characters/templates/hitman_campaign_demo/charset_target_mctargetface.entitytemplate].pc_entitytemplate
and set the Factory blueprint to:
[assembly:/_pro/characters/templates/hitman_campaign_demo/charset_target_mctargetface.entitytemplate].pc_entityblueprint
Switch to the Tree view.
Copying an existing character set
Let's copy the charset for Fabien and modify it.
Go to the Game content tab and search for charset_ and check the Separete tree by partition checkbox. Scroll down to the greedy > assembly > _pro > characters > templates > raccoon > char_raccoon_unique.template? folder and expand it. Click on the charset_raccoon_unique_headofsecurity_m.entitytemplate node and click the Open in editor button. Switch to the Tree view.
Right-click on the CHARSET_Raccoon_Unique_HeadOfSecurity_M node and click Clipboard > Copy.
Switch back to the charset_target_mctargetface.entity.json file. Right-click on the Scene and click Clipboard > Paste.
Now it is a child node of the Scene node, but we actually want it at the root. Drag the CHARSET_Raccoon_Unique_HeadOfSecurity_M node to the root of the tree. It will now be on the same level as the Scene node.
We also need to set this node to be the root entity. Click the new entity, and copy the entity id from under the Editor panel header text.
Switch to the Metadata tab. Replace the value into the Root entity text field with the id you copied.
Switch back to the Tree tab and delete the Scene node.
Click on the CHARSET_Raccoon_Unique_HeadOfSecurity_M node and change the name field to CHARSET_TargetMcTargetface.
Modifying an existing character set
Expand the CHARSET_TargetMcTargetface node.
Click on the Actor > 0 node and change the m_Outfit > value > resource field to:
[assembly:/_pro/characters/templates/hitman_campaign_demo/outfit_target_mctargetface_actor_v0.entitytemplate].pc_entitytemplate
Click the save button.
We now have a custom charset for our new NPC with the Actor v0 outfit pointing to our new custom outfit.
We need to add an outfits brick that uses this charset.
Adding a new Outfits brick
Back on the Files tab, right-click the content/chunk12/Outfits folder and click New File and name it outfits_bank.entity.json. Click on that new file.
Switch to the Metadata tab and change the Entity type from Scene to Brick.
Let's set the Factory hash to:
[assembly:/_pro/scenes/missions/hitman_campaign_demo/outfits_bank.brick].pc_entitytype
and set the Factory blueprint to:
[assembly:/_pro/scenes/missions/hitman_campaign_demo/outfits_bank.brick].pc_entityblueprint
In the External scenes section, click the Add an entry button, enter:
[assembly:/_pro/scenes/bricks/globaldata.brick].pc_entitytype
and press Continue.
Switch to the Tree tab.
Right-click on the Scene node and click Create Entity and name it Target McTargetface. Replace everything beneath the parent field with:
 "name": "Target McTargetface",
  "factory": "[modules:/zglobaloutfitkit.class].pc_entitytype",
  "blueprint": "[modules:/zglobaloutfitkit.class].pc_entityblueprint",
  "properties": {
    "m_sId": {
      "type": "ZGuid",
      "value": "[TARGET OUTFIT UUID]"
    },
    "m_pParentOutfit": {
      "type": "SEntityTemplateReference",
      "value": {
        "ref": "6736fcbbd3e73209",
        "externalScene": "[assembly:/_pro/scenes/bricks/globaldata.brick].pc_entitytype"
      }
    },
    "m_eActorCCClass": {
      "type": "EActorCCPreset",
      "value": "ACCP_CivilianeMale"
    },
    "m_eActorType": {
      "type": "EActorType",
      "value": "eAT_Civilian"
    },
    "m_sCommonName": {
      "type": "ZString",
      "value": "Target McTargetface"
    },
    "m_sTitle": {
      "type": "ZString",
      "value": "Target McTargetface"
    },
    "m_DamageMultipliers": {
      "type": "SBodyPartDamageMultipliers",
      "value": {
        "m_fHeadDamageMultiplier": 3.0,
        "m_fFaceDamageMultiplier": 3.0,
        "m_fArmDamageMultiplier": 1.0,
        "m_fLArmDamageScalar": 0.0,
        "m_fRArmDamageScalar": 0.0,
        "m_fHandDamageMultiplier": 0.5,
        "m_fLHandDamageScalar": 0.0,
        "m_fRHandDamageScalar": 0.0,
        "m_fLegDamageMultiplier": 0.6000000238418579,
        "m_fLLegDamageScalar": 0.0,
        "m_fRLegDamageScalar": 0.0,
        "m_fTorsoDamageMultiplier": 1.0,
        "m_bApplyLeftRightScalars": false
      }
    },
    "m_rDescriptionTextResource": {
      "type": "ZRuntimeResourceID",
      "value": {
        "resource": "[assembly:/localization/hitman6/conversations/ui/pro/online/repository/outfits_npcs_raccoon.sweetmenutext?/outfits_raccoon_target_lieutenant_m_description_33caaba6-7e28-4e9c-ad35-8e1d9a3f58f0.sweetline].pc_sweetline",
        "flag": "5F"
      }
    },
    "m_rNameTextResource": {
      "type": "ZRuntimeResourceID",
      "value": {
        "resource": "[assembly:/localization/hitman6/conversations/ui/pro/online/repository/outfits_npcs_raccoon.sweetmenutext?/outfits_raccoon_target_lieutenant_m_name_33caaba6-7e28-4e9c-ad35-8e1d9a3f58f0.sweetline].pc_sweetline",
        "flag": "5F"
      }
    },
    "m_eSoundFootwearType": {
      "type": "EHM5SoundFootwearType",
      "value": "EFWT_LEATHER"
    },
    "m_rDefaultVoiceVariations": {
      "type": "TArray<EActorVoiceVariation>",
      "value": [
        "eAVV_CIVMALE07"
      ]
    },
    "m_aCharSets": {
      "type": "TArray<SEntityTemplateReference>",
      "value": [
      ],
      "postInit": true
    }
  }
}
Replace [TARGET OUTFIT UUID] with your new target's outfit's UUID.
Right-click the Target McTargetface node in the Tree view and click Create Entity and name it CHARSET_TargetMcTargetface.
Replace the factory and blueprint lines with this:
	"factory": "[assembly:/_pro/characters/templates/hitman_campaign_demo/charset_target_mctargetface.entitytemplate].pc_entitytemplate",
	"blueprint": "[assembly:/_pro/characters/templates/hitman_campaign_demo/charset_target_mctargetface.entitytemplate].pc_entityblueprint"
Copy the id of the new CHARSET_TargetMcTargetface entity and in the Target McTargetface entity, paste it into the m_aCharSet value array. It should look something like this:
    "m_aCharSets": {
      "type": "TArray<SEntityTemplateReference>",
      "value": [
        "[ID OF THE CHARSET_TargetMcTargetface ENTITY]"
      ],
      "postInit": true
    }
Click the save button.
Now that we have an outfits brick that points to our custom charset, which points to our custom outfit, let's add this outfit brick to our scenario.
Adding the outfits brick
Open the scenario_bank.entity.json file and go to the Metadata tab.
In the External scenes section, click the Add an entry button. Enter:
[assembly:/_pro/scenes/missions/hitman_campaign_demo/outfits_bank.brick].pc_entitytype
and press the Continue button.
Press the save button. While we're on the scenario file, let's create an NPC that uses our new charset and outfit.
Creating a new NPC entity
On the Tree tab, right-click on the Scene > Scenario_Bank > NPCs node and click Create Entity and set the name to CHAR_TargetMcTargetface.
Replace everything beneath the parent field with:
	"name": "CHAR_TargetMcTargetface",
	"factory": "[assembly:/templates/gameplay/ai2/actors.template?/npcactor.entitytemplate].pc_entitytype",
	"blueprint": "[assembly:/templates/gameplay/ai2/actors.template?/npcactor.entitytemplate].pc_entityblueprint",
	"properties": {
		"m_mTransform": {
			"type": "SMatrix43",
			"value": {
                "rotation": {
                    "x": -0.0,
                    "y": 0,
                    "z": -0.0
                },
                "position": {
                    "x": -22.26884,
                    "y": 55.282745,
                    "z": 25.000002
                }
			}
		},
		"RepositoryId": {
			"type": "ZGuid",
			"value": "[GENERATED NPC UUID]"
		},
		"m_OutfitRepositoryID": {
			"type": "ZGuid",
			"value": "[GENERATED NPC OUTFIT ID]"
		},
		"m_nOutfitVariation": {
			"type": "int32",
			"value": 0
		},
		"m_sActorName": {
			"type": "ZString",
			"value": "Target McTargetface"
		},
		"m_eRequiredVoiceVariation": {
			"type": "EActorVoiceVariation",
			"value": "eAVV_CIVMALE01"
		},
		"m_InventoryItemKeys": {
			"type": "TArray<SEntityTemplateReference>",
			"value": []
		},
		"m_aEnforcedOutfits": {
			"type": "TArray<SEntityTemplateReference>",
			"value": [],
			"postInit": true
		},
		"m_eidParent": {
			"type": "SEntityTemplateReference",
			"value": "fffffffffffffffe",
			"postInit": true
		}
	},
	"subsets": {
		"AudioEmitters": [
			"fffffffffffffffe"
		],
		"Replicable": [
			"fffffffffffffffe"
		]
	}
}
Replace [GENERATED NPC UUID] with the new NPC's UUID.
Replace [GENERATED NPC OUTFIT ID] with the new NPC's outfit's UUID.
This will create our new target NPC and place him roughly in the center of the CEO's Office.
Adding a profession to an NPC
Since the m_aEnforcedOutfits array is empty, he will not be an enforcer for Agent 47. We could make the NPC an enforcer for Agent 47 in his own suit, but it might be better to just give our new CEO the CEO profession. This way, any zones that the CEO enforces will also be enforced by our NPC.
Switch to the outfits_bank.entity.json file. Right-click on the Target McTargetface node and click Create Entity and set the name to Prof_Greedy_Unique_CEO. Replace everything in the entity contents after the parent field with:
	"name": "Prof_Greedy_Unique_CEO",
	"factory": "[assembly:/_pro/design/actor/profession.template?/prof_greedy_unique_ceo.entitytemplate].pc_entitytype",
	"blueprint": "[assembly:/_pro/design/actor/profession.template?/prof_greedy_unique_ceo.entitytemplate].pc_entityblueprint",
	"properties": {
		"m_aHolders": {
			"type": "TArray<SEntityTemplateReference>",
			"value": [
			],
			"postInit": true
		}
	}
}
In the m_aHolders value array, add the id of the Target McTargetface entity from under the Editor header text. It should look something like this:
{
	"parent": "cafe459970a0deb3",
	"name": "Prof_Greedy_Unique_CEO",
	"factory": "[assembly:/_pro/design/actor/profession.template?/prof_greedy_unique_ceo.entitytemplate].pc_entitytype",
	"blueprint": "[assembly:/_pro/design/actor/profession.template?/prof_greedy_unique_ceo.entitytemplate].pc_entityblueprint",
	"properties": {
		"m_aHolders": {
			"type": "TArray<SEntityTemplateReference>",
			"value": ["cafe459970a0deb3"],
			"postInit": true
		}
	}
}
Let's redeploy, relaunch, and start the mission and see what happens.

Our target is visible on the menu
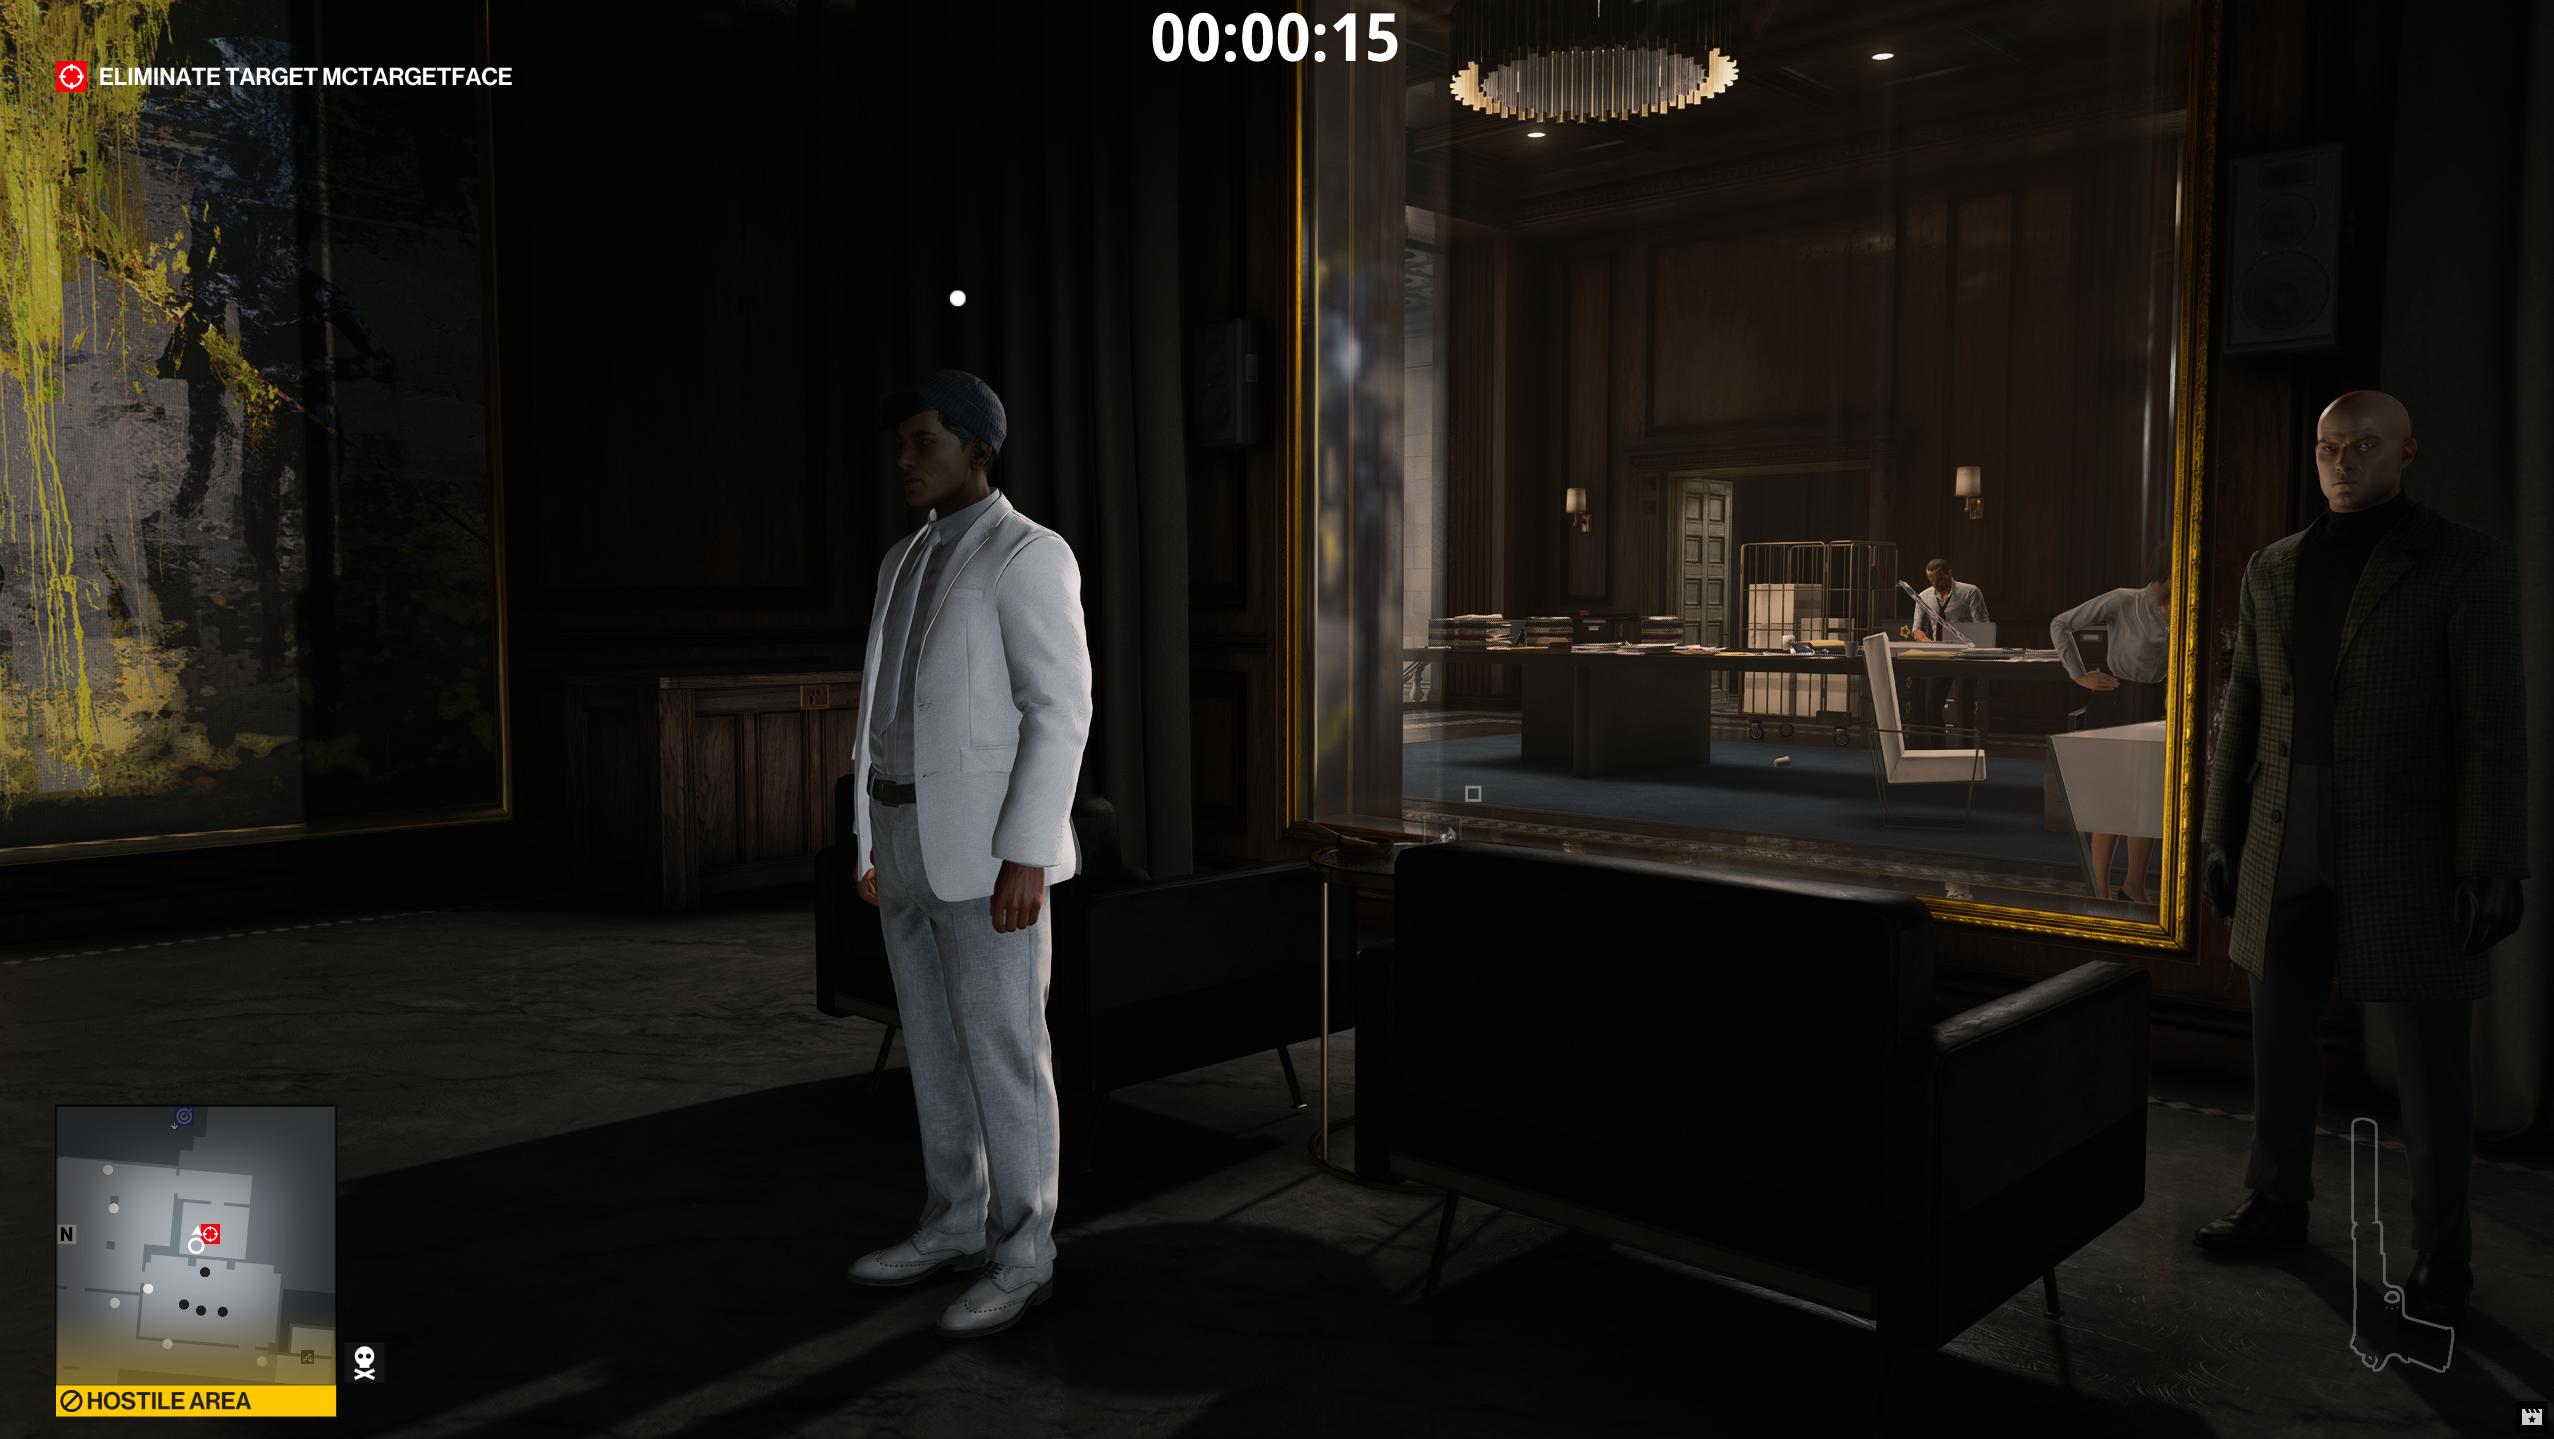
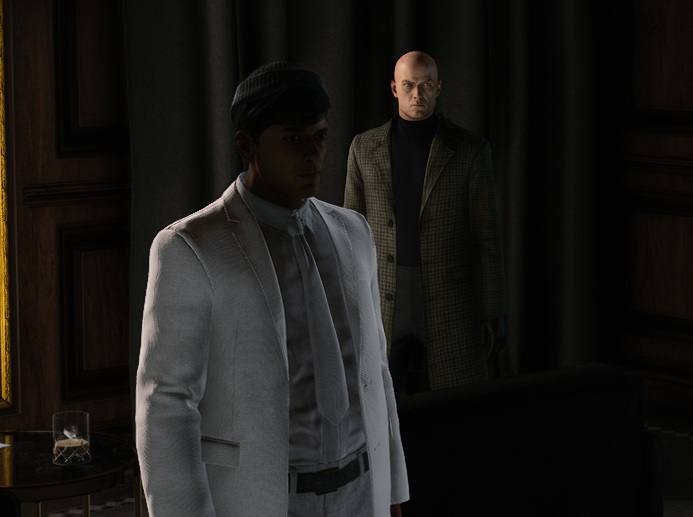
Our target has a new outfit and is an enforcer for the CEO's office
Updating the menu pictures
Now that we have the mission fully setup, let's replace our template screenshots with some bespoke ones.
Updated bank
tile.jpg
Updated
bank_entrance_ceo.jpg
Updated
campaign_deom_tile.jpg
Updated
target_mc_targetface.jpg
Making a new release
Now would be a good time to make a new GitHub release. Follow a similar procedure as we did on the Committing to GitHub page.
Next Steps
Now let's make a whole new mission from scratch.