Creating a Scene and Scenario
For this tutorial, we will go over creating a custom scene file and a custom scenario file based on an existing scenario.
Understanding Bricks, Scenario Bricks, and Scenes
- Brick
- A brick contains a group of entities.
- This typically is a set of similar entities, either geometry objects or NPCs.
- Scenario Brick
- A brick that contains entities for a location.
- It is best practice to follow a standardized hierarchical format of entity folders that group similar entities together.
- For instance, you would put all your NPC entities in a NPCs folder.
- Scene Entity
- An entity that uses a scenario brick and possibly other bricks, specified in the
externalSceneslist. - There could be multiple scenes that all use the same scenario brick.
- For instance, there could be one scene for the main mission for a location, and a separate scene for an Elusive Target for that same location.
- An entity that uses a scenario brick and possibly other bricks, specified in the
Downloading the scenario file from the template
The Custom-Scenes templates page contains a template for a Scenario Brick, which is copied here for convenience.
For each mission, it is best practice to create both a Scene and Scenario entity.json file for reusability, though not strictly necessary. We will be following that methodology for this guide.
For the Bank mission, we will need to have Simple Mod Framework (SMF) put these files in the proper chunk for the mission's location. We do that by placing them in a folder name that matches the chunk.
To find the correct chunk for the Bank mission, let's look at the Chunk Data page.
Scrolling down to the Hitman 3 table, we can see that the New York location is in Chunk 12.

Create a new folder in the content folder named bank. In that folder, create a new folder named chunk12.
In GlacierKit, right-click the content/chunk12 folder and click New File and set the name to scene_bank.entity.json. Since we gave it a name that ends with .entity.json, GlacierKit will initialize the file with the entity template.
Right click Scenario brick and press Save link as... and save it into your content/chunk12 folder with a name of scenario_bank.entity.json.
Setting the factory and blueprint hashes for the scene
Now we have our scene and scenario files, but the game doesn't know to tie them to the IOI strings that we created. We can fix that by setting the Factory hash and Blueprint hash for these files.
In GlacierKit, click on the scene_bank.entity.json file, switch to the Metadata tab, and in the Factory hash text field enter:
[assembly:/_pro/scenes/missions/hitman_campaign_demo/mission_bank/scene_bank.entity].pc_entitytemplate
and press enter. It will automatically be converted to a hashed hexadecimal value that the game uses for this IOI string.
NOTE: It is important to use
pc_entitytemplatehere and for the rest of the IOI strings in the scene and scenario, instead ofentitytemplate.
This is slightly different from the IOI string in the manifest.
Just as important to set as the Factory hash is the Blueprint hash. For that, we can just use the same IOI string, but instead of ending with .pc_entitytemplate, change the ending to .pc_entityblueprint. For our bank mission it will be:
[assembly:/_pro/scenes/missions/hitman_campaign_demo/mission_bank/scene_bank.entity].pc_entityblueprint
Note that when we created this entity file, it set the Entity Type dropdown to Scene by default. That is what we want for this so we can leave it like that.
Setting the scenario for the scene
To set the scenario for the scene we first need to choose the IOI string for the scenario. Typically, it will be the same as the scene's IOI string, but with scenario instead of scene.
For the bank mission's scene as we specified in the manifest.json, we are using:
[assembly:/_pro/scenes/missions/hitman_campaign_demo/mission_bank/scene_bank.entity].pc_entitytemplate
So our IOI string for the scenario will be:
[assembly:/_pro/scenes/missions/hitman_campaign_demo/mission_bank/scenario_bank.brick].pc_entitytype
NOTE: The scene ends in
.entity].pc_entitytemplatewhile the scenario ends in.brick].pc_entitytype. This is because the scenario has an entity type ofBrick, as we will soon see.
We need to add it to the externalScenes field of the content/chunk12/scene_bank.entity.json file.
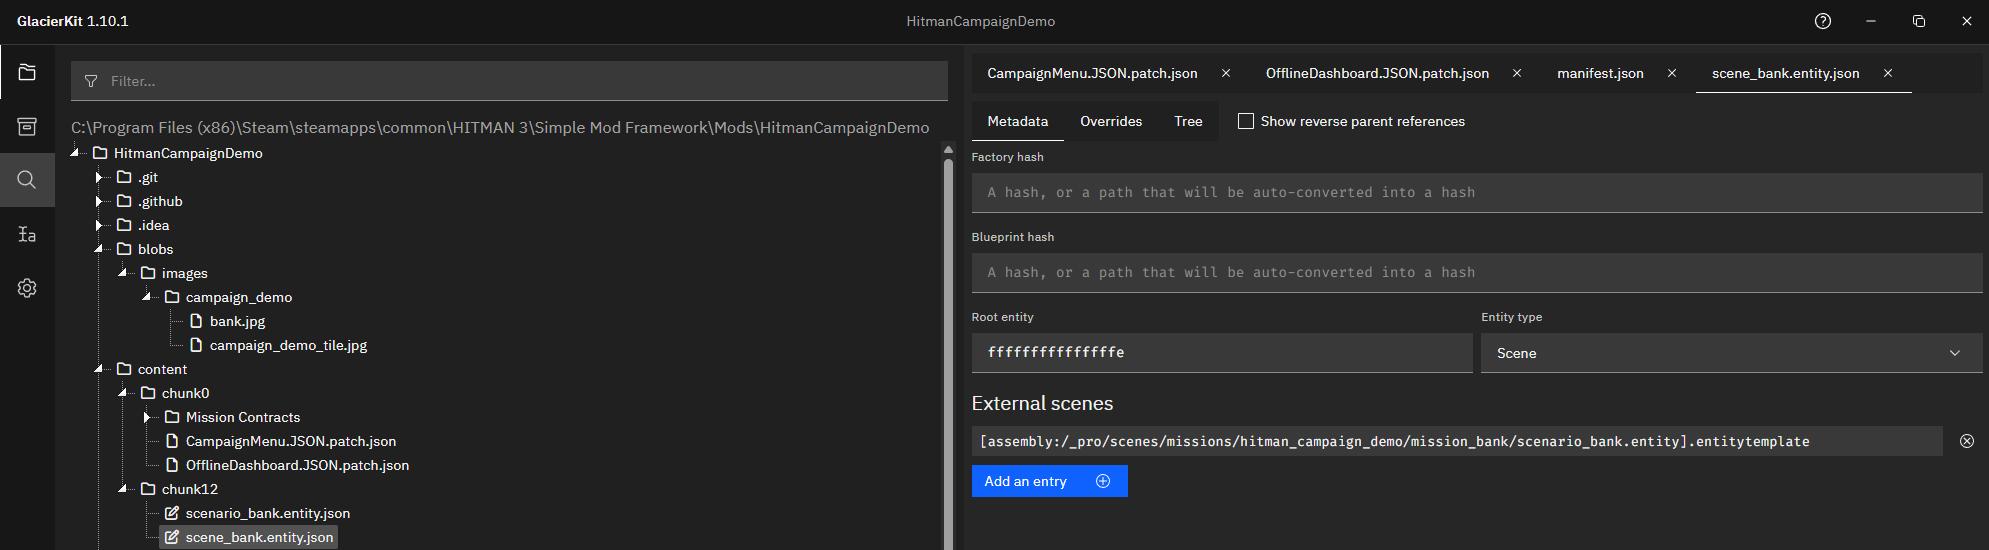
In GlacierKit, while still on the Metadata tab for scene_bank.entity.json, click the Add an entry button under the External scenes section. Enter:
[assembly:/_pro/scenes/missions/hitman_campaign_demo/mission_bank/scenario_bank.brick].pc_entitytype
and click the Continue button.
Now that we have set the Factory hash and Blueprint hash, and added the scenario to the External scenes, we are done with the Scene file. Save the file by pressing the save icon in the tab, or Ctrl+S (if you are on windows). Let's move on to the scenario itself.
Setting the factory and blueprint hashes for the scenario
The scenario will also need Factory and Blueprint hashes in order for the game to use them.
In GlacierKit, navigate to the content/chunk12/scenario_bank.entity.json file and open it.
In the Factory hash text field, enter:
[assembly:/_pro/scenes/missions/hitman_campaign_demo/mission_bank/scenario_bank.brick].pc_entitytype
and press enter.
In the Factory blueprint text field enter:
[assembly:/_pro/scenes/missions/hitman_campaign_demo/mission_bank/scenario_bank.brick].pc_entityblueprint
and press enter.
For the scenario, we want the Entity Type to be Brick. The template file we used for the scenario already has it set to Brick so we can just leave that as is.
Press the save button.
Next Steps
Now we have a scenario file and a scene file pointing to it, but the scenario doesn't have anything in it.
Let's update the scenario file to add an existing scenario brick as an external scene and modify it.