Committing to GitHub
For this tutorial, we will go over committing your changes to the GitHub Repo. Let's try out our git commit strategy, manage our branches, and update our .gitignore file.
Creating the next-release branch
Let's make a few new branches on our repo. In WebStorm, click the Terminal button on the bottom of the left sidebar.

First let's create our next-release branch. In the terminal enter:
git checkout -b next-release
This will check out a new branch named next-release. We want this branch to just be the same as the main branch for now.
Currently, this branch doesn't exist on our GitHub repository, so we need to push the changes. Enter:
git push -u origin head
Since we are pushing a new branch to the repo, we are adding -u origin head, which tells git to create the branch on the remote repo.
Creating the initial-setup branch
Now let's create a new feature branch. Let's name this one initial-setup. In the terminal enter:
git checkout -b initial-setup
This will check out a new branch named inital-setup. We want to add our changes and new files to this branch.
Updating the .gitignore file
Click on the Commit button on the top of the left sidebar.
We can see that there are a lot of changes under the Unversioned Files node in the .idea folder. These were created by WebStorm, and we do not need to include them in our repo, so let's tell git to ignore them.
Switch back to the Project view by pressing the Project button on the top of the left sidebar and open the .gitignore file.
Add this line at the end of the file:
.idea
Staging files
Switch back to the Commit tab.
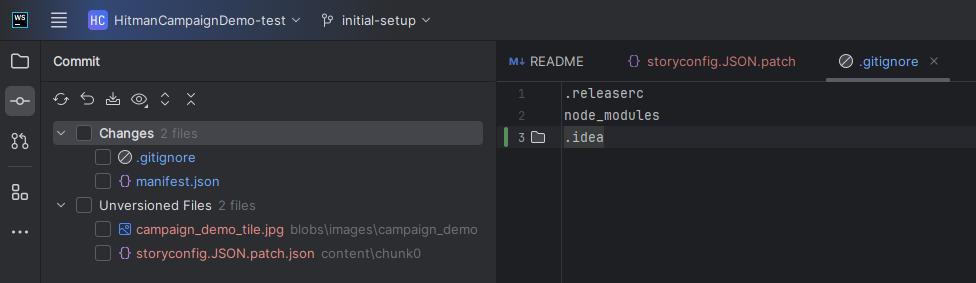
Now we can see the only files listed are the files we've modified under the Changes node, or added under the Unversioned Files node. If we were to commit to the repo at this time, the commit would not include our new files, so select both of those new files (colored in red), right-click one of them, and click Add to VCS (Version Control System). This will stage the files, so that we are able to commit them.
Now back in the terminal, enter:
git commit -am "Updated manifest and gitignore, added storyconfig and campaign image"
This command makes a commit with two flags, the -a flag, which stages all files that are in the VCS, as well as the -m flag which includes a message in the commit without an additional prompt.
Viewing the git log
Now we've made our first commit to this inital-setup branch. To see the commit, enter:
git log
It will open an interactive log of your repo. Press the up or down keys to scroll through the git log, and the q key to exit.
Pushing to the repository on GitHub
Currently, this branch and commit also don't exist on our GitHub repository, so we need to push the changes. Enter:
git push -u origin head
This pushes our commit to the origin, which here refers to your repository on GitHub.
For subsequent pushes to this branch we can just use git push and leave off the -u origin head, since the branch will already exist.
Making a Pull Request
We can manage branch merges manually using the git CLI, or we can use GitHub to merge our changes using Pull Requests. Using Pull Requests adds a few extra steps, but it also allows you to visually compare and manage your changes more easily, as well as keeping an easy-to-use record of your changes. And when working with multiple contributors, Pull Requests allow you to require a review from a repo admin before allowing merging.
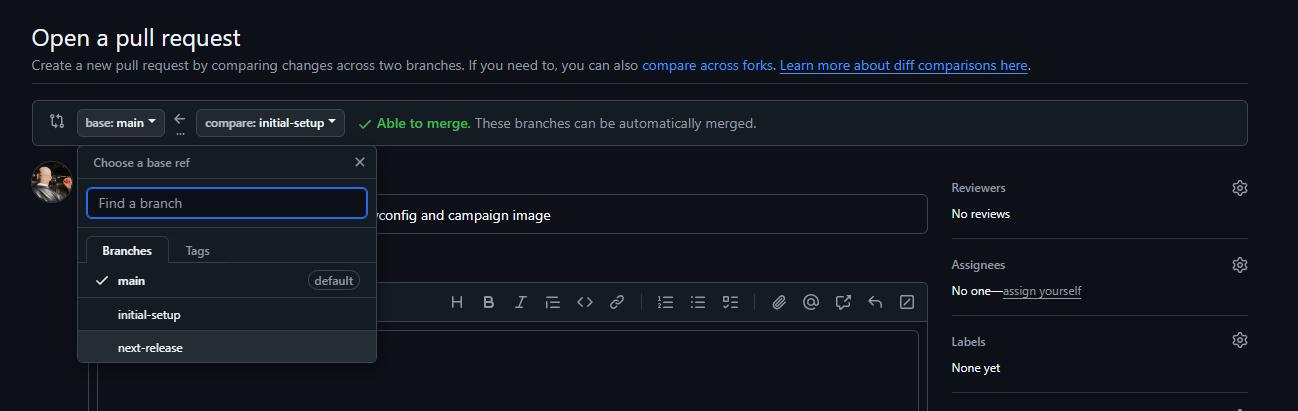
Let's create a pull request for this branch. If we click the link in the terminal it will open the Comparing changes / Open a pull request page for our branch. Alternatively, we can get to that page by navigating back to our repo's page on the GitHub website, and clicking on the green Compare & pull request button in the yellow bar that appeared on the top of our repo's contents.

We don't actually want to merge our initial-setup branch into the main branch. Instead, we want to merge this branch into the next-release branch, so change the base branch to next-release in the dropdown list.
Now click the Create pull request button.
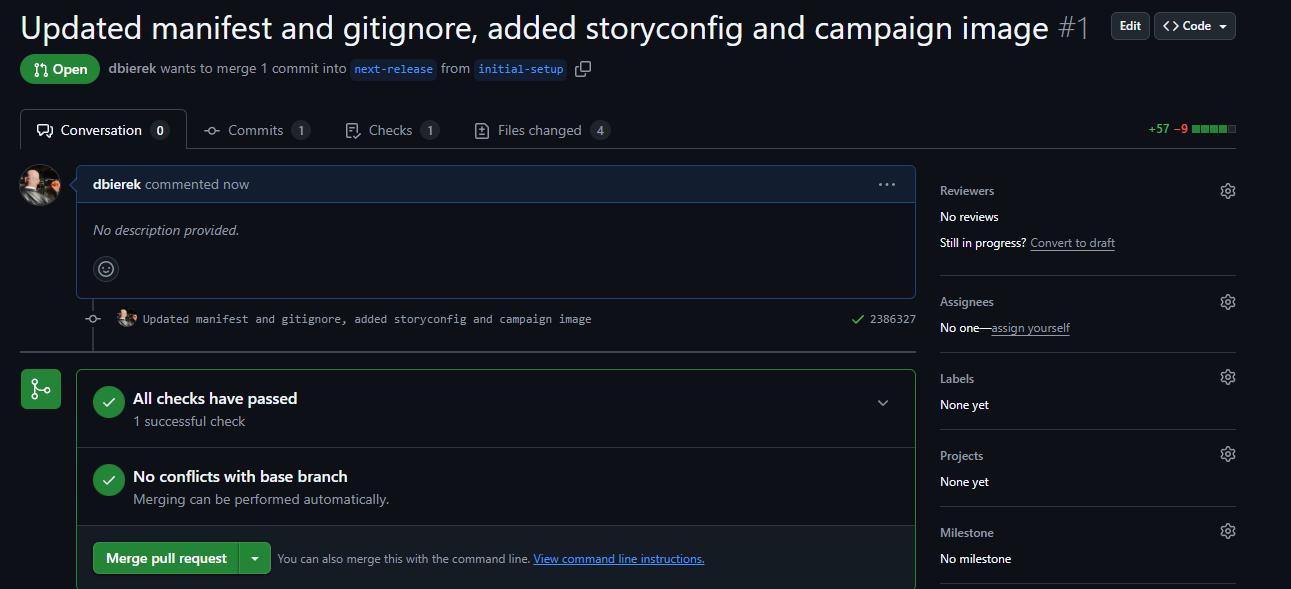
Here you can add a description if you'd like, or review your changes on the Files changed tab.
Merging a Pull Request into the next-release branch
When you are done, change the dropdown on the Merge pull request button on the Conversation tab to Squash and Merge.
For the commit message use feat: Initial setup and continue with the merge.
Now that the Pull Request for the initial-setup branch has been merged into the next-release branch, we no longer need the inital-setup branch.
Click the Delete Branch button on the PR.
Creating a new release
You may want to have multiple Pull Requests in one release, but for this example, let's make a release now just to try out the process.
Back on the home page of your mod repository, the green Compare & pull request button in the yellow bar that appeared on the top of our repo's contents. Create a Pull Request from the next-release branch with a base of the main branch.
This time though, instead of using the Squash & Merge button, just use the normal Merge button. For the message, you can just leave it as the default, or set the message to something else.
When the merge is done, a GitHub Actions workflow will begin, and since one of the commits includes a semantic versioning keyword (feat: ), it will make a new release. For more information about this process, check the README.md file in your mod.
Let's also delete the next-release branch. We'll recreate it later for the next release.
Pulling the latest from the main branch
Now that we have made a new release, we have some cleanup to do on our local machine. First, let's update our local git repository with the latest information from the remote repository on GitHub. In WebStorm, open the terminal and enter:
git fetch
It will output something like this:
From https://github.com/HitmanModder/HitmanCampaignDemo-test
 - [deleted]         (none)     -> origin/initial-setup
 - [deleted]         (none)     -> origin/next-release
remote: Enumerating objects: 36, done.
remote: Counting objects: 100% (36/36), done.
remote: Compressing objects: 100% (12/12), done.
remote: Total 26 (delta 10), reused 23 (delta 9), pack-reused 0 (from 0)
Unpacking objects: 100% (26/26), 227.58 KiB | 1.70 MiB/s, done.
   eb22775..33b085d  main       -> origin/main
 * [new tag]         0.2.0      -> 0.2.0
Now your local repo knows that the initial-setup and next-release branches have been deleted from the remote repository.
Let's check out our local main branch again.
git checkout main
It will output a message like this:
Switched to branch 'main'
Your branch is behind 'origin/main' by 3 commits, and can be fast-forwarded.
  (use "git pull" to update your local branch)
This is saying that we are now on the main branch of our local repo, but it is out of date with the remote repository. Let's update it. Enter:
git pull
It will output a message like this:
Updating eb22775..33b085d
Fast-forward
 .github/json-patch-schema.json                    |   16 +-
 .github/repository-schema.json                    |    9 +-
 .github/unlockables-schema.json                   |   16 +-
 .github/validate-mod-folder.js                    |  351 +-
 .github/validate.js                               |    6 +-
 .gitignore                                        |    3 +-
 README.md                                         |  103 +-
 blobs/images/campaign_demo/campaign_demo_tile.jpg |  Bin 0 -> 188003 bytes
 content/chunk0/storyconfig.JSON.patch.json        |   25 +
 manifest.json                                     |   33 +-
 package-lock.json                                 | 7779 +++++++++++++++++++++
 11 files changed, 8086 insertions(+), 255 deletions(-)
 create mode 100644 blobs/images/campaign_demo/campaign_demo_tile.jpg
 create mode 100644 content/chunk0/storyconfig.JSON.patch.json
 create mode 100644 package-lock.json
Now your local main branch matches the main branch on the remote repository.
Cleaning up branches deleted from the remote repository
Since we've deleted the remote branches for inital-setup and next-release let's delete those locally as well. Enter:
git branch -d initial-setup
It will output a message like this:
warning: deleting branch 'initial-setup' that has been merged to
         'refs/remotes/origin/initial-setup', but not yet merged to HEAD.
Deleted branch initial-setup (was 2386327).
Don't worry about that warning, it's just there because we merged to the intermediate next-release branch instead of the main branch, but it's not a problem.
Let's delete the next-release branch now. Enter:
git branch -d next-release
It will output a message like this:
Deleted branch next-release (was eb22775).
Now let's check what branches we have locally. Enter:
git branch
It will output a message like:
* main
Which indicates that the main branch is the only one we have locally.
Creating and checking out new branches
Let's recreate the next-release branch. Enter:
git checkout -b next-release
And let's also push this new branch to the remote repo. Enter:
git push
Now that the next-release branch is on the remote repo, we can make another new branch for our next feature, which will be more setup, so let's call it more-setup. Enter:
git checkout -b more-setup
Next Steps
Now that we have committed our changes, made a new release and cleaned up our local repo, let's create the MenuMapSetup and use it in the main menu.