Creating New Geometry
For this tutorial we will be adding new custom geometry to our Modtown mission.
Creating new geometry
Reusing in-game assets is useful, but sometimes you need to create your own 3D assets. For this will use blender, with the Glacier 2 Blender Add-on.
If you'd like an example you can refer to you can load this blender file: modland.blend. Note, this reference example is called
Modland, notModtown.
After installing the add-on, open Blender.

The default scene includes a light and a camera. We won't need those so click on them in the object panel and press delete. Click on the Collection node and press the F2 key and rename it to Modtown.
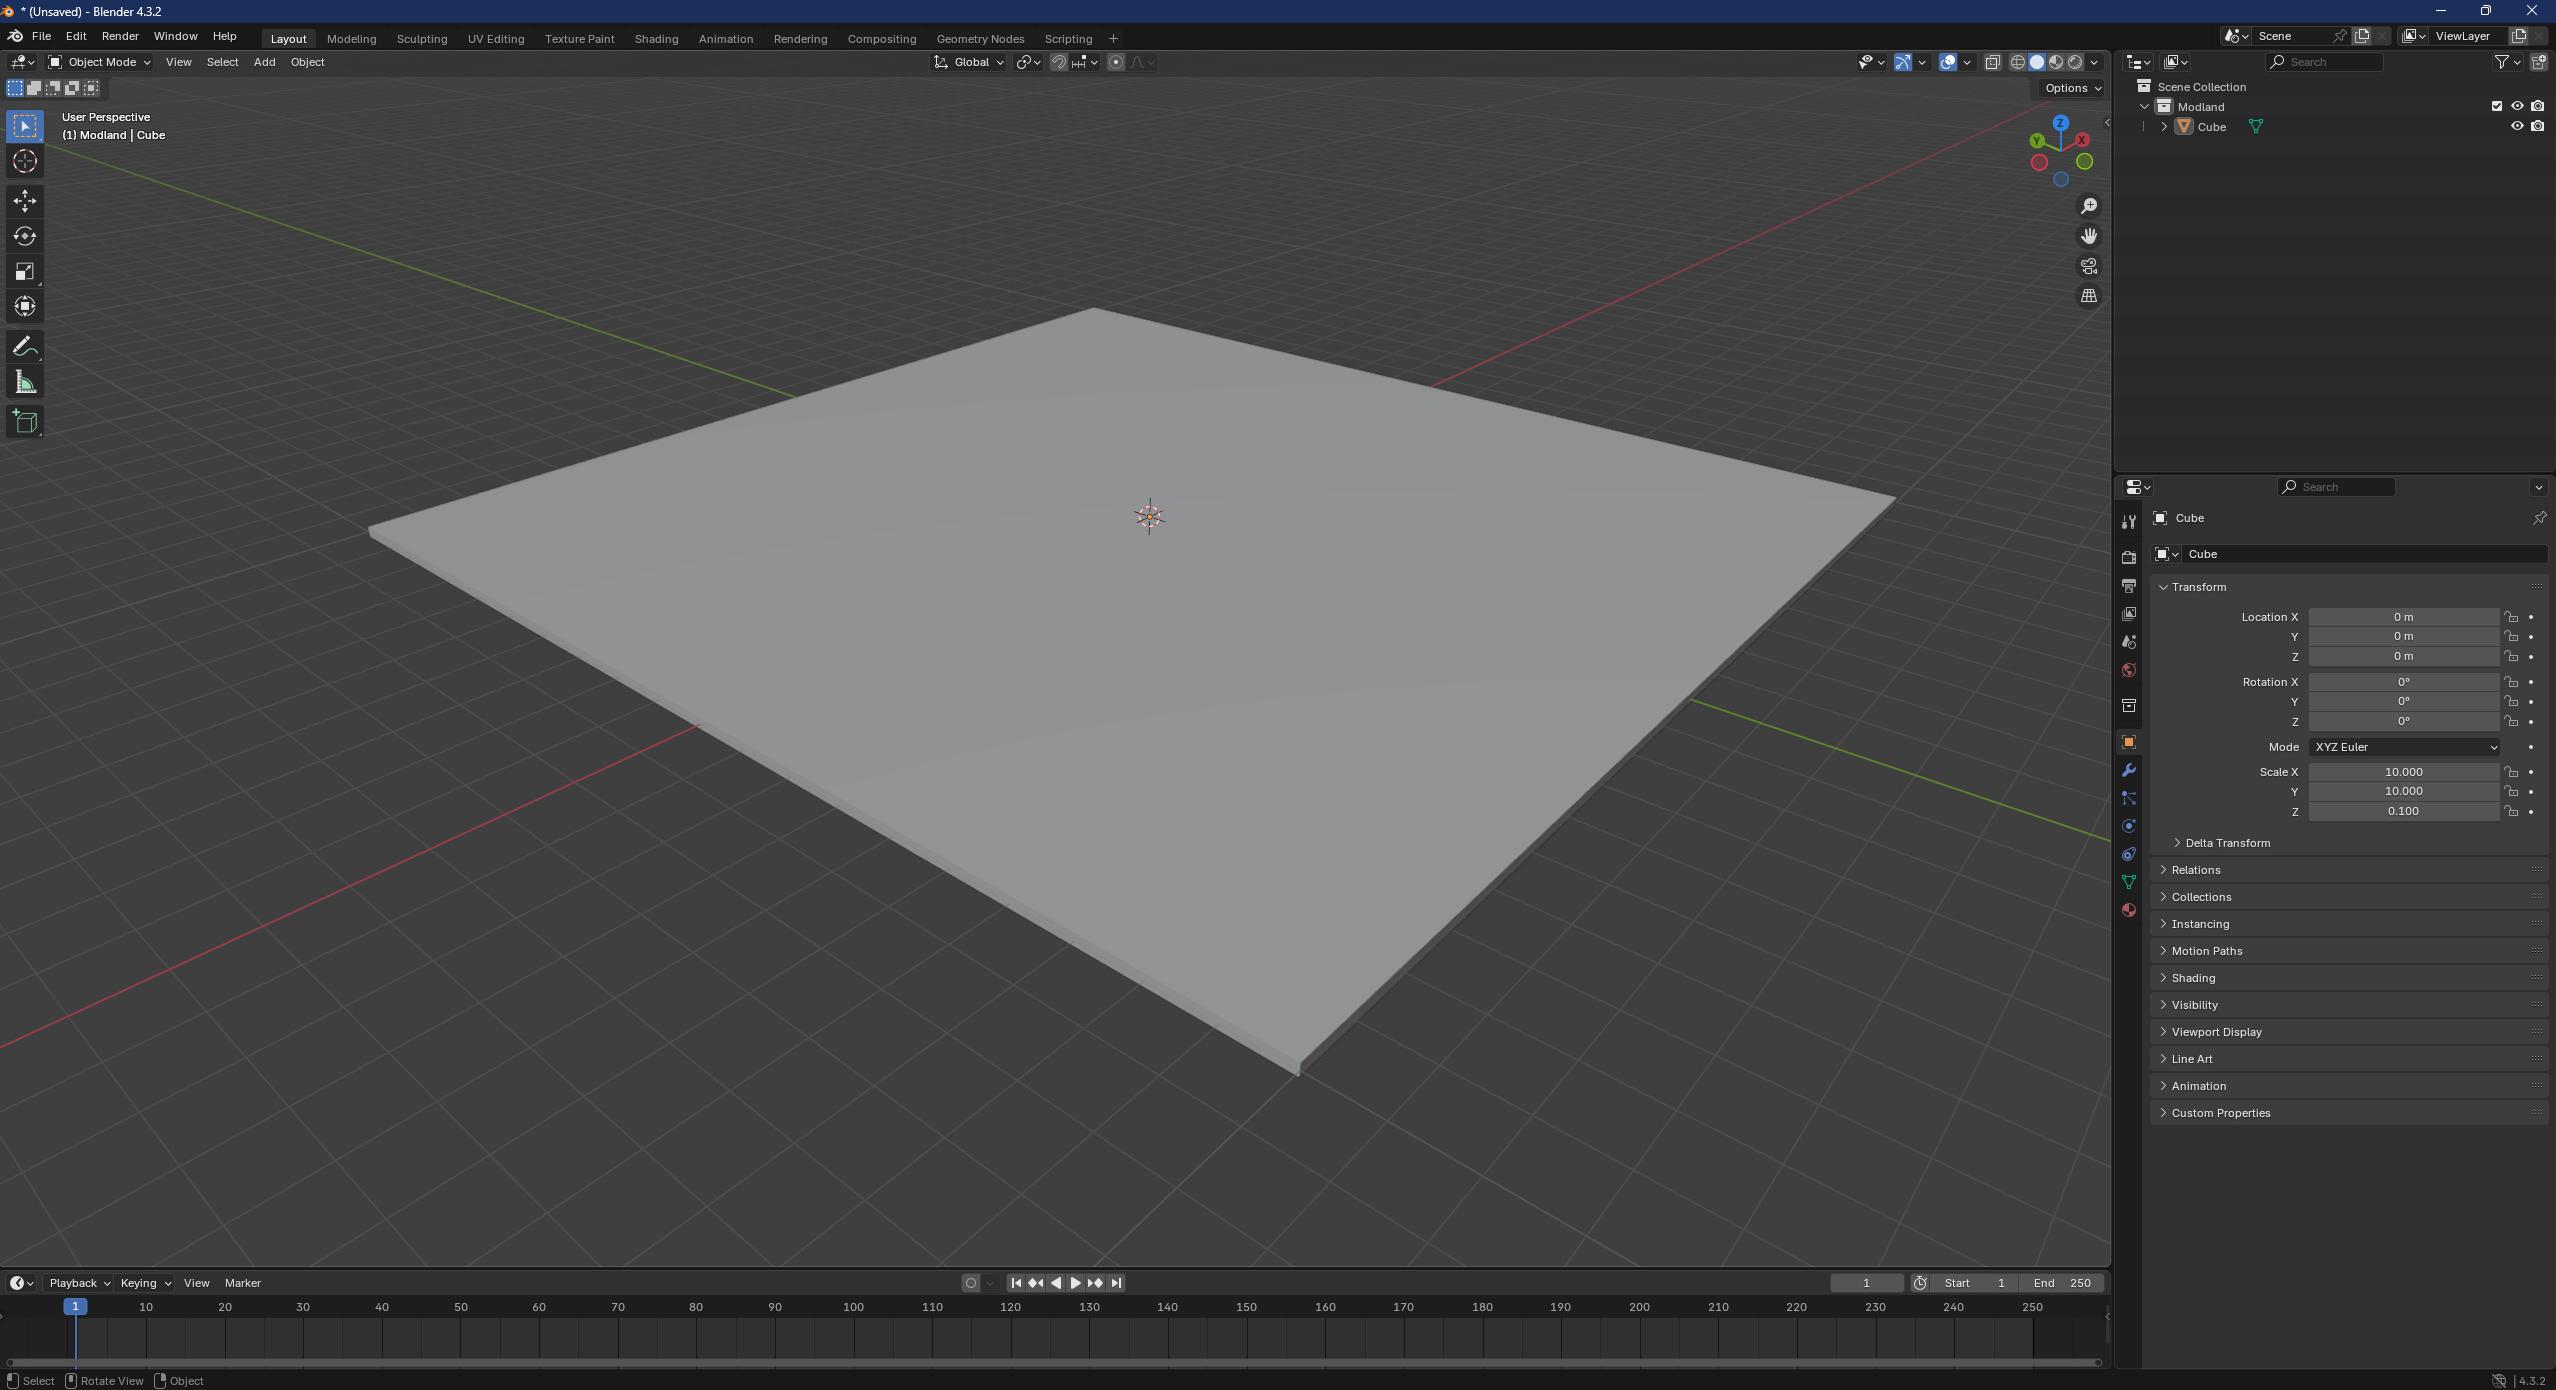
Our geometry so far isn't that interesting; it's just a small cube. Let's make some changes to make it more interesting.
Click the cube and press S to enter scale mode, then press Z to limit the scale to the Z-axis. Hold Ctrl to enable snapping, and then decrease the scale to 0.8. You can also just manually type in the scale there if you'd like instead.
Click the cube and press S to enter scale mode, then press X to limit the scale to the X-axis. Hold Ctrl to enable snapping, and then increase the scale to 10, which you can see on the cube transform properties on the right sidebar.
Click the cube and press S to enter scale mode, then press Y to limit the scale to the Y-axis. Hold Ctrl to enable snapping, and then increase the scale to 10, which you can see on the cube transform properties on the right sidebar.
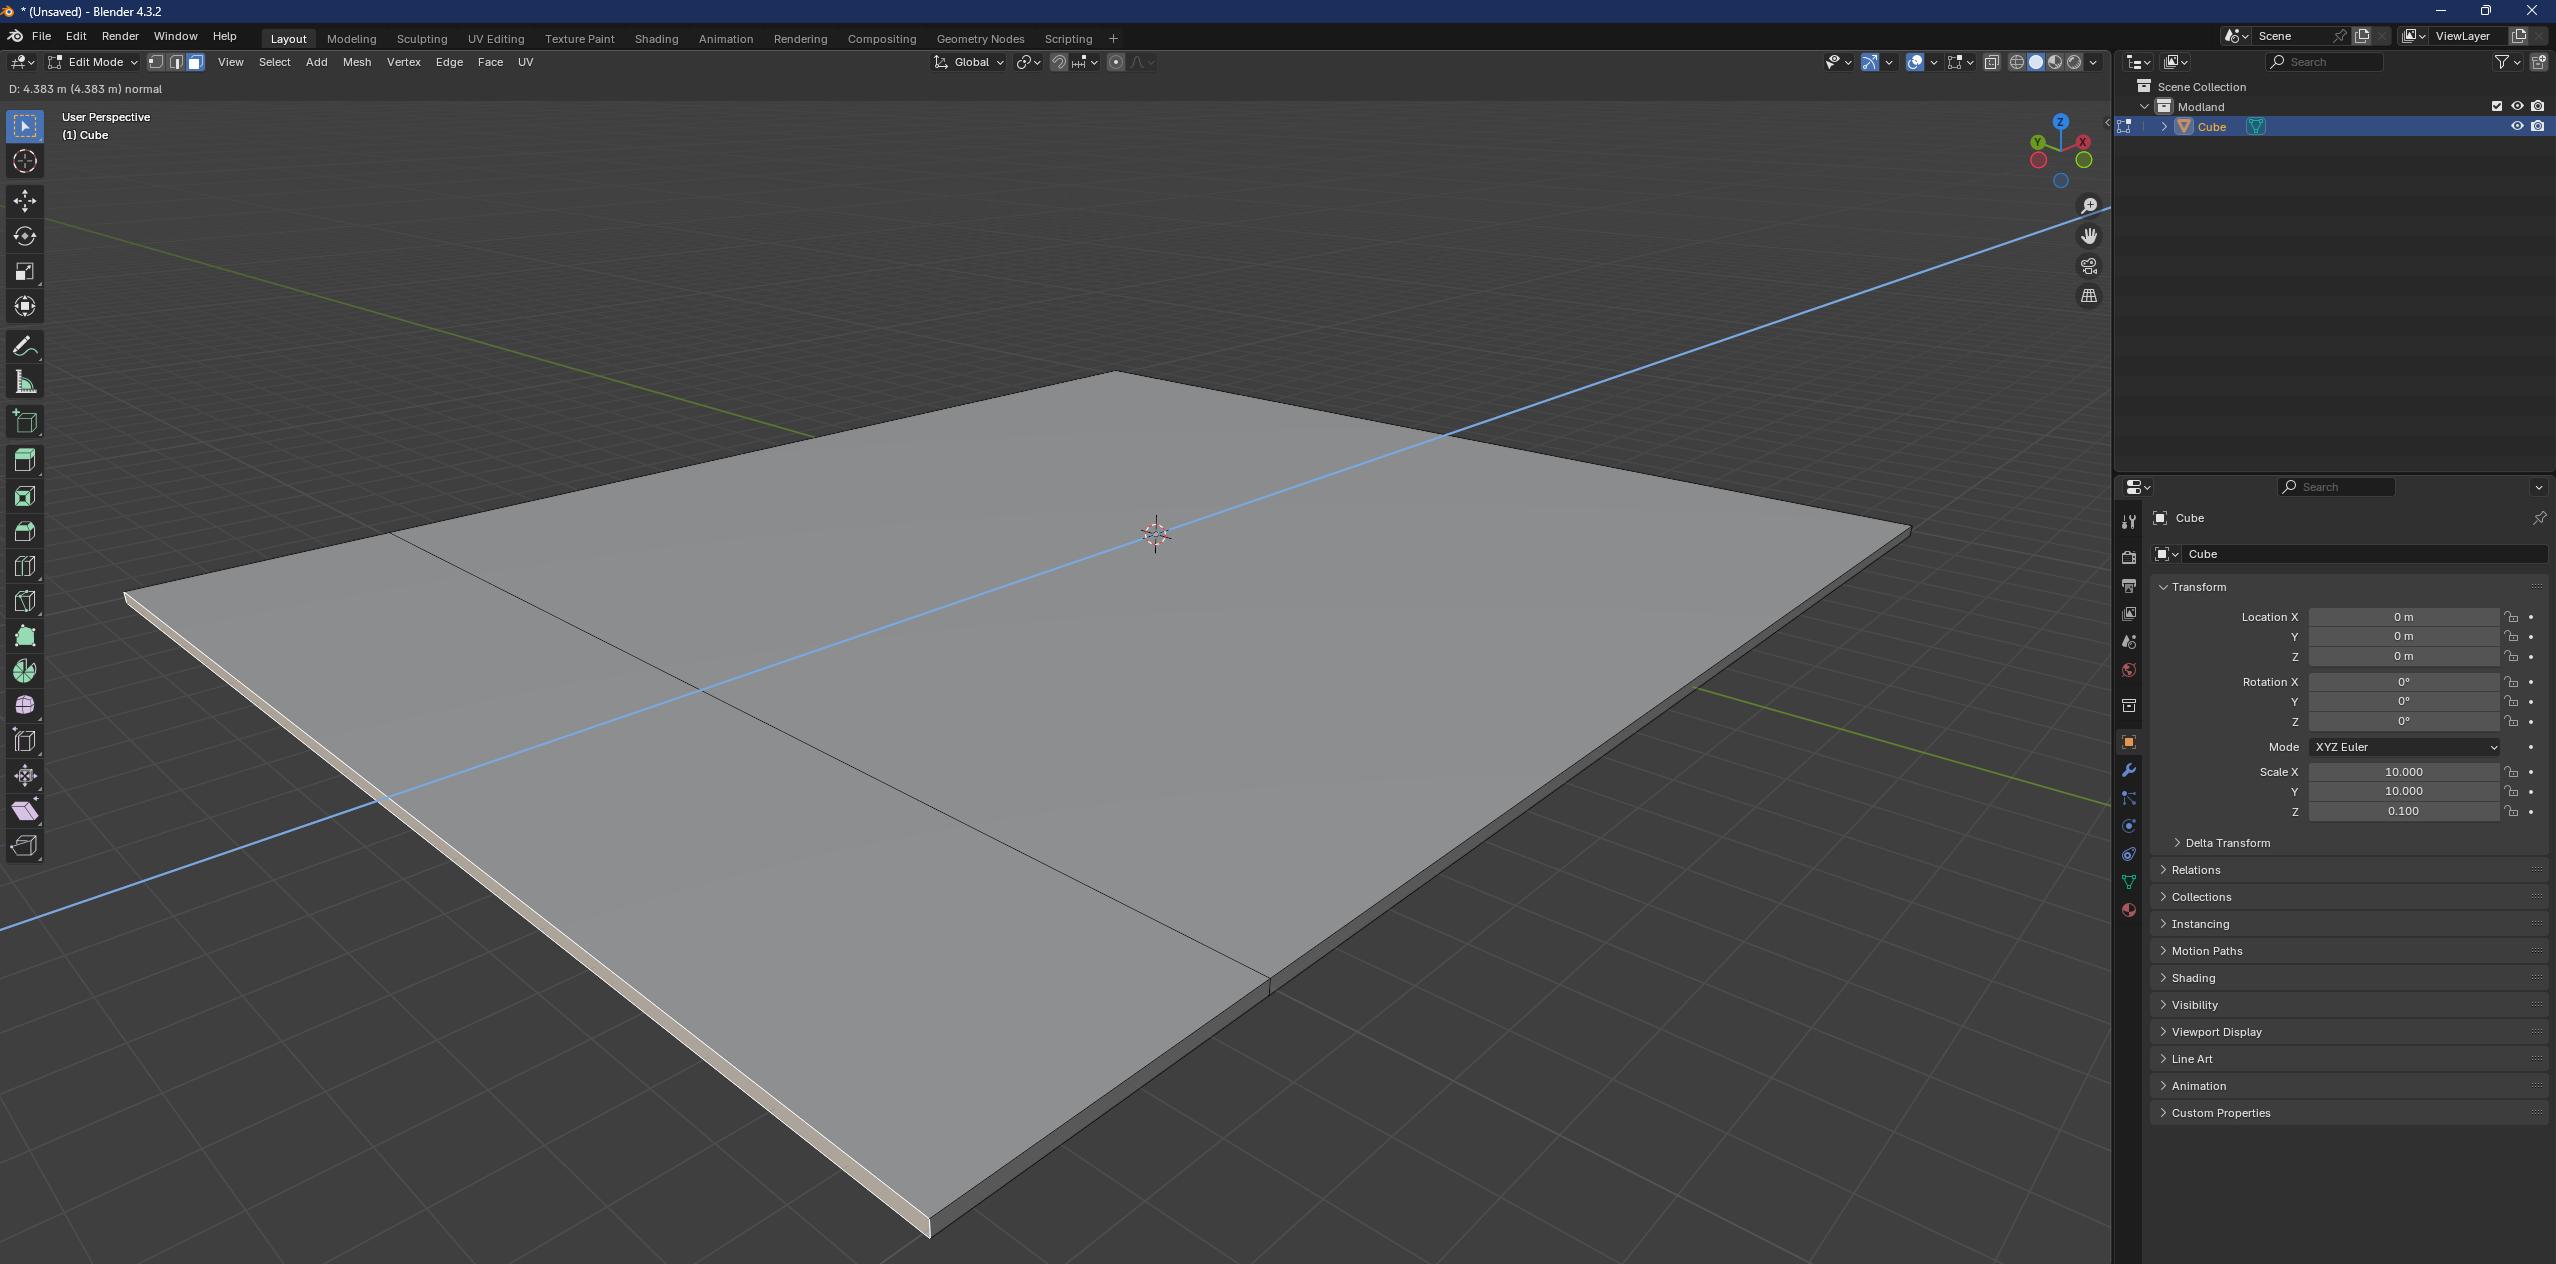
Let's extrude some of the faces. With the cube selected, switch from Object Mode to Edit Mode mode from the dropdown menu on the top left of the window. Then switch the select mode to Face Select, which is the button with the white square right next to the Edit Mode dropdown.

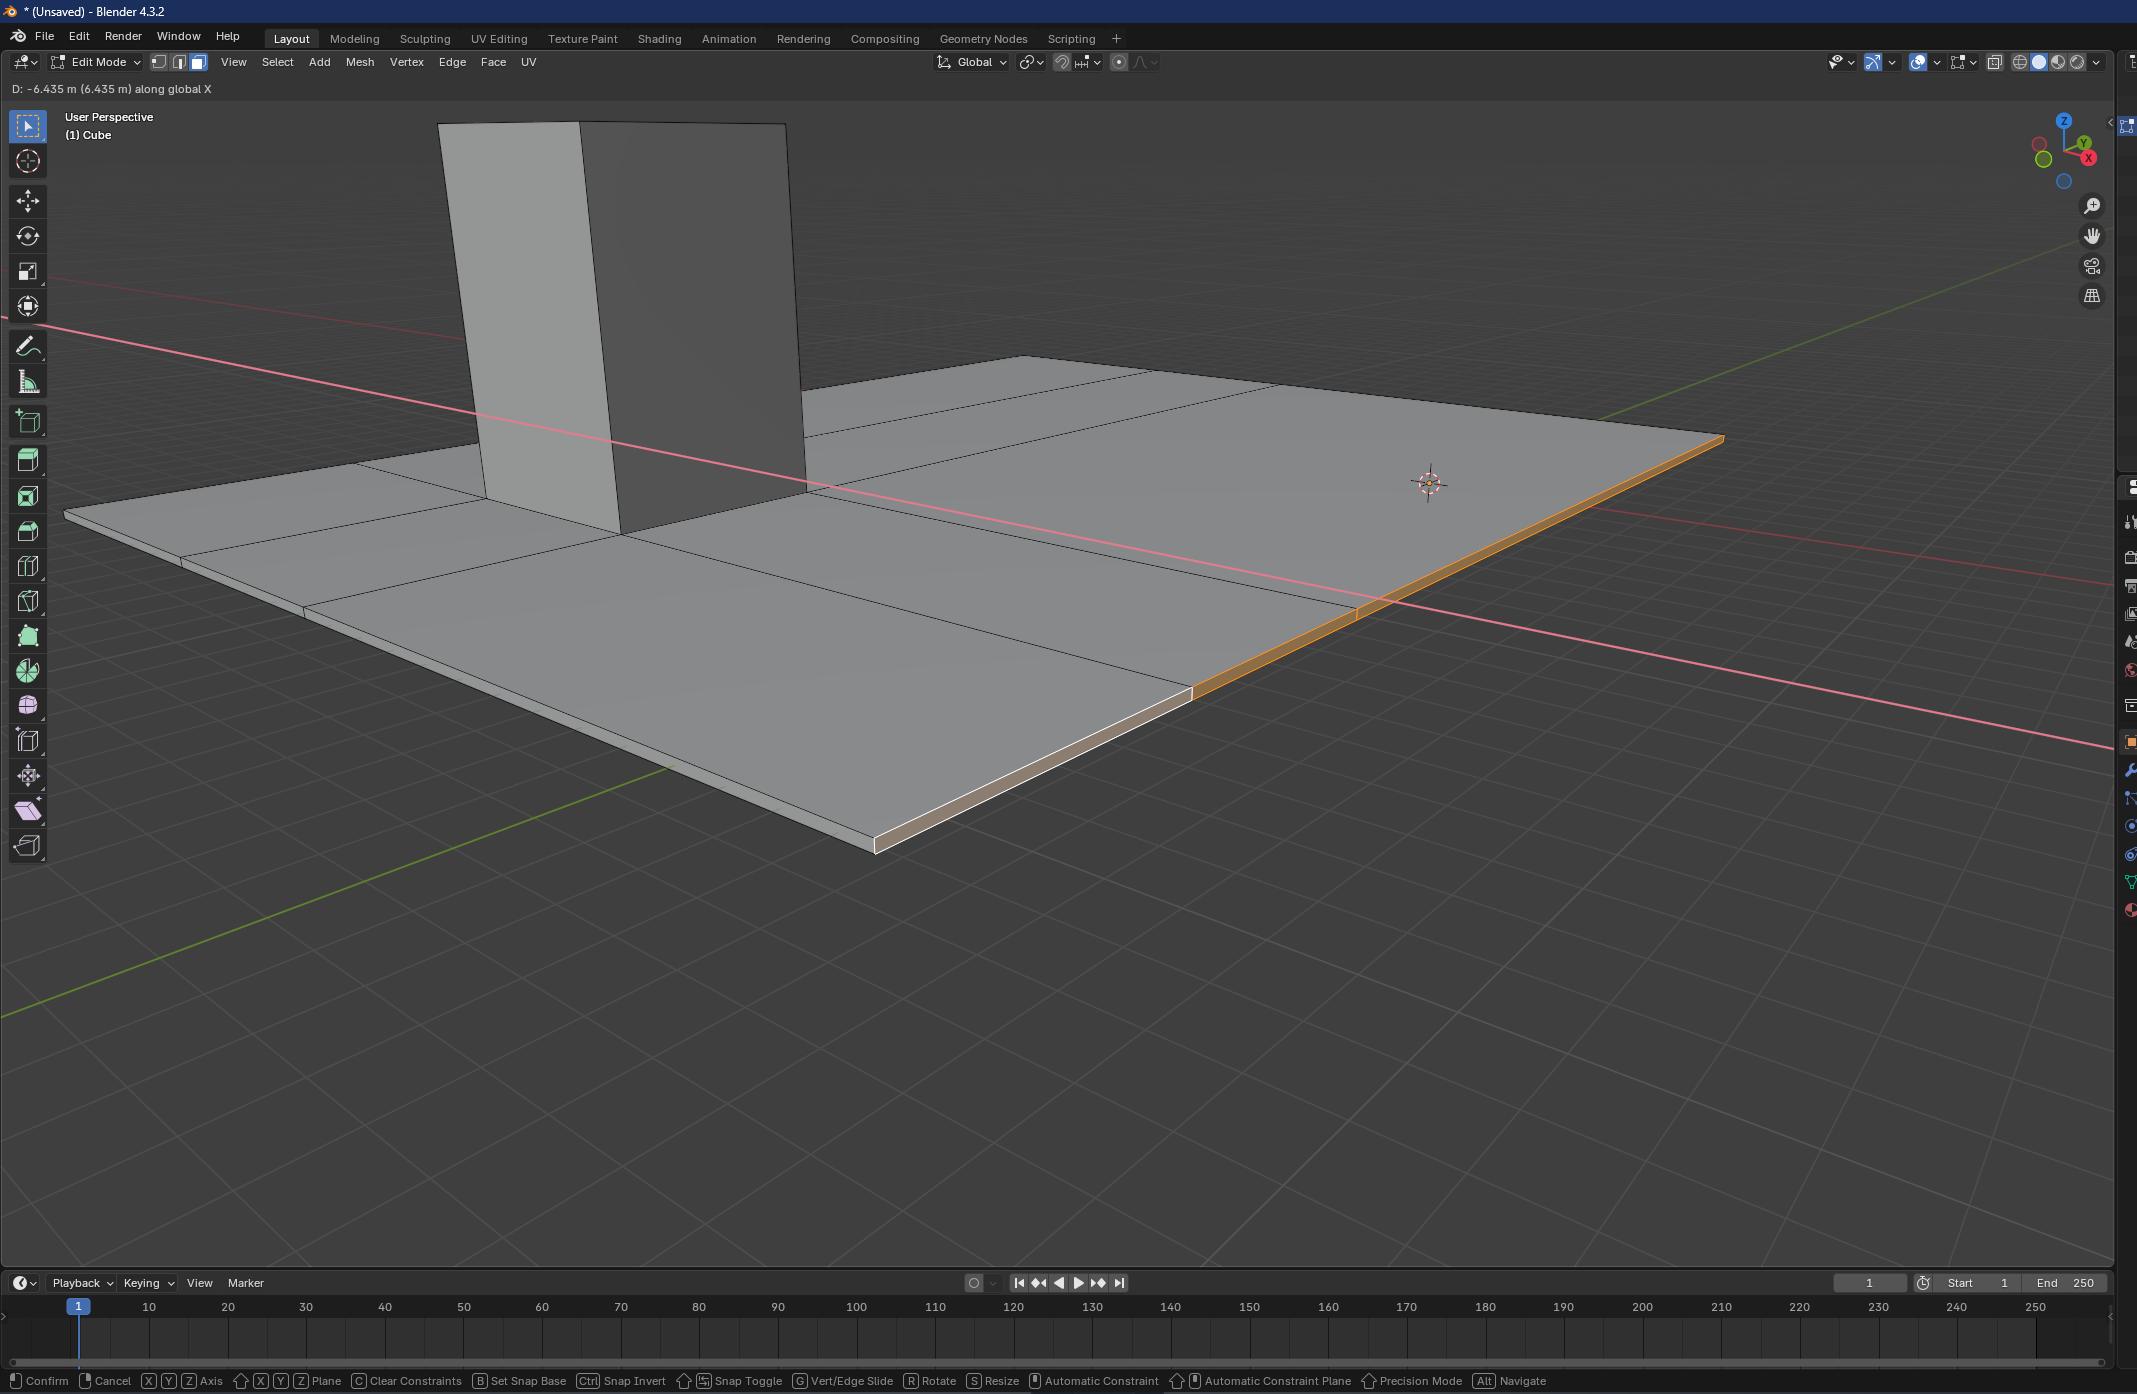
Now select one of the side faces of the cube by clicking on it. Press the E key to extrude, and then drag the cursor out somewhat, until it makes a new cuboid to the side of the original one.
 Select multiple faces by holding
 Ctrl and clicking on them, or dragging a box around them, and then extrude some more. Keep going at this until you have created some geometry that you would like for your mission.
If you want to move a face, select it and then press the G key, and then either the X, Y, or Z keys to lock the movement to that axis.
You can also select Vertices or Edges by clicking one of those buttons on the top left of the window, next to the Face Select button we clicked earlier.

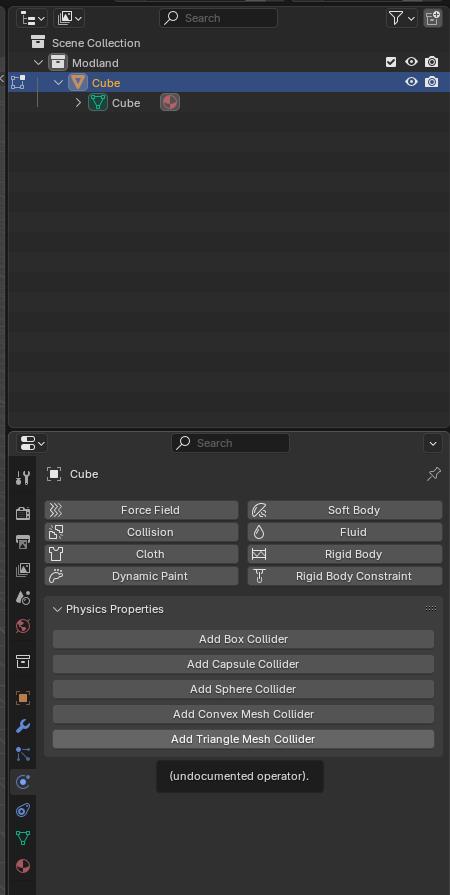
Now that we have geometry we are happy with, we will need to make the geometry collideable.
Adding collision to the new geometry
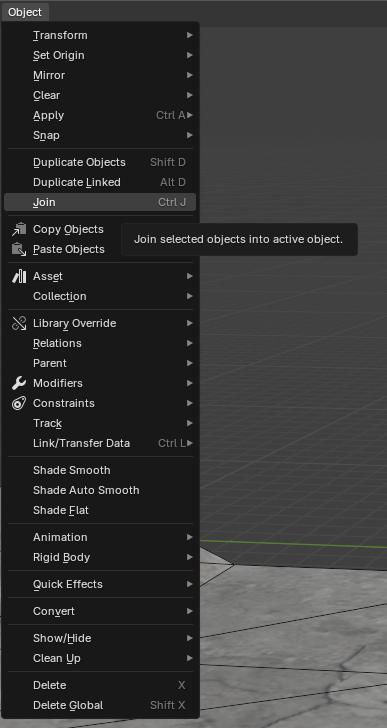
Right-click the Modtown collection and click Duplicate Collection to create a temporary duplicate collection. Select all the objects in the temporary duplicate collection and on the Object menu on the second menu bar from the top, click the Join Objects button.
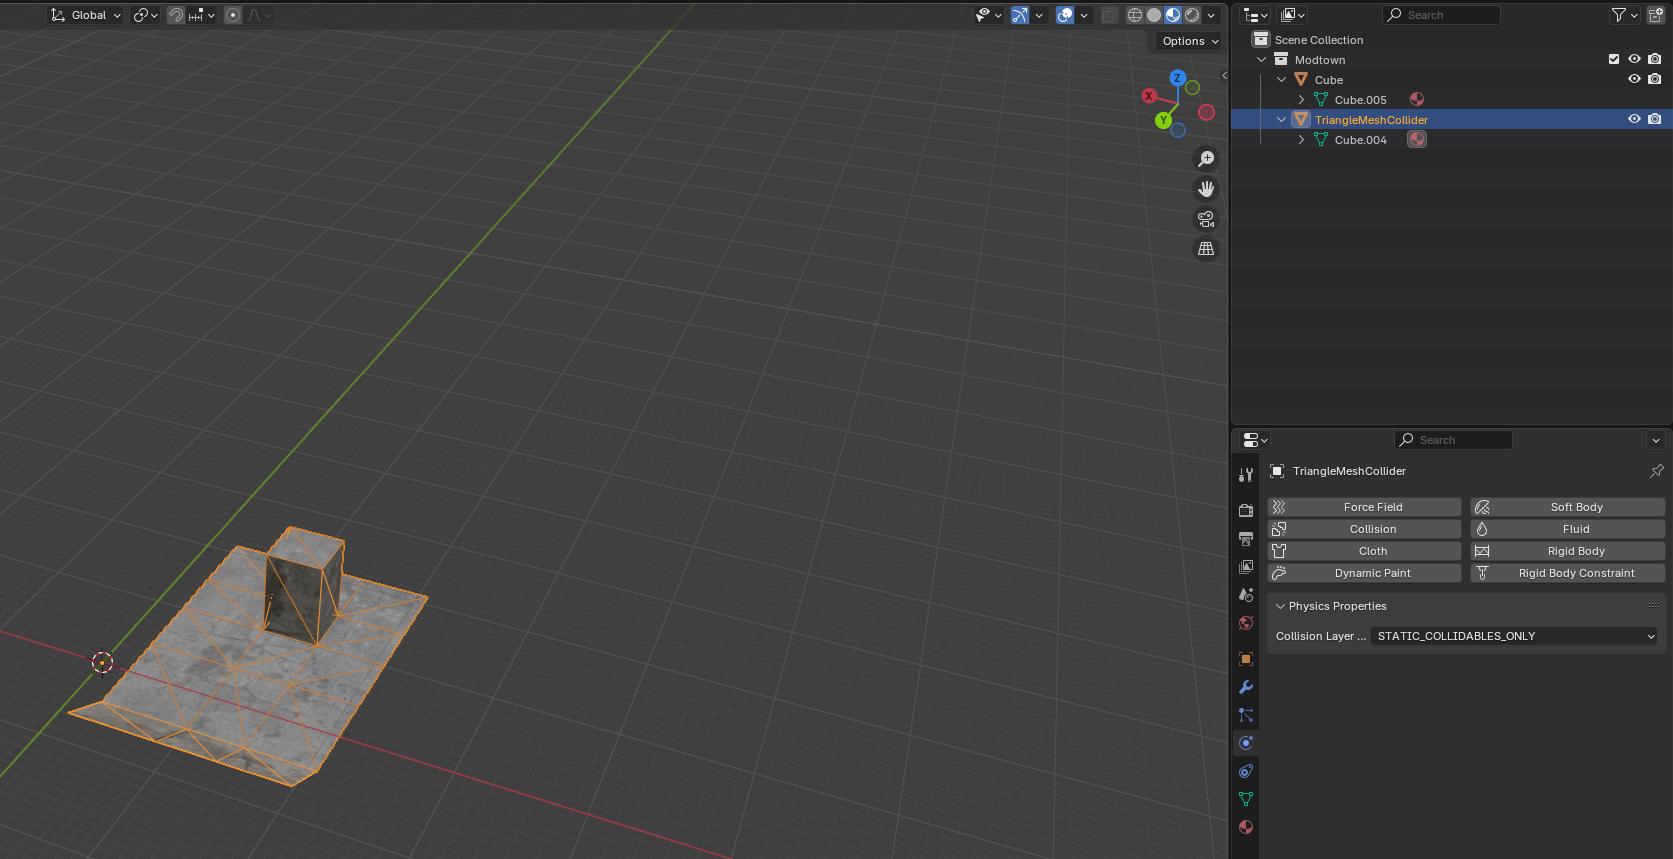
Select the new collection and on the right panel, select the Physics tab, and click the Add Triangle Mesh Collider button.
Drag that new triangle mesh collider object over the original collection and hold the Shift and Alt keys to remove the parent and keep the transforms, and then release the mouse button.
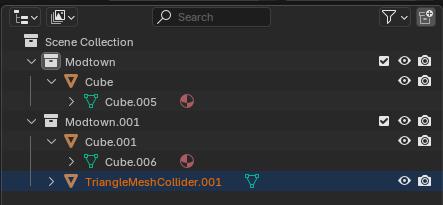
Drag the TriangleMeshCollider object to the original collection to assign the collection as its parent. Right-click the temporary duplicate collection and click Delete Hierarchy. Click on the TriangleMeshCollider object and in the Physics tab of the properties panel on the right sidebar, change the Collision Layer to STATIC_COLLIDABLES_ONLY.
In the object panel, select the Modtown Collection and switch to the Collection properties panel on the right sidebar.
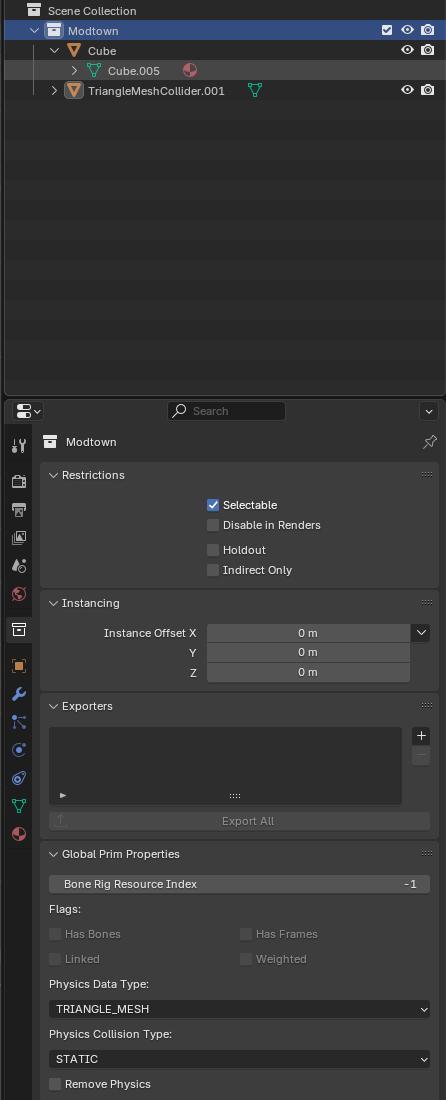
Change the Physics Data Type dropdown to TRIANGLE_MESH, and the Physics Collision Type to STATIC.

Texturing the new geometry
On the object panel, select the Cube object. On the properties panel, switch to the Materials tab and click the yellow button next to the Base Color section, and choose Image Texture.

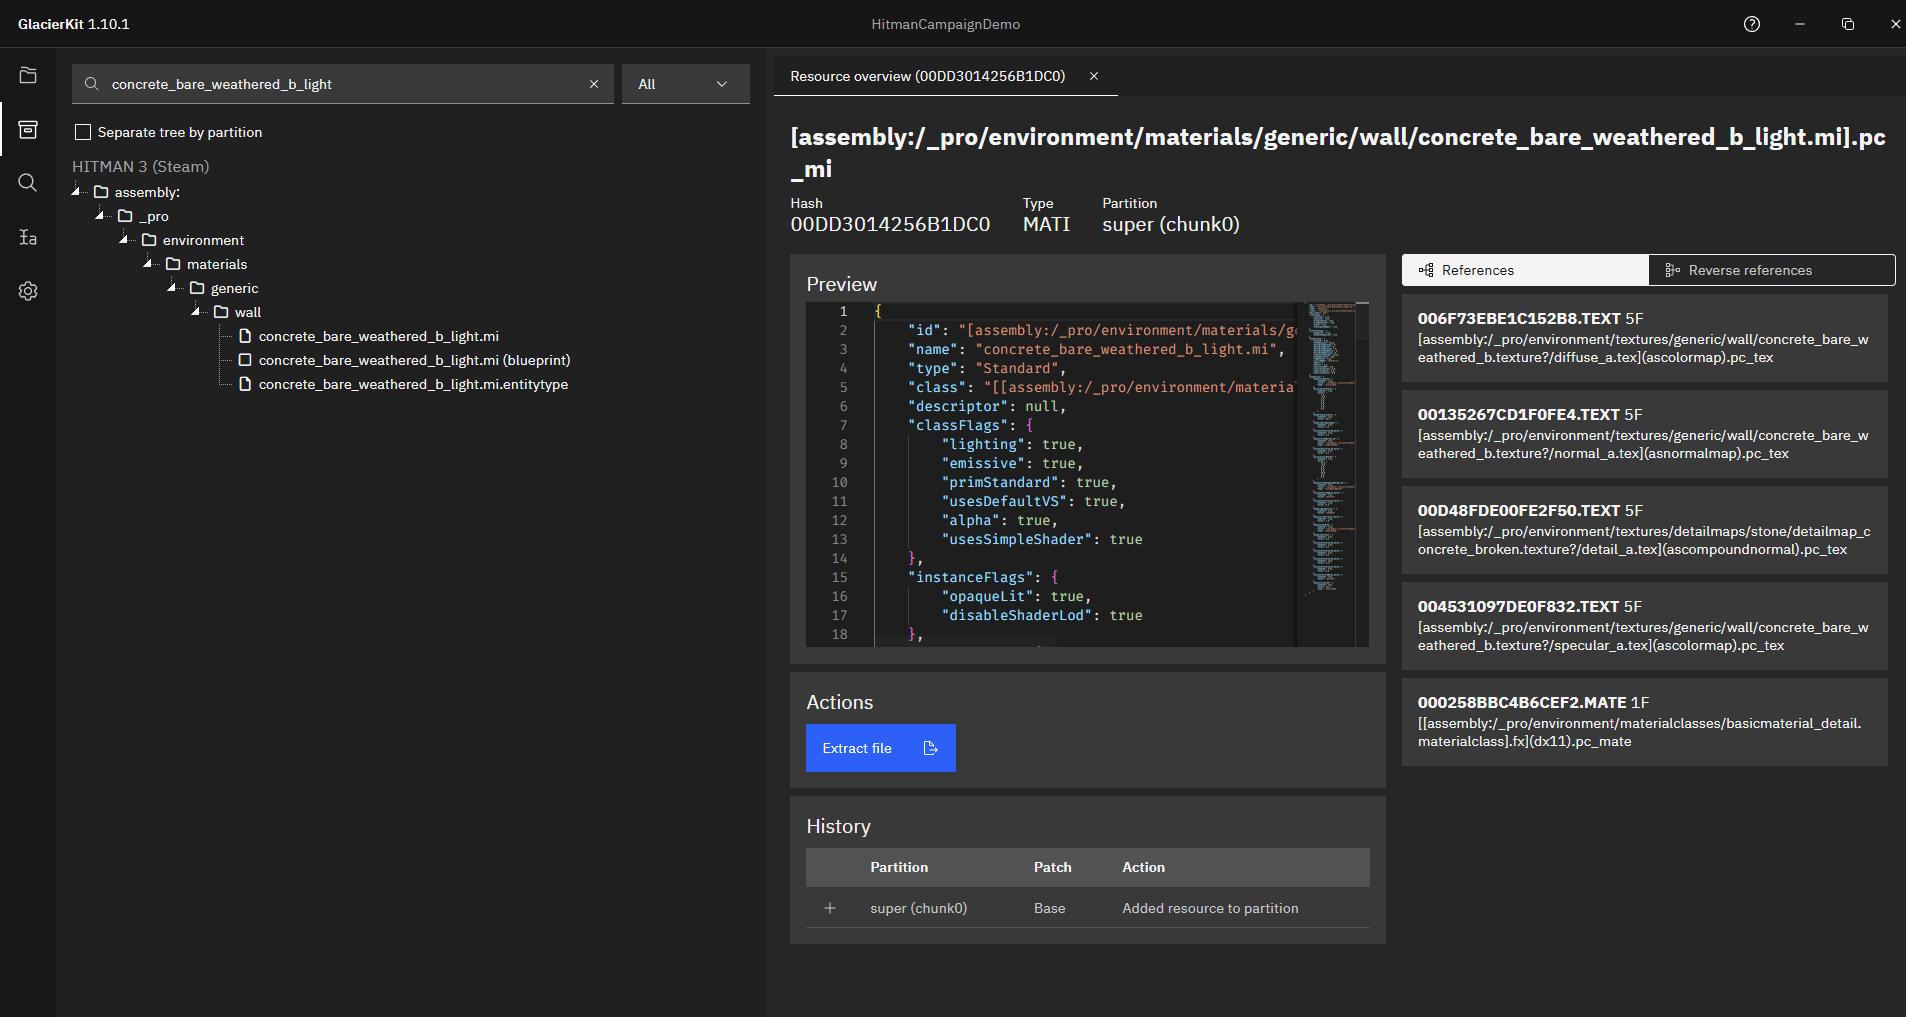
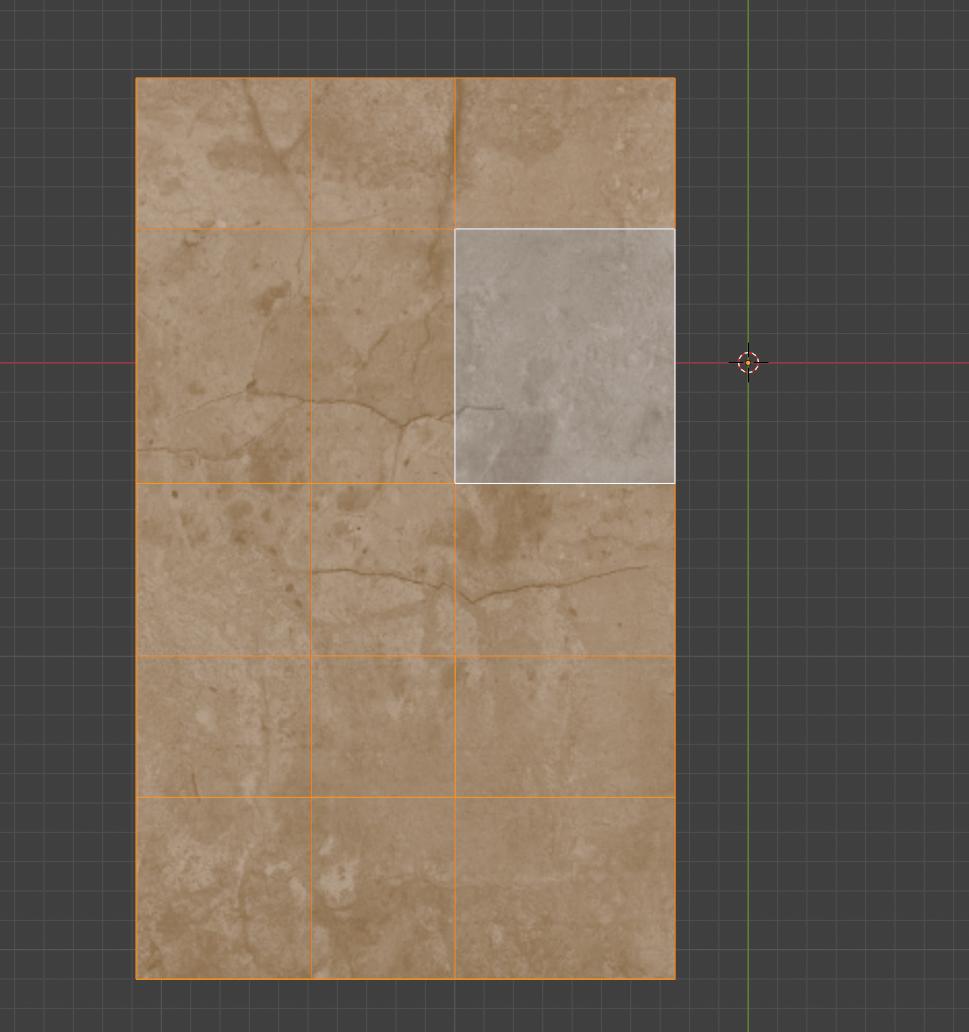
Now let's extract a texture to use using GlacierKit. This will help us UV map the texture to the model. Let's use the concrete_bare_weathered_b_light. In GlacierKit, on the Game contents section search for concrete_bare_weathered_b_light and click the concrete_bare_weathered_b_light.mi resource. On the resource panel on the right, you can see details about that material. What we want is the diffuse colormap .TEXT file, which is the top item in the References list.
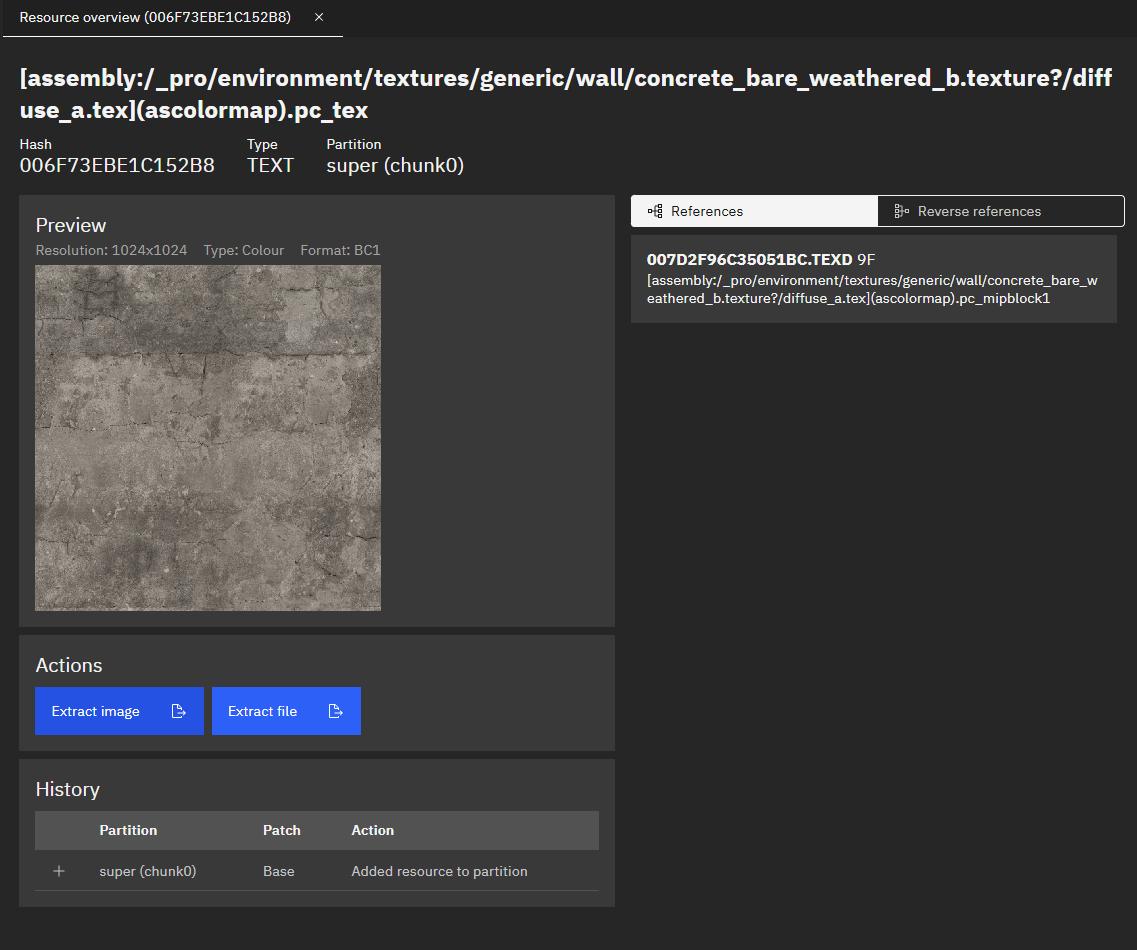
 Click on that. You will see the texture that we want to use. Click the
 Extract image button and save it somewhere easy to access, for instance, with your modtown.blend file.
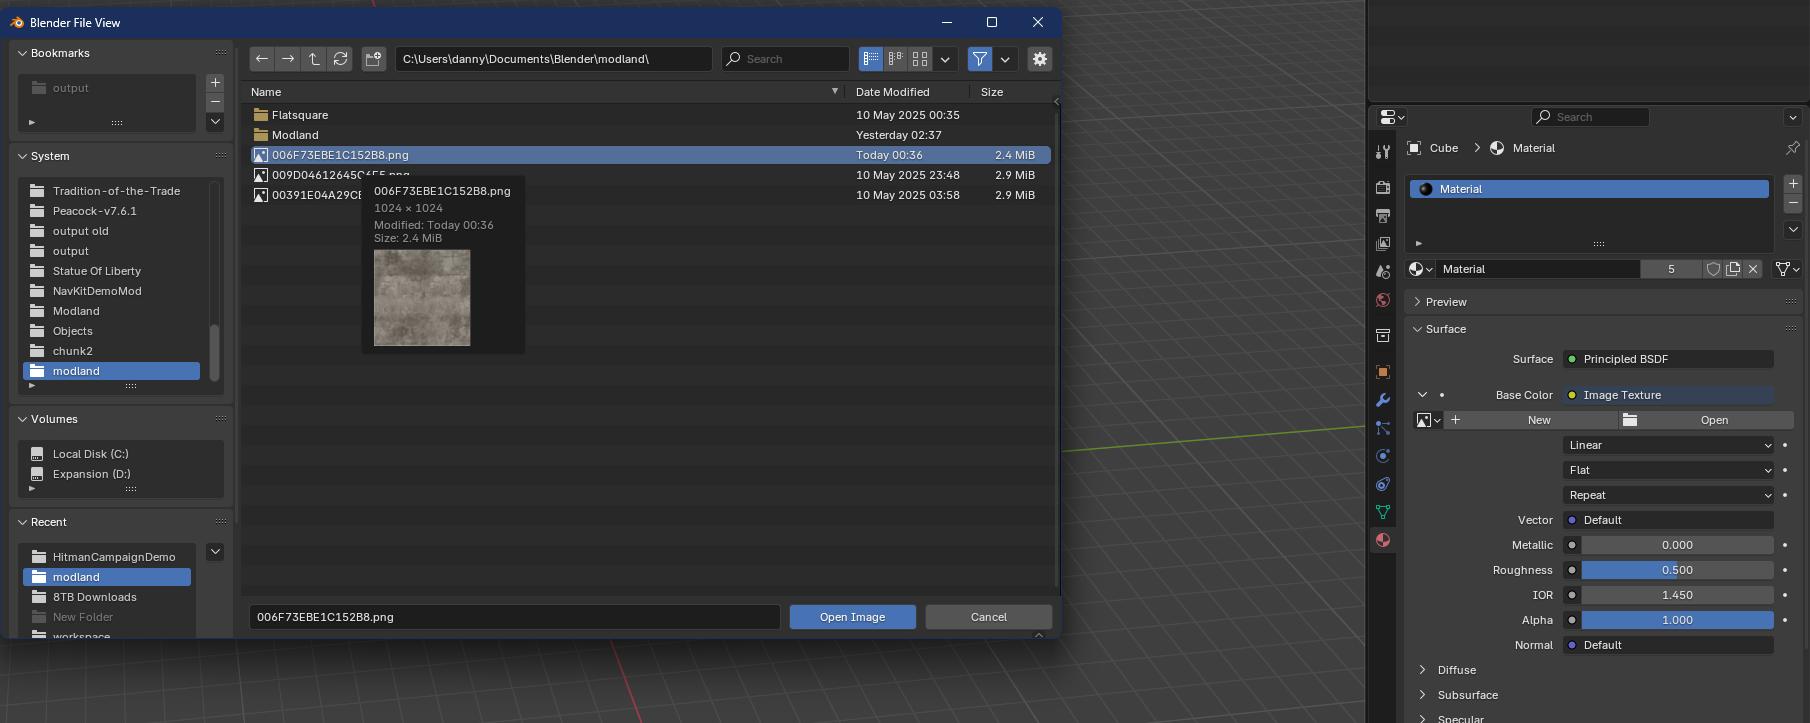
In Blender, click the Open Image button with the folder icon next to the Base Color section and choose the 009D04612645C6E5.jpg that you extracted.
Now the mesh has the texture, but we can't see it because the Shading mode is set to Solid.
 With your mouse over the 3D area and hold the
 Z key and the Shading popup menu will appear. Move the mouse over Material Preview and let go of the Z key.
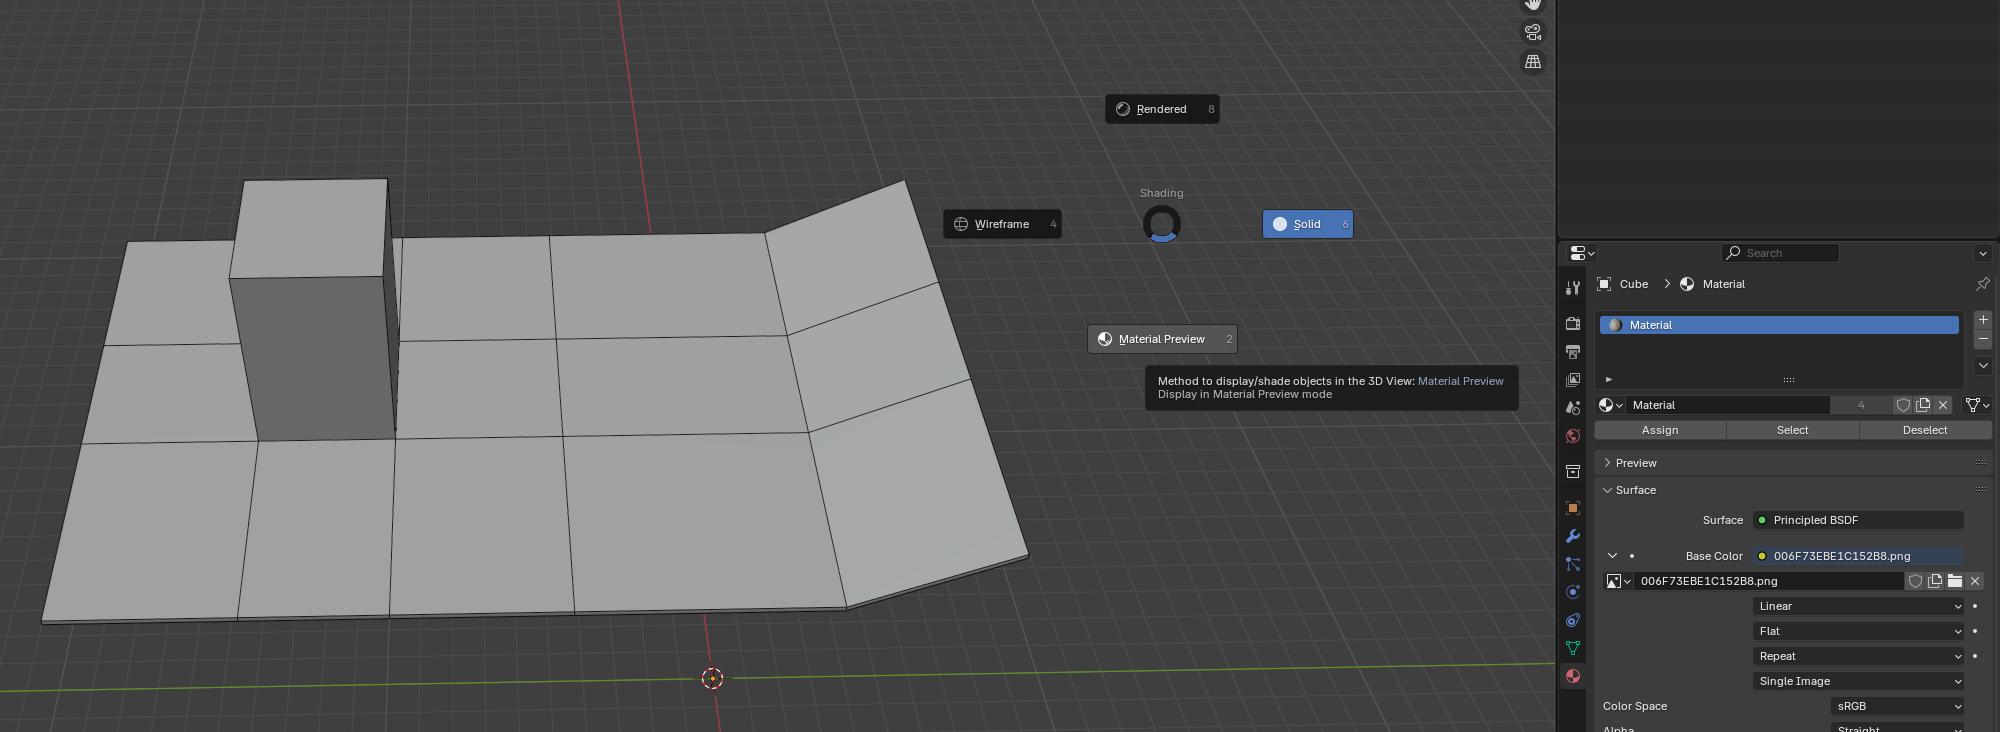
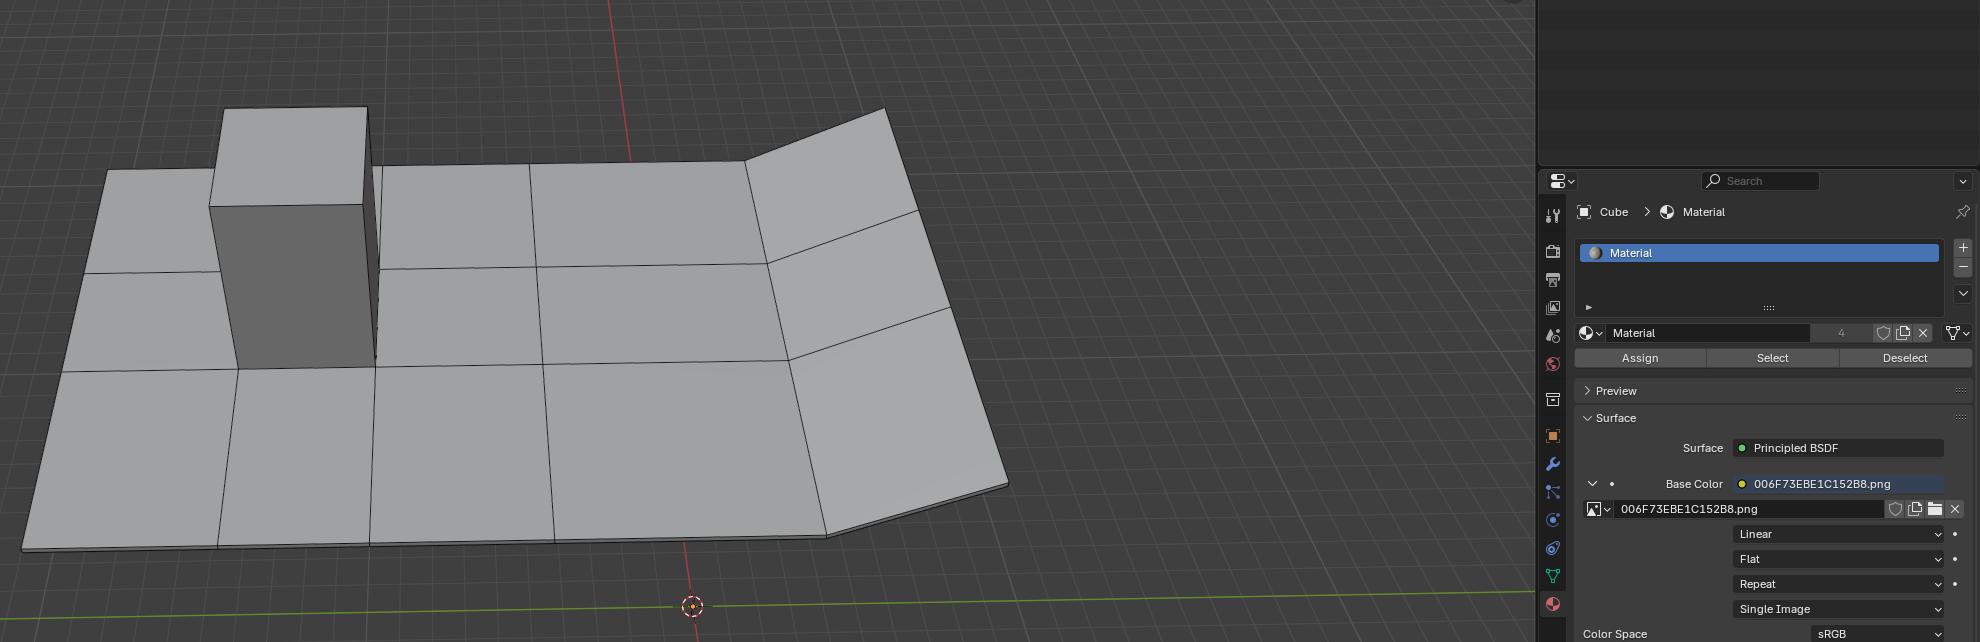
Now that the shading mode is set to Material Preview, we can see the texture on the material, and we can see that the UV mapping doesn't look perfect.
While in Object Mode, click on the cube, and then switch to Edit Mode using the dropdown on the top left, and then click on the Face Select button. Press the A key to select all the faces, then click the blue Z circle in the 3D view on the top right to get a top view.
Press the U key to bring up the UV Mapping popup and click Project from View, and the UV mapping will be much better.
Holding down the middle mouse button, drag the mouse around, and you can see that all the faces that are not facing upwards have UV maps that don't look that great. You can click the red X circle or green Y circle on the top right of the 3D view to switch to a Front, Side, or Back view, then press Alt + A to deselect all the faces, then click on a face that has a bad UV mapping, press the U key and click Project from View again to UV map just this face. Repeat for all the faces that don't look properly UV mapped.
Exporting the geometry from Blender
Switch back to Object Mode on the top left dropdown so that the Blender add-on doesn't have trouble exporting.
Let's save our scene so we can reload it later if we want.
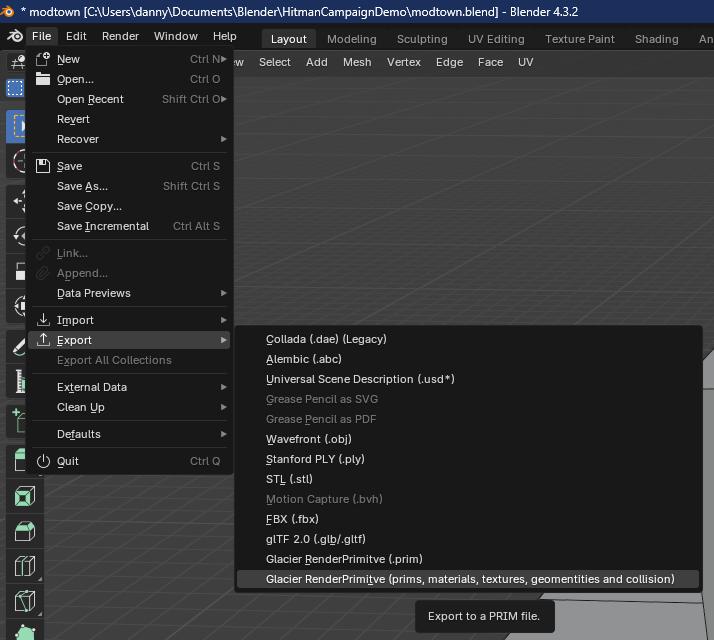
Now click File > Export > Glacier RenderPrimitive (prims, materials, textures, geomentities, and collision), and put it somewhere you can find easily.
You'll wind up with a folder of files like this:
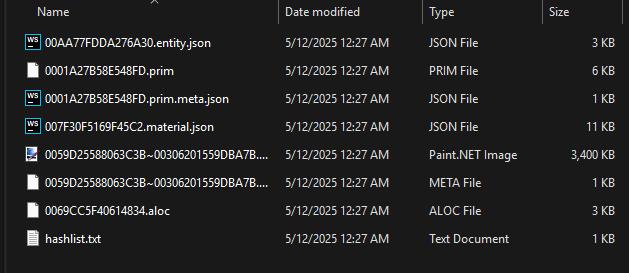
Create a new folder named content/chunk2/Geometry and copy these files to that folder:
00AA77FDDA276A30.entity.json
0001A27B58E548FD.prim
0001A27B58E548FD.prim.meta.json
0069CC5F40614834.aloc
Updating and editing up the geometry files
Rename the .entity.json file to modtown_geomentity.entity.json.
Open the 0001A27B58E548FD.prim.meta.json file in a regular text editor like VS Code, or WebStorm, and in the hash_reference_data array, replace the hash the value of the object with:
[assembly:/_pro/environment/materials/generic/wall/concrete_bare_weathered_b_light.mi].pc_mi
and save the file.
In GlacierKit, open the new modtown_geomentity.entity.json file and set the Factory hash to:
[assembly:/_pro/environment/geometry/modtown/modtown.prim].pc_entitytype
It should already have that hash, but this will add it to the GlacierKit project custom hashes.
In the new Geometry folder, create a new file named modtown.entity.json. In the metadata tab, set the Factory hash field to:
[assembly:/_pro/environment/geometry/modtown/modtown.entitytemplate].pc_entitytype
and the Blueprint hash field to:
[assembly:/_pro/environment/geometry/modtown/modtown.entitytemplate].pc_entityblueprint
And in the Tree view, right-click on the Scene node and click Create Entity and name it modtown and in its contents, replace everything after the parent field with:
	"name": "modtown",
	"factory": "[modules:/zspatialentity.class].pc_entitytype",
	"blueprint": "[modules:/zspatialentity.class].pc_entityblueprint"
}
Drag it to be the root entity node, and delete the Scene node. Copy the modtown entity's id and in the Metadata tab set the Root entity text field to that id. Set the Entity type dropdown to Template.
On the Tree view, right-click on the modtown node and make a new entity named modtown_geomentity. In the contents, replace everything after the parent node with:
	"name": "modland_geomentity",
	"factory": "[assembly:/_pro/environment/geometry/modtown/modtown.prim].pc_entitytype",
	"blueprint": "[assembly:/templates/geometrytemplatestaticcoll.template?/geomentity01.entitytemplate].pc_entityblueprint",
	"properties": {
		"m_mTransform": {
			"type": "SMatrix43",
			"value": {
				"rotation": {
					"x": 0,
					"y": 0,
					"z": 0
				},
				"position": {
					"x": 0.0,
					"y": 0.0,
					"z": 0.0
				}
			}
		},
		"m_eidParent": {
			"type": "SEntityTemplateReference",
			"value": null,
			"postInit": true
		}
	}
}
Copy the root modtown node's id and set modtown_geomentity's m_eidParent > value to that id.
Right-click on the modland_geomentity node and click Create New and name it metal_copper_b, and in its contents, replace everything after the parent field with:
	"name": "metal_copper_b",
	"factory": "[assembly:/_pro/environment/materials/generic/metal/metal_copper_b.mi].pc_entitytype",
	"blueprint": "[assembly:/_pro/environment/materials/generic/metal/metal_copper_b.mi].pc_entityblueprint",
	"properties": {
		"m_mTransform": {
			"type": "SMatrix43",
			"value": {
				"rotation": {
					"x": 0,
					"y": 0,
					"z": 0
				},
				"position": {
					"x": 0,
					"y": 0,
					"z": 0
				}
			}
		},
		"Override": {
			"type": "bool",
			"value": true
		},
		"Texture2D_03": {
			"type": "ZRuntimeResourceID",
			"value": {
				"resource": "[assembly:/_pro/environment/textures/custom/metal/metal_brushed_green_a.texture?/specular_a.tex](ascolormap).pc_tex",
				"flag": "5F"
			}
		},
		"ShaderLOD_Distance_op": {
			"type": "IRenderMaterialEntity.EModifierOperation",
			"value": "eReplace"
		},
		"ShaderLOD_Distance": {
			"type": "float32",
			"value": 9999999999
		},
		"ShaderLOD_Speccolor_op": {
			"type": "IRenderMaterialEntity.EModifierOperation",
			"value": "eReplace"
		},
		"ShaderLOD_Speccolor": {
			"type": "SColorRGB",
			"value": "#ff0000"
		},
		"Texture2D_03_enab": {
			"type": "bool",
			"value": true
		},
		"Active": {
			"type": "bool",
			"value": true
		},
		"Clients": {
			"type": "TArray<SEntityTemplateReference>",
			"value": [
				null
			],
			"postInit": true
		},
		"m_eidParent": {
			"type": "SEntityTemplateReference",
			"value": null,
			"postInit": true
		}
	}
}
Add the modland_geomentity entity id to the Clients value array, and to the m_eidParent value.
Adding the new geometry to the scenario
In the scenario_modtown.entity.json file, right-click on the 000_Outside > Geometry node and click Create Entity, set the name to modtown, click on it and in the contents, replace everything after the parent field with:
	"name": "modtown",
	"factory": "[assembly:/_pro/environment/geometry/modtown/modtown.entitytemplate].pc_entitytype",
	"blueprint": "[assembly:/_pro/environment/geometry/modtown/modtown.entitytemplate].pc_entityblueprint",
	"properties": {
		"m_mTransform": {
			"type": "SMatrix43",
			"value": {
				"rotation": {
					"x": 0.0,
					"y": 0.0,
					"z": 0.0
				},
				"position": {
					"x": 0.0,
					"y": 0.0,
					"z": 0.0
				}
			}
		},
		"m_eidParent": {
			"type": "SEntityTemplateReference",
			"value": null
		}
	}
}
Set the m_eidParent value to the entity id of the 000_Outside node.
Click the save button, redeploy, relaunch, and start the mission.
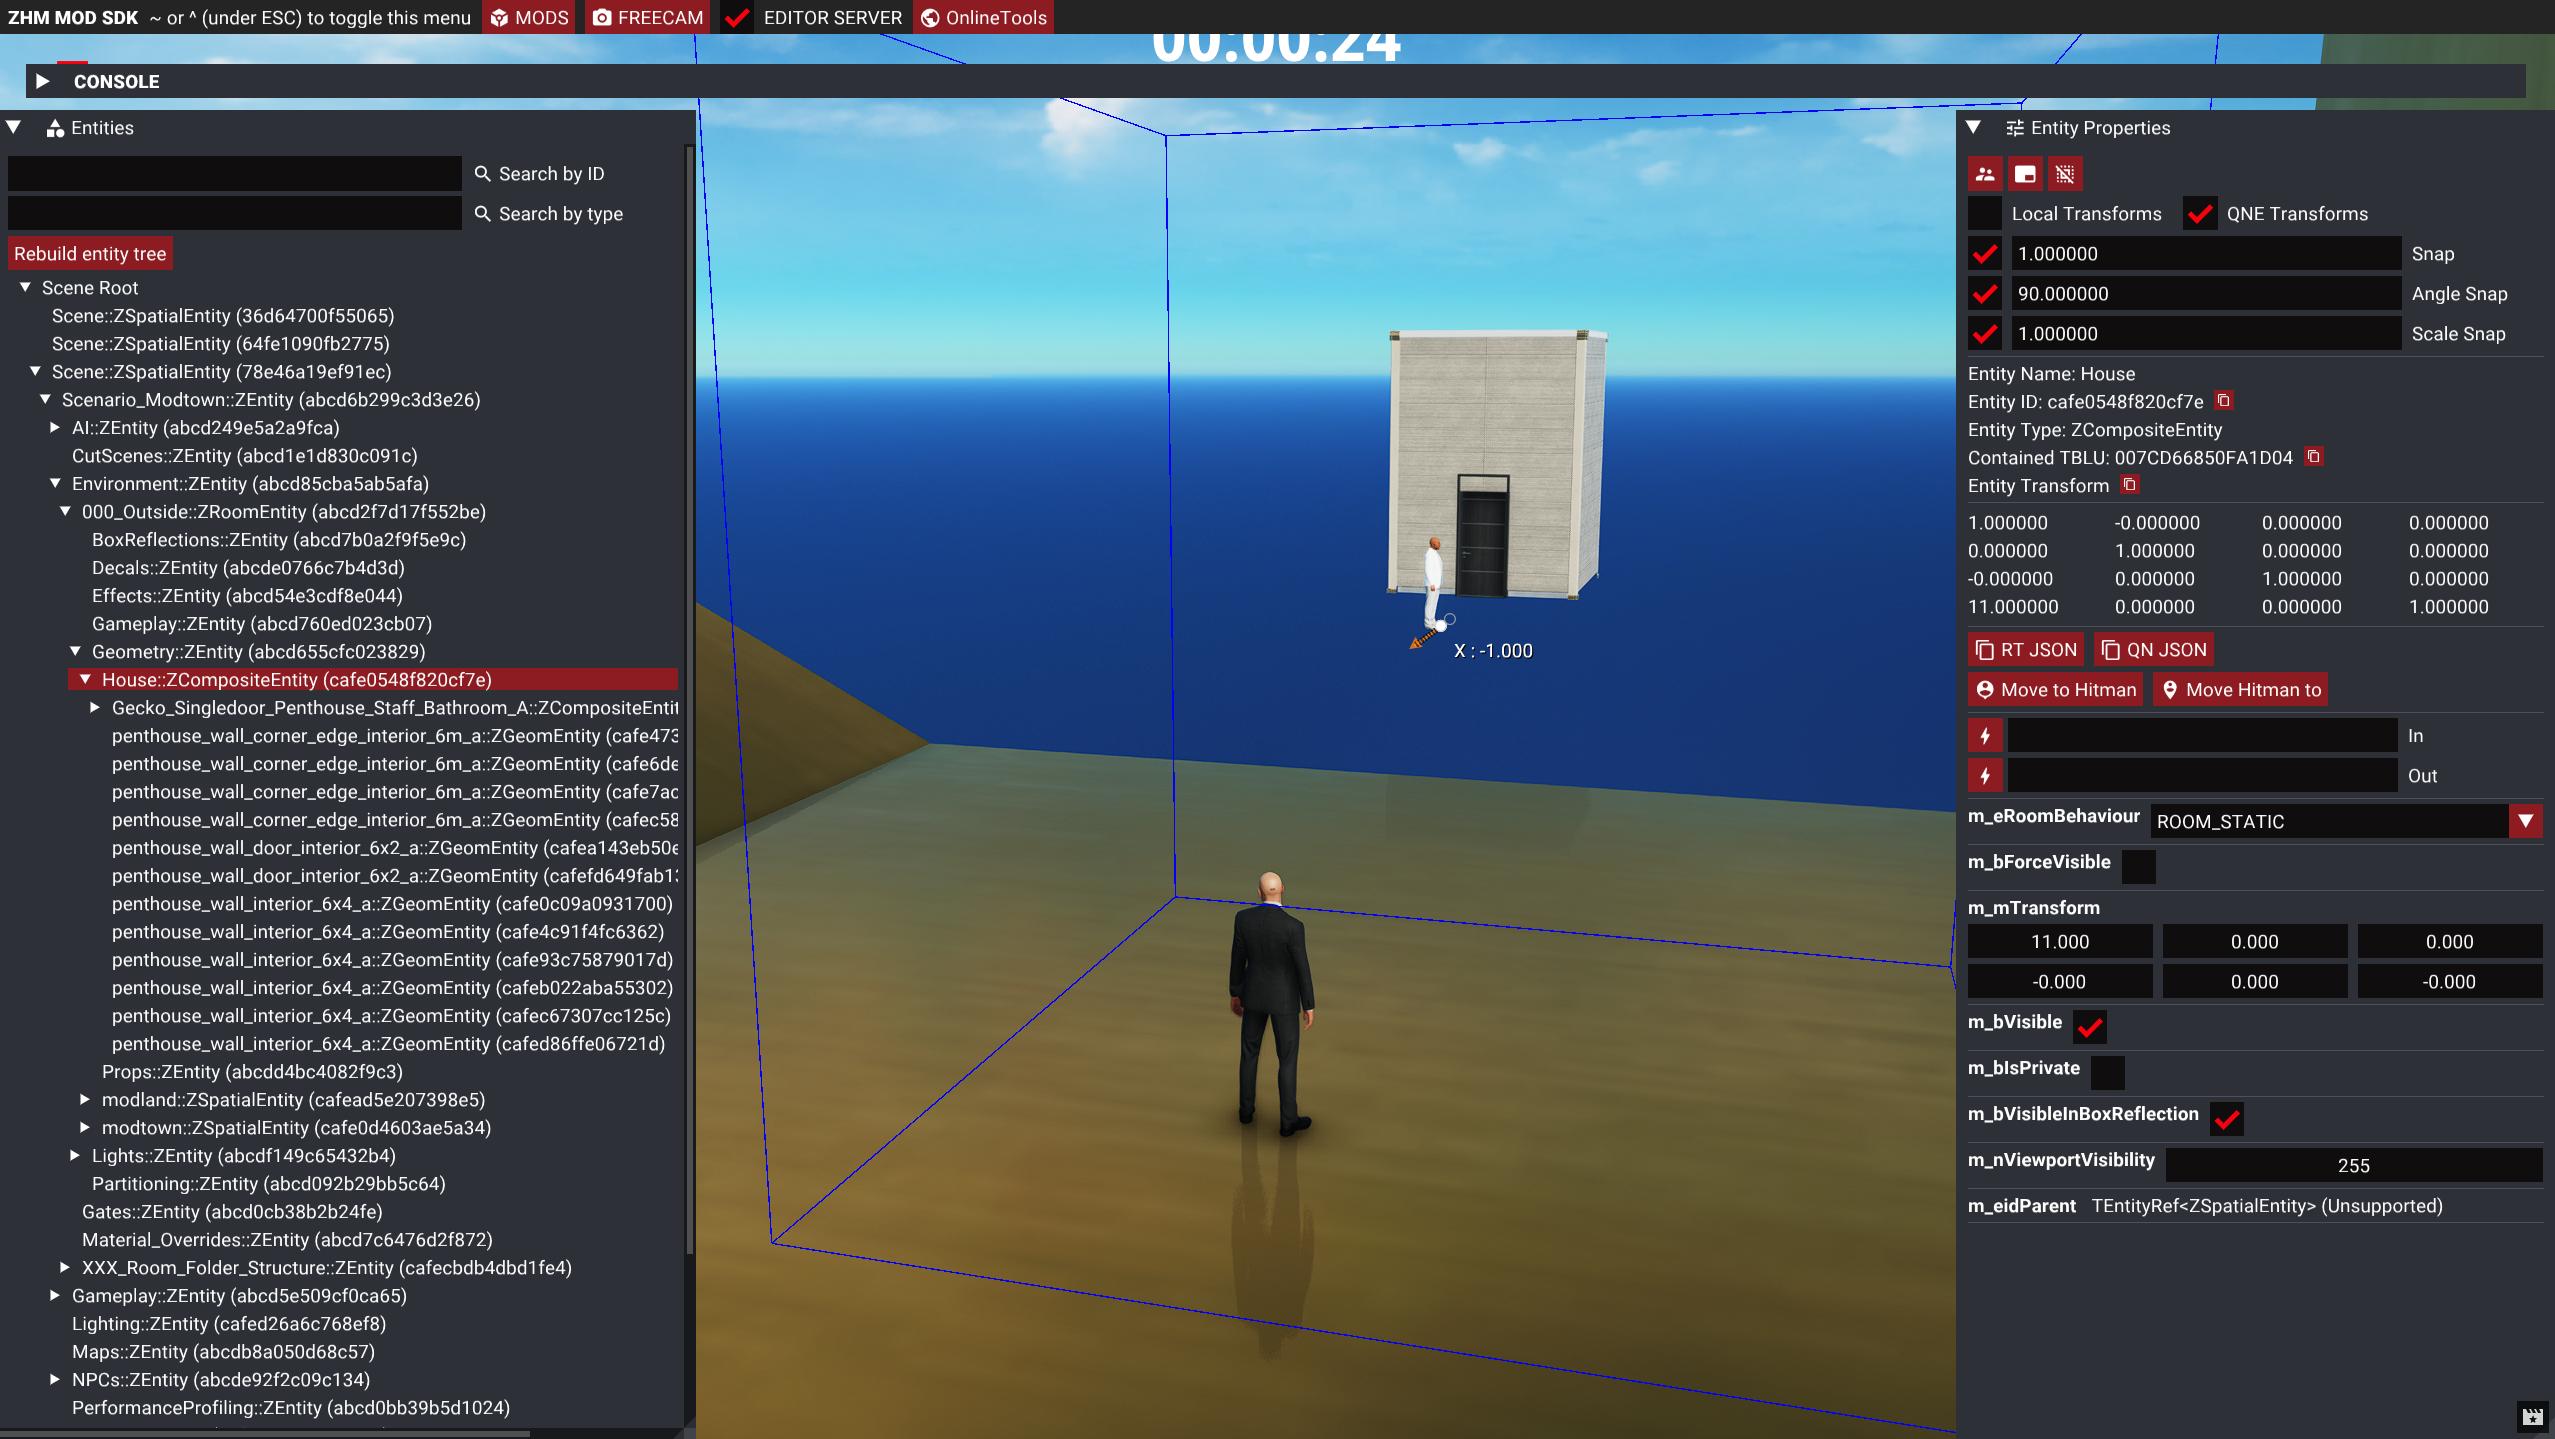
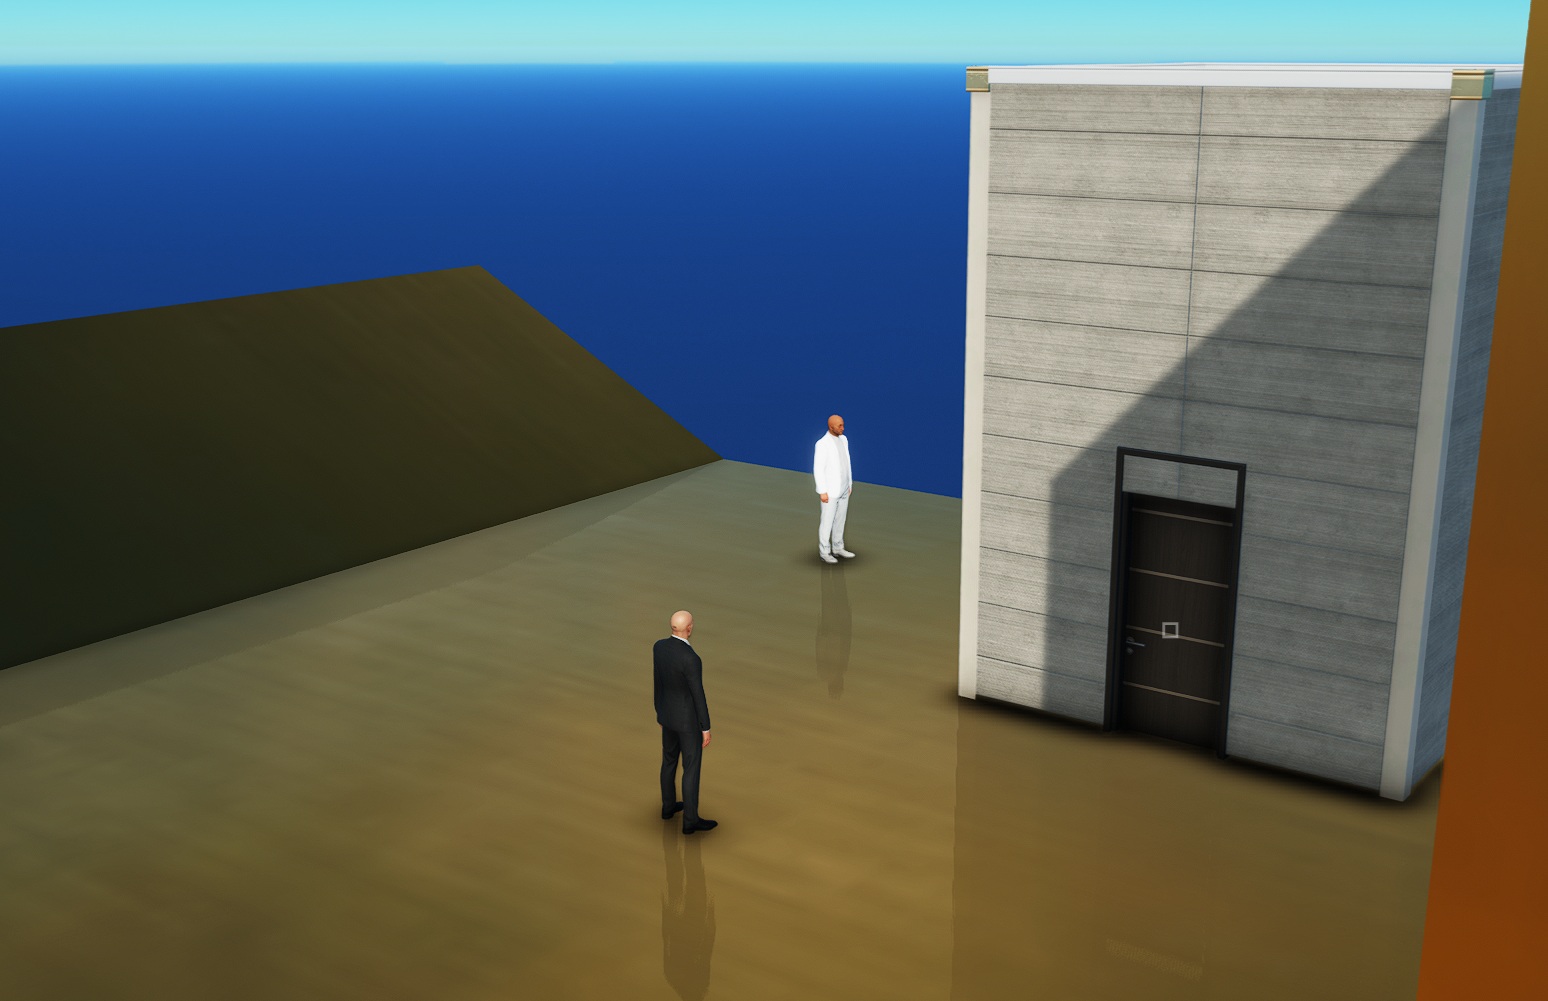
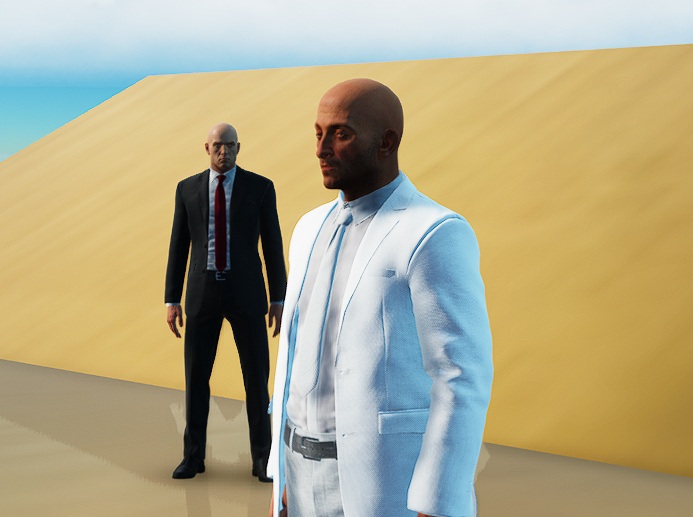
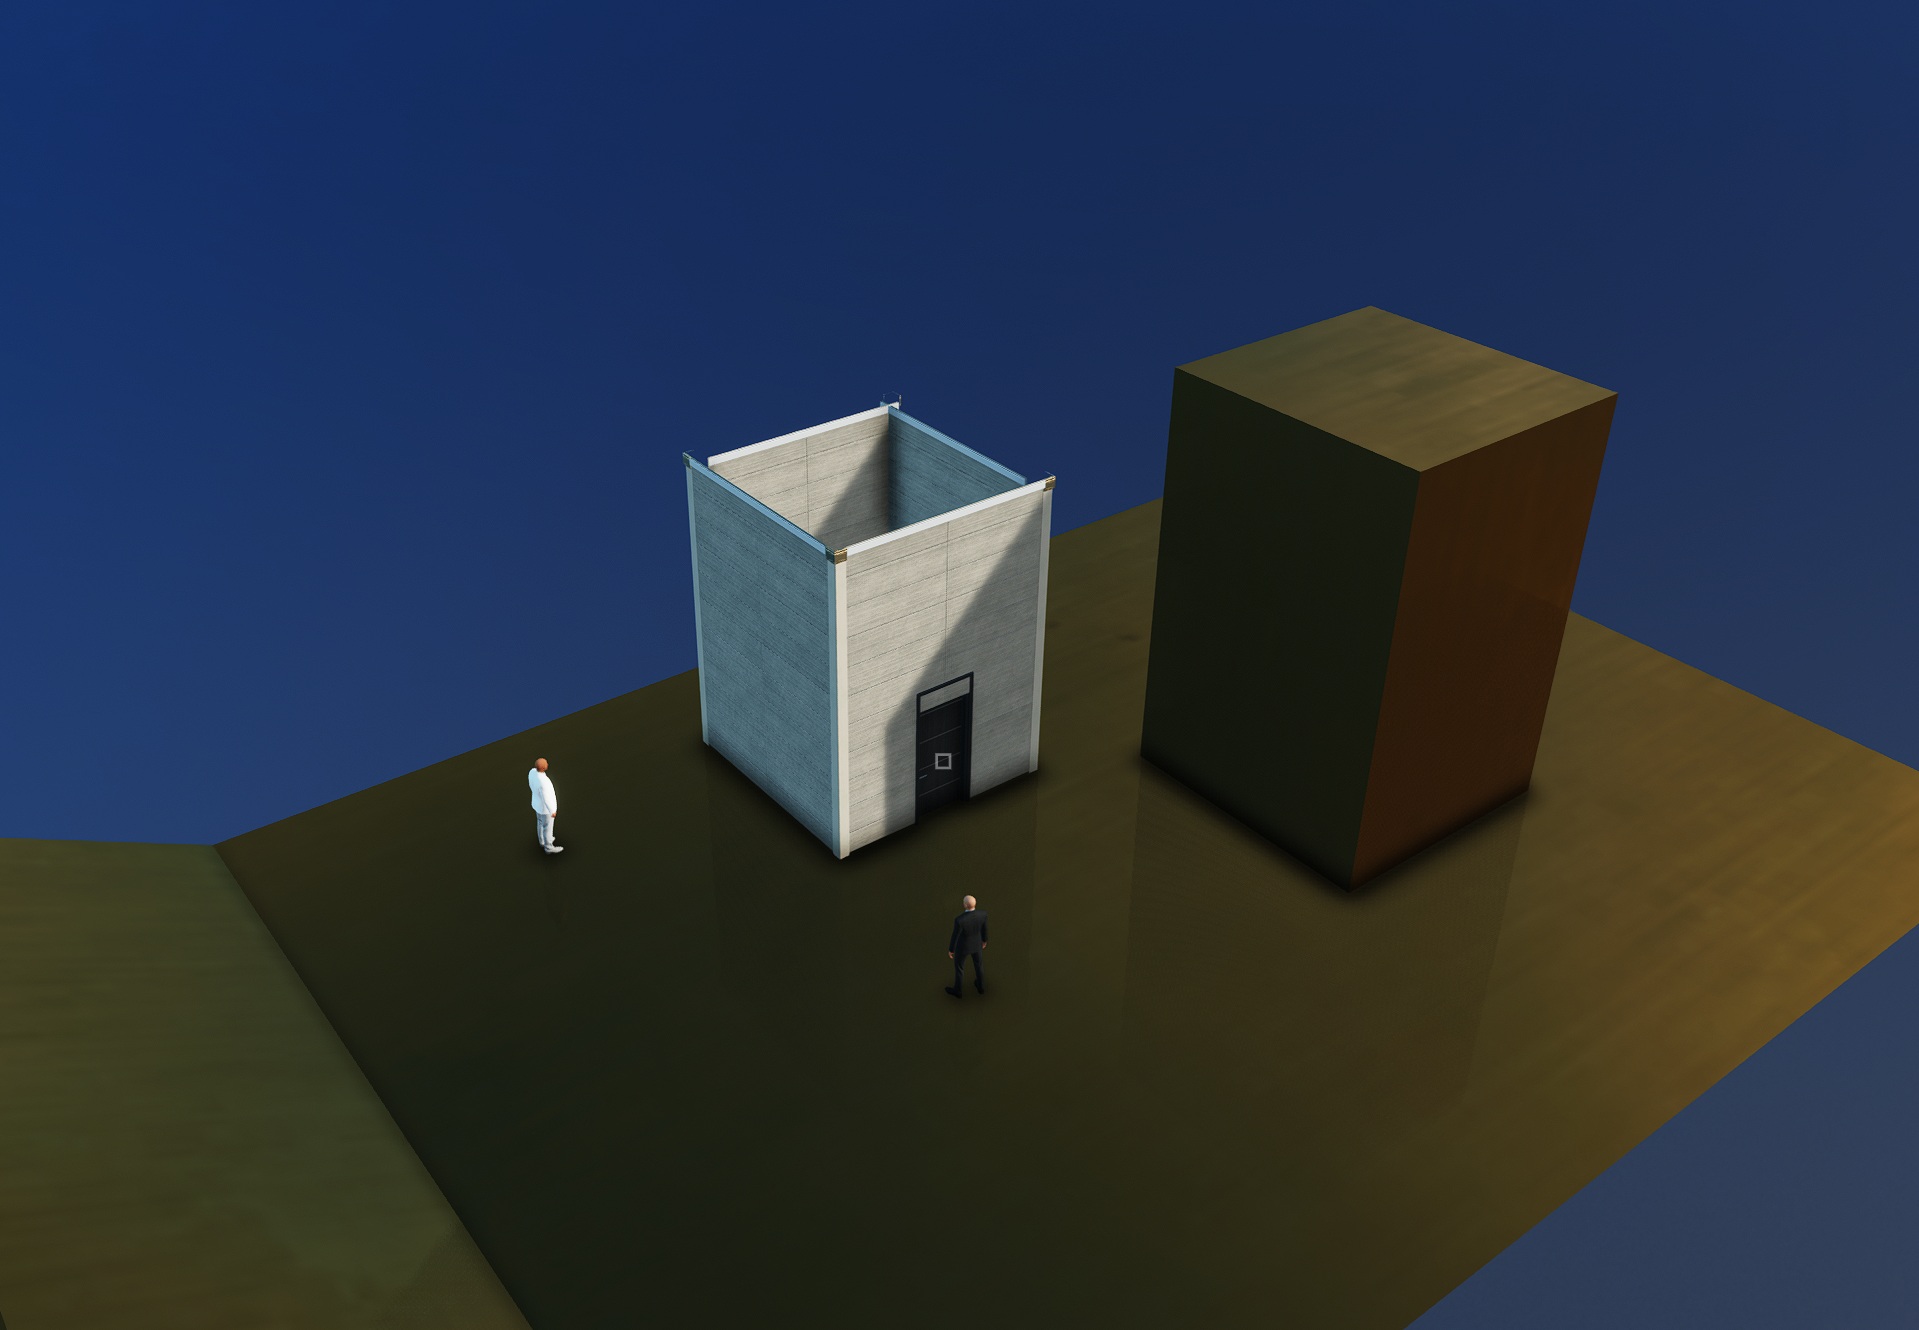
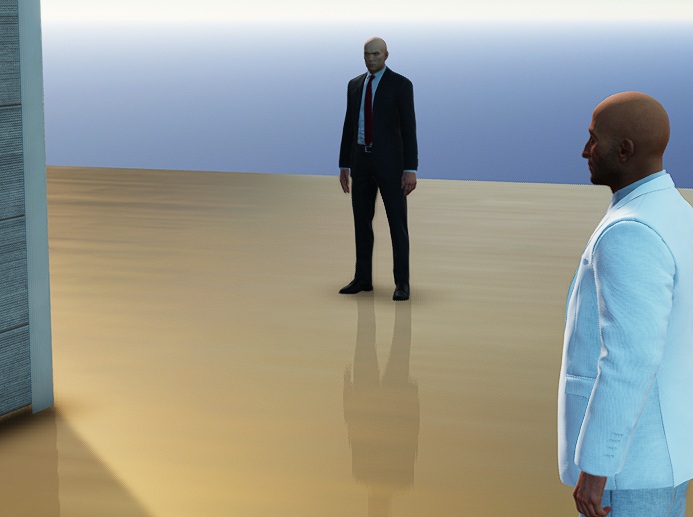
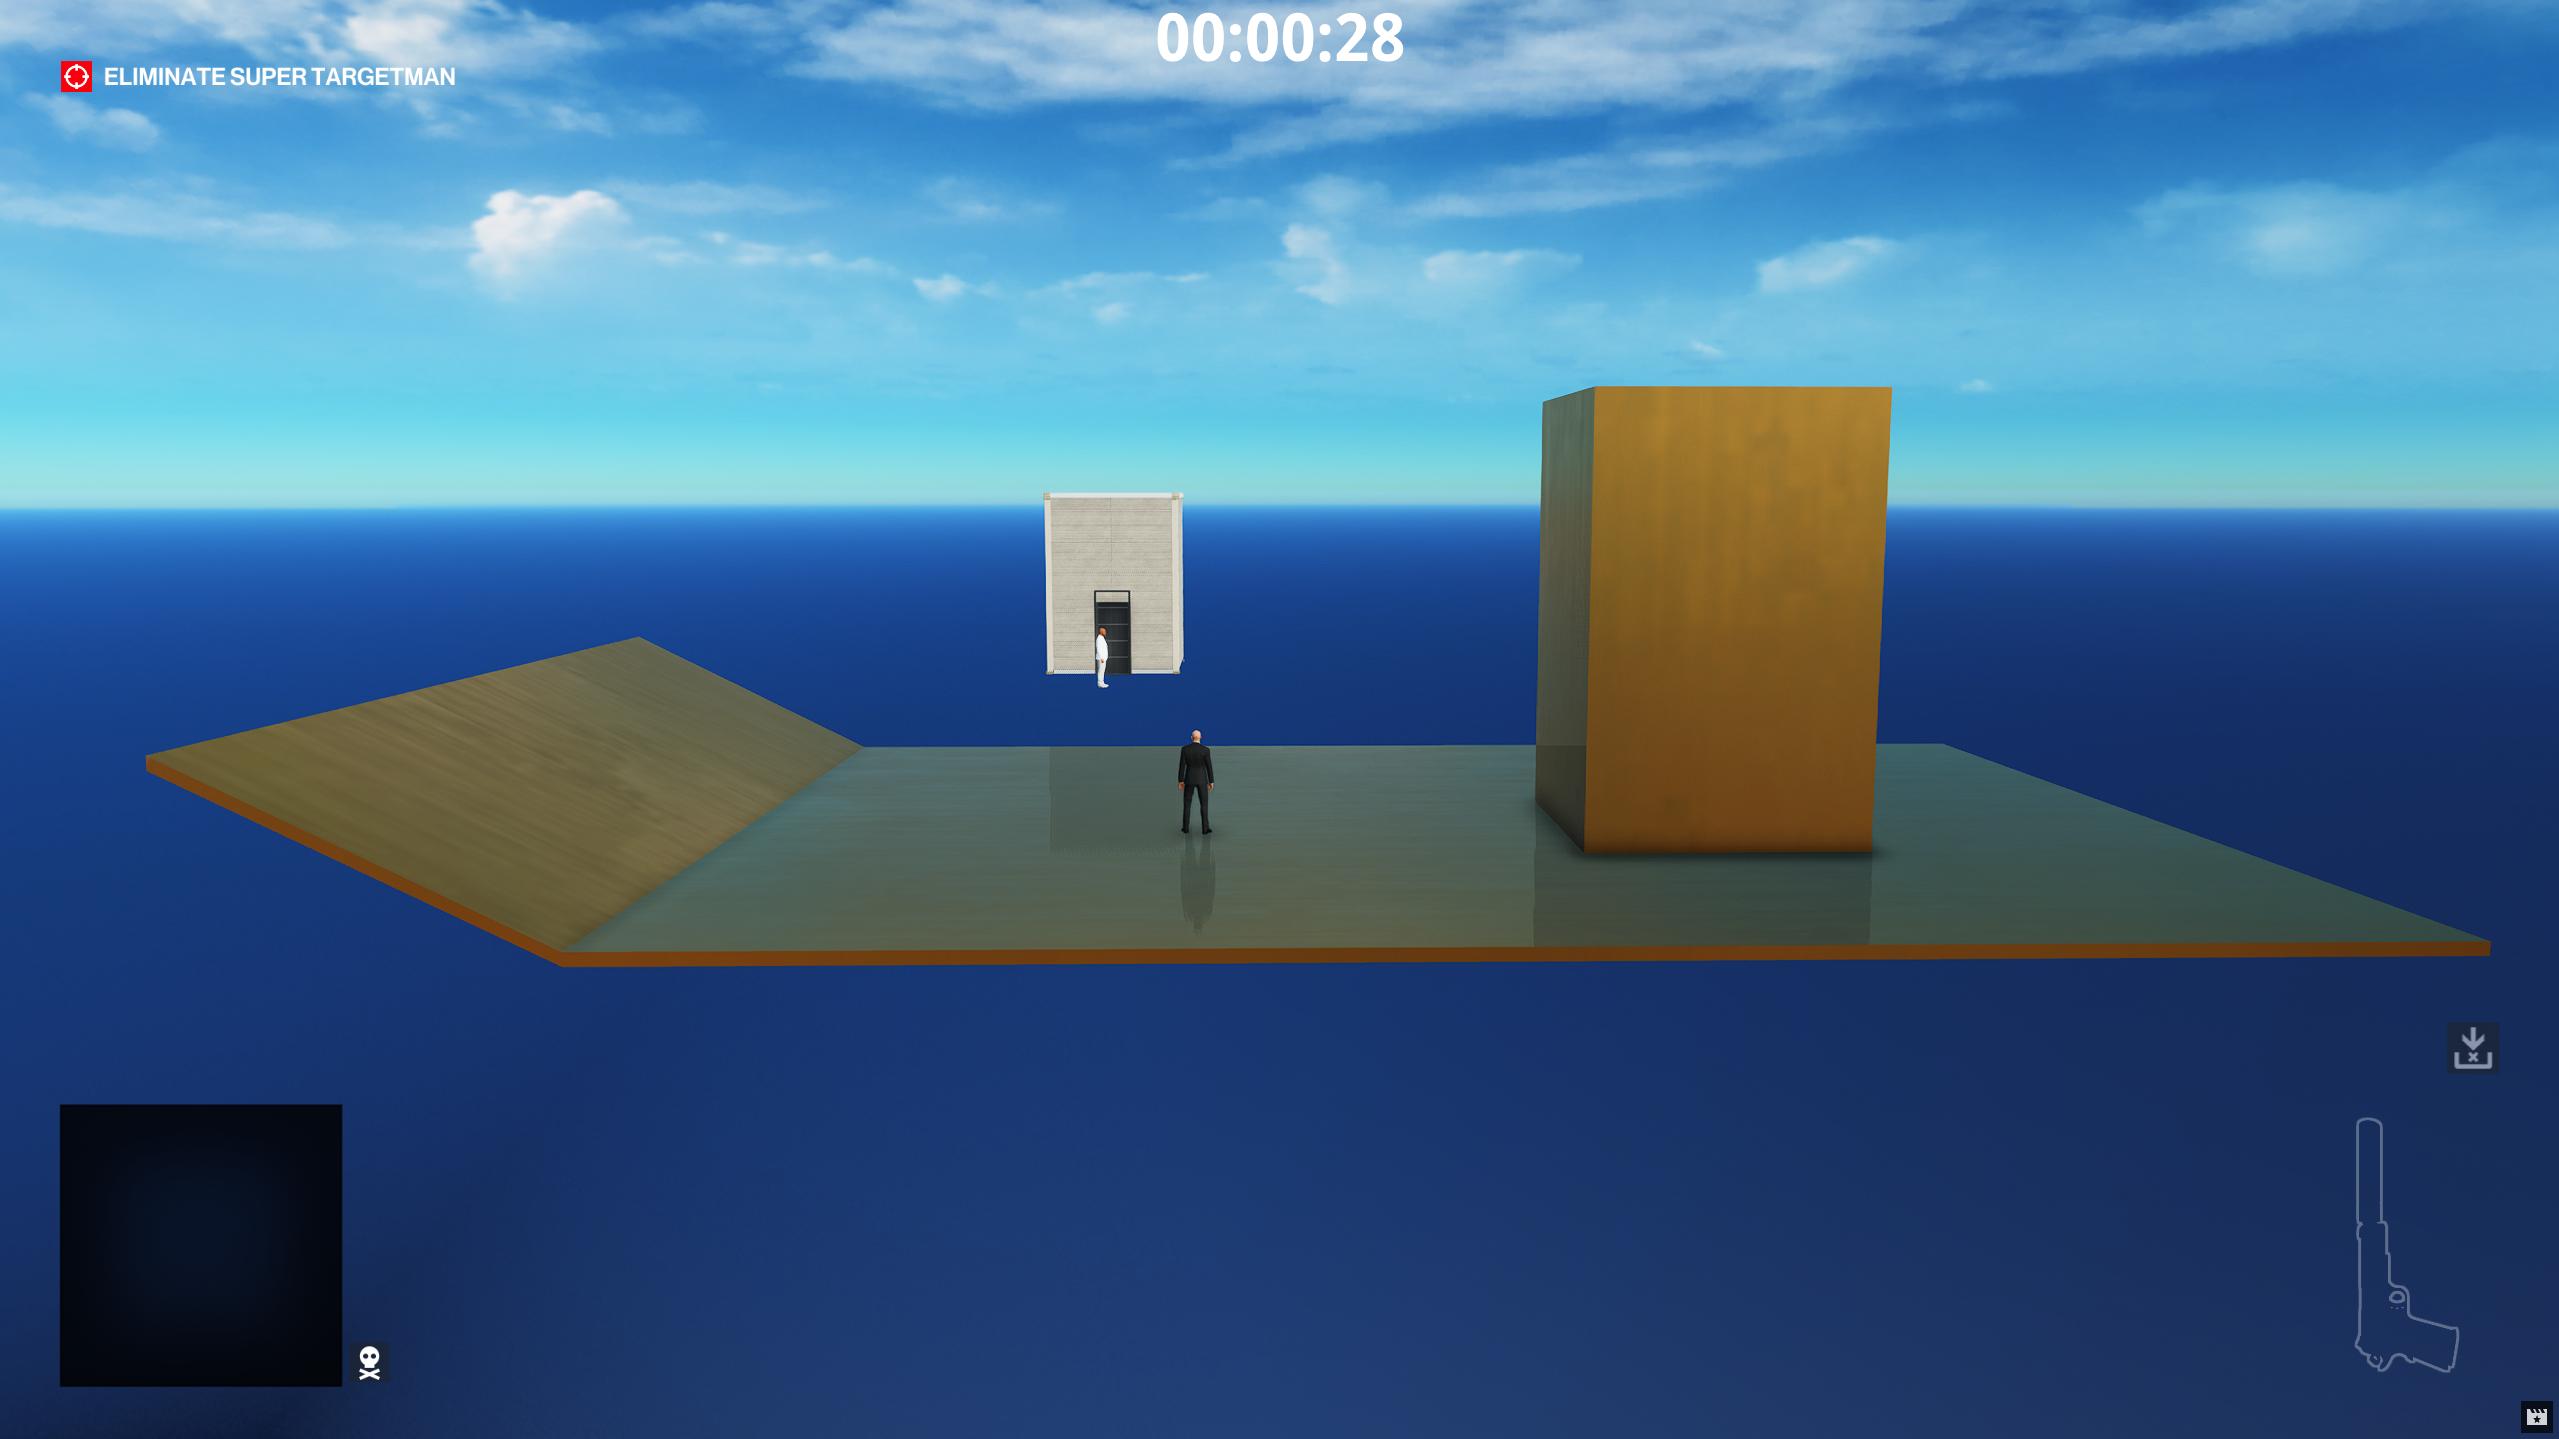 We can see our new geometry in the game! Using this example geometry, things don't quite line up with the house and SuperTargetman in this instance, so let's move the house to be on our new geometry. With GlacierKit opened to the
 scenario_modtown.entity.json file enable the ZHMModSDK Editor by pressing the tilde key and click the Rebuild entity tree button. Click on the house to select it in the ZHMModSDK Editor Tree as well as in GlacierKit, and you can see that it selected one of the components of the house.
 We want to move the whole house, so select the
 House node, and with the gizmo in translate mode, drag it with the arrows to move it over our new geometry.
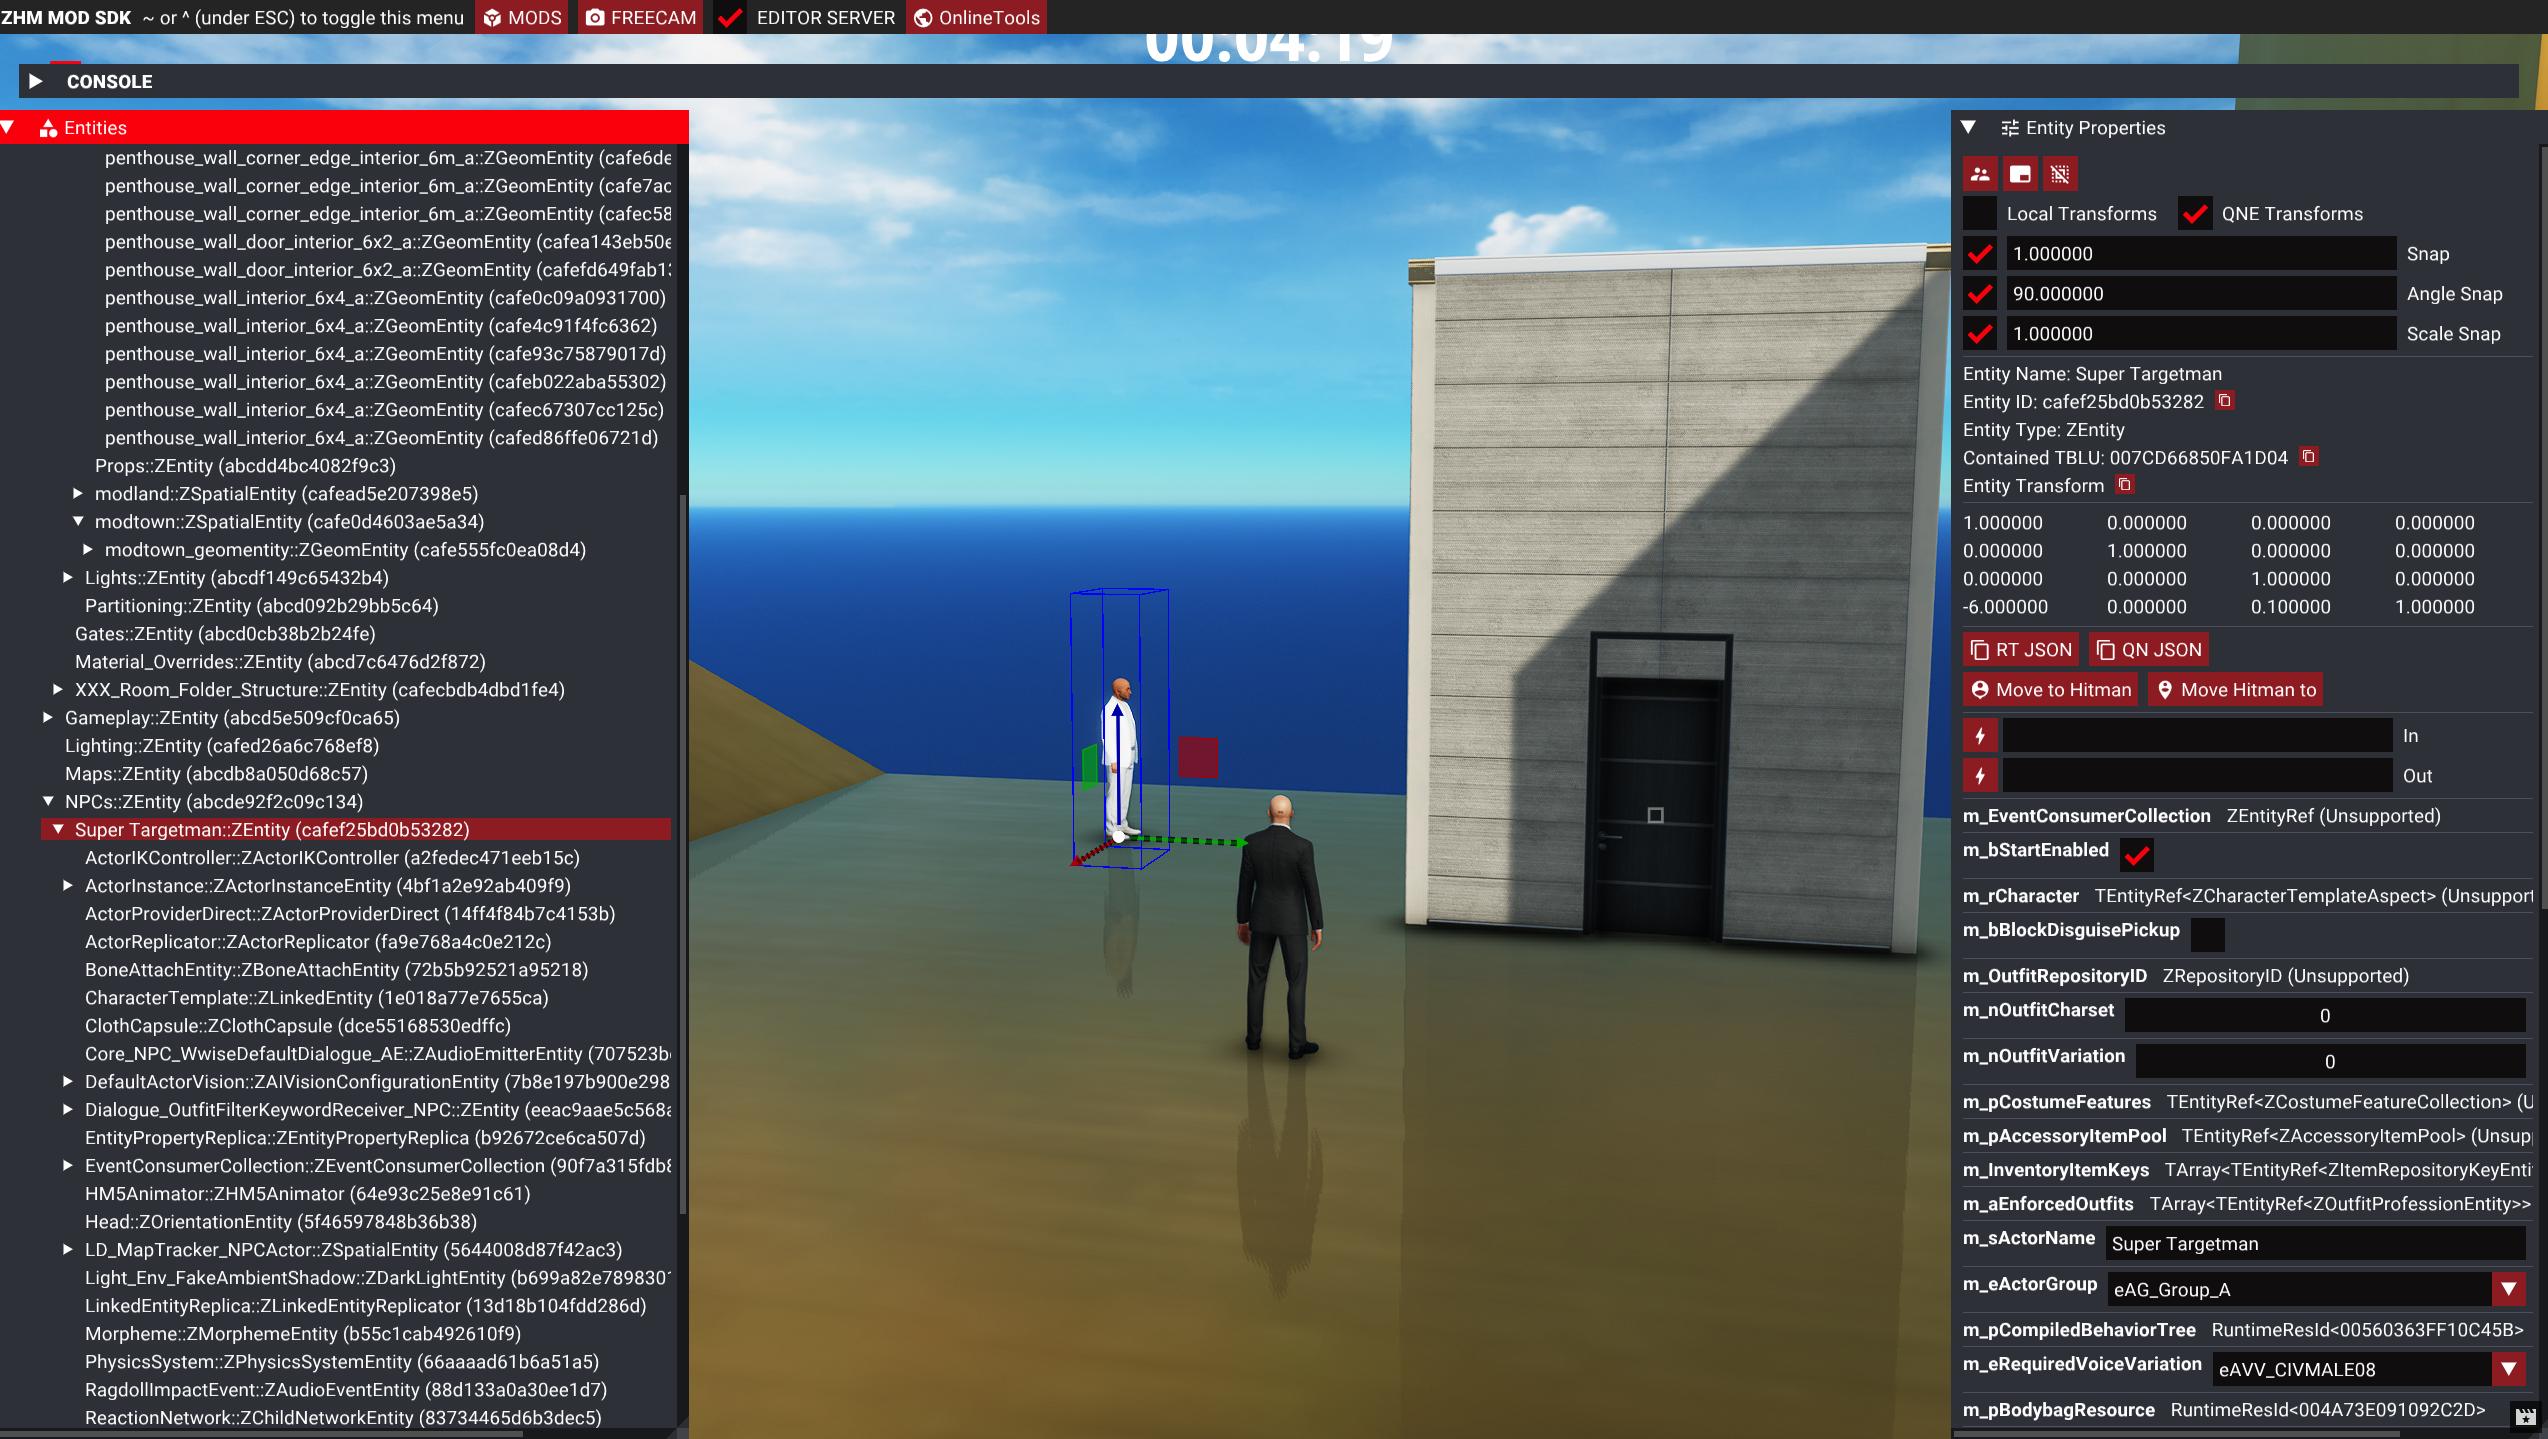
Let's also move the Super Targetman's starting location. Click on him and change his position to be over the new geometry as well.
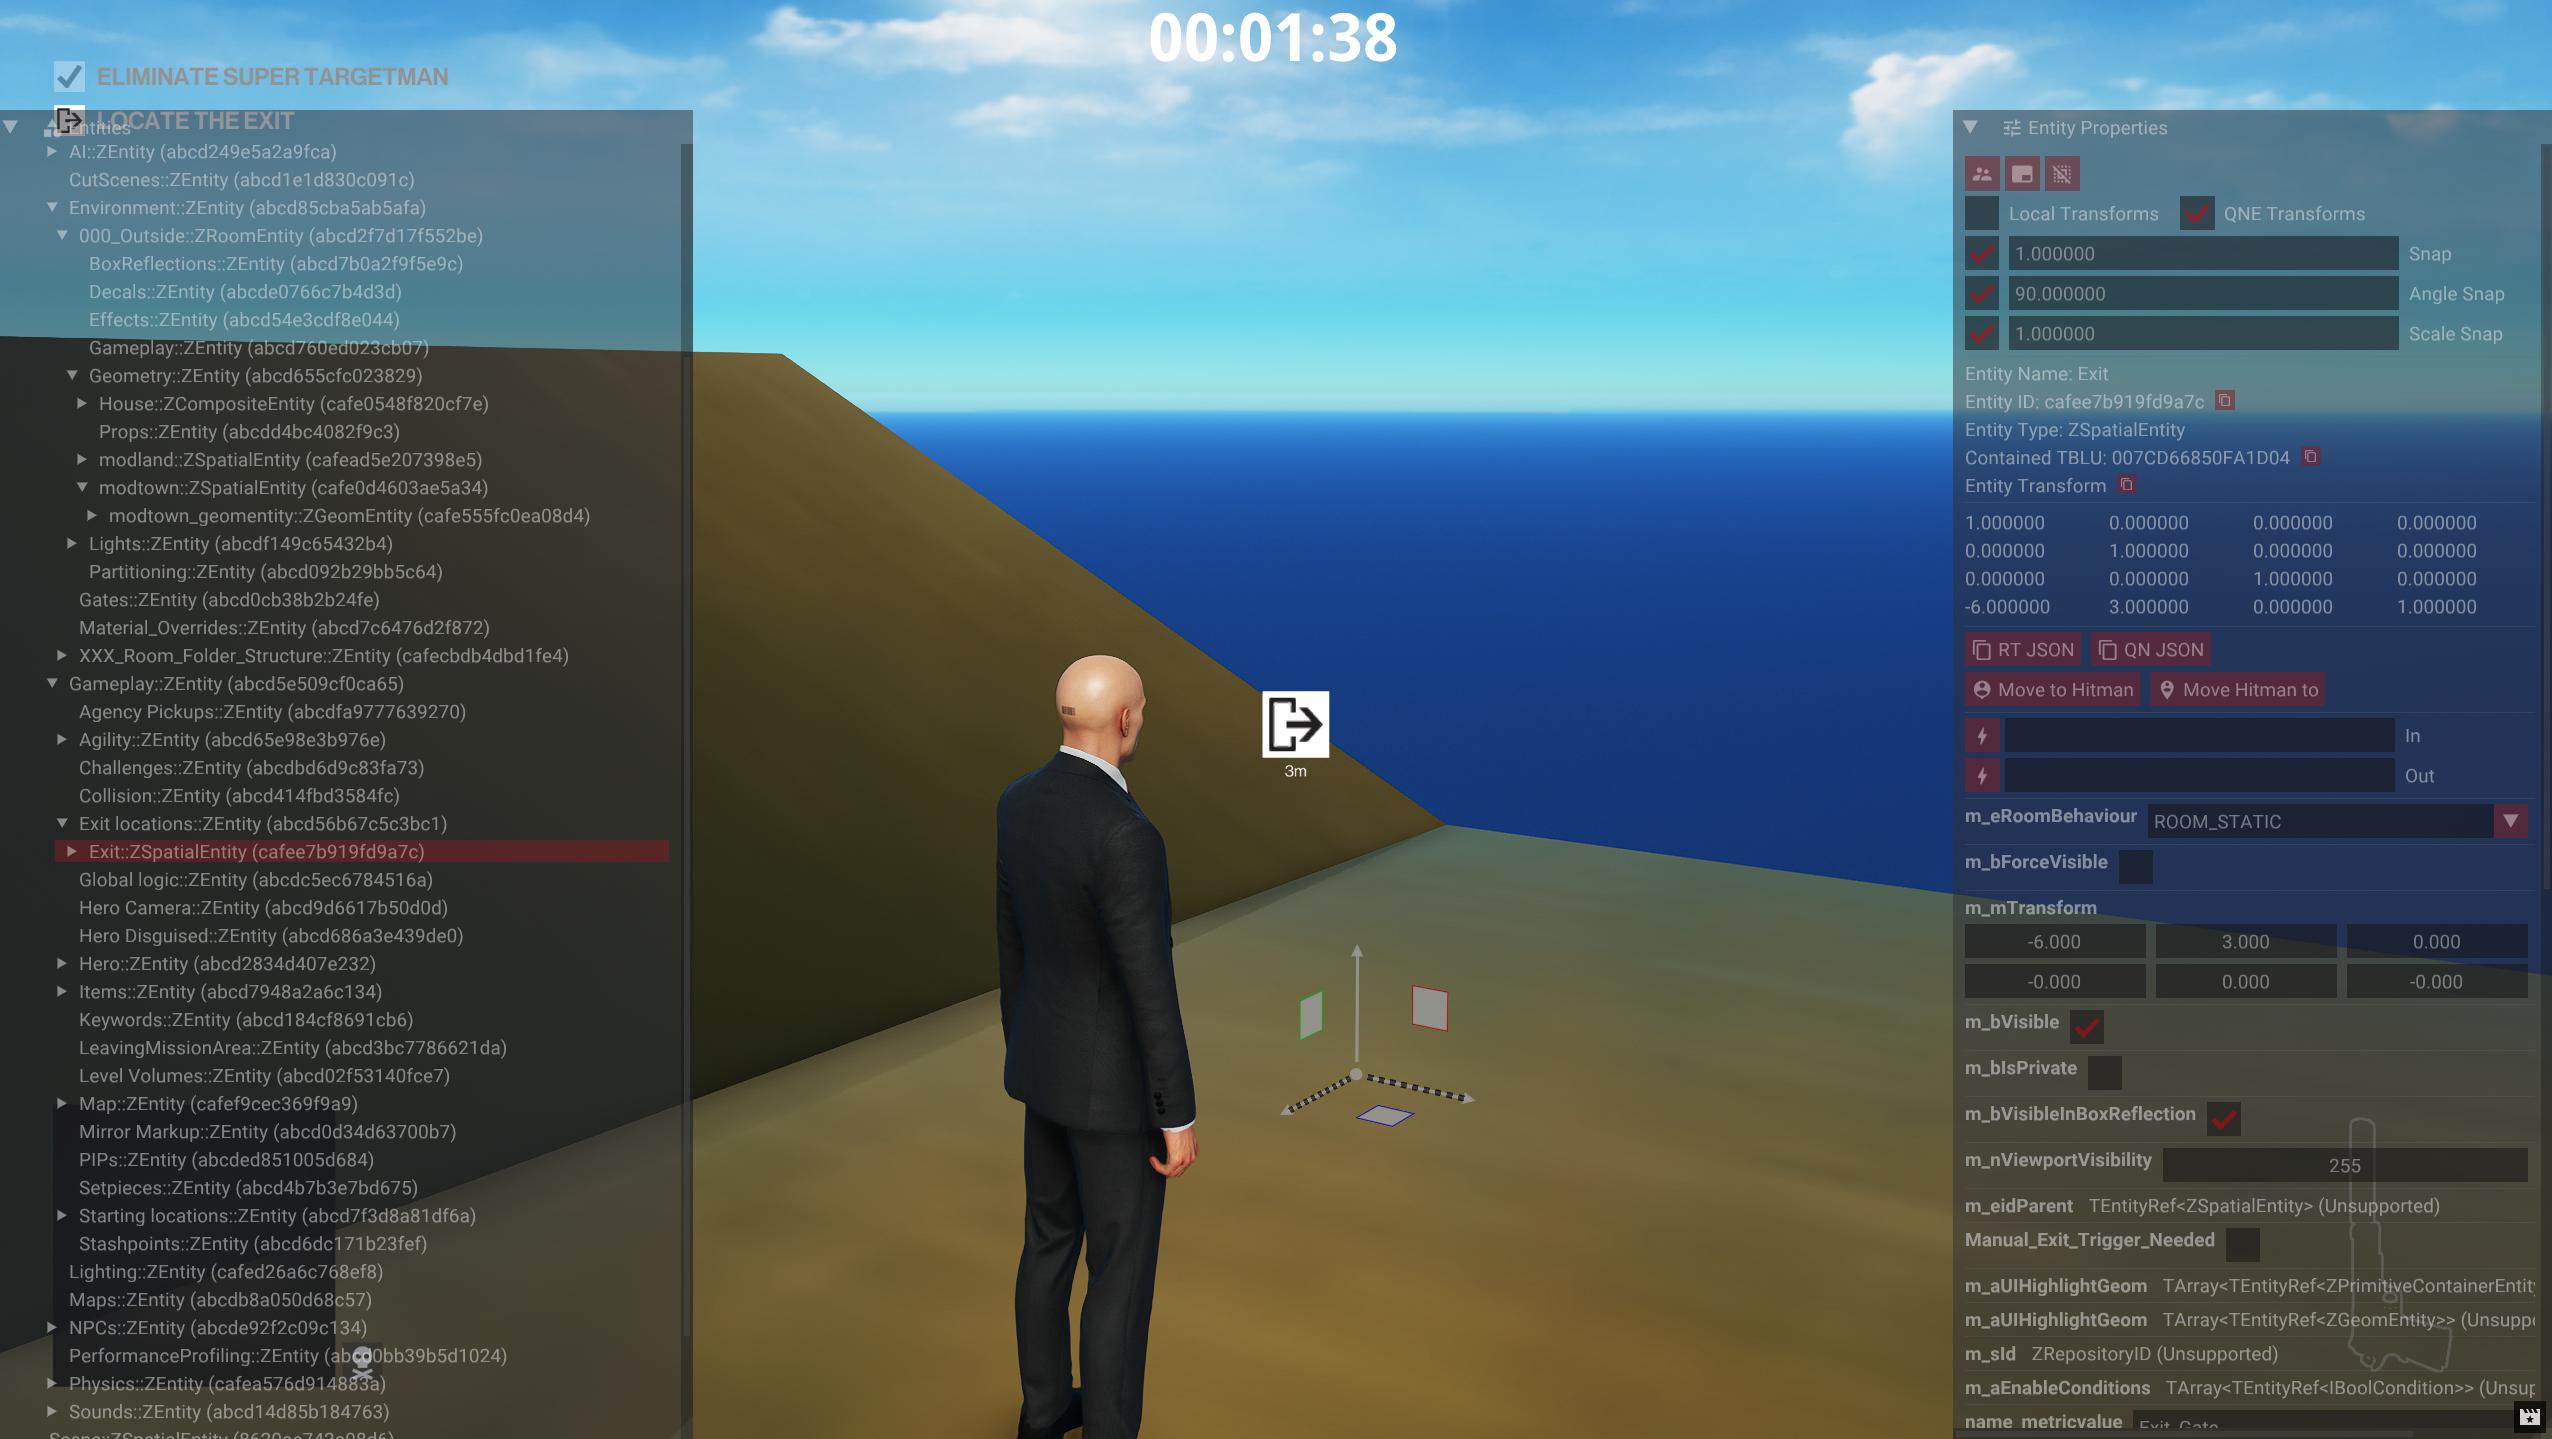
After taking out the target, we may need to move the exit as well.
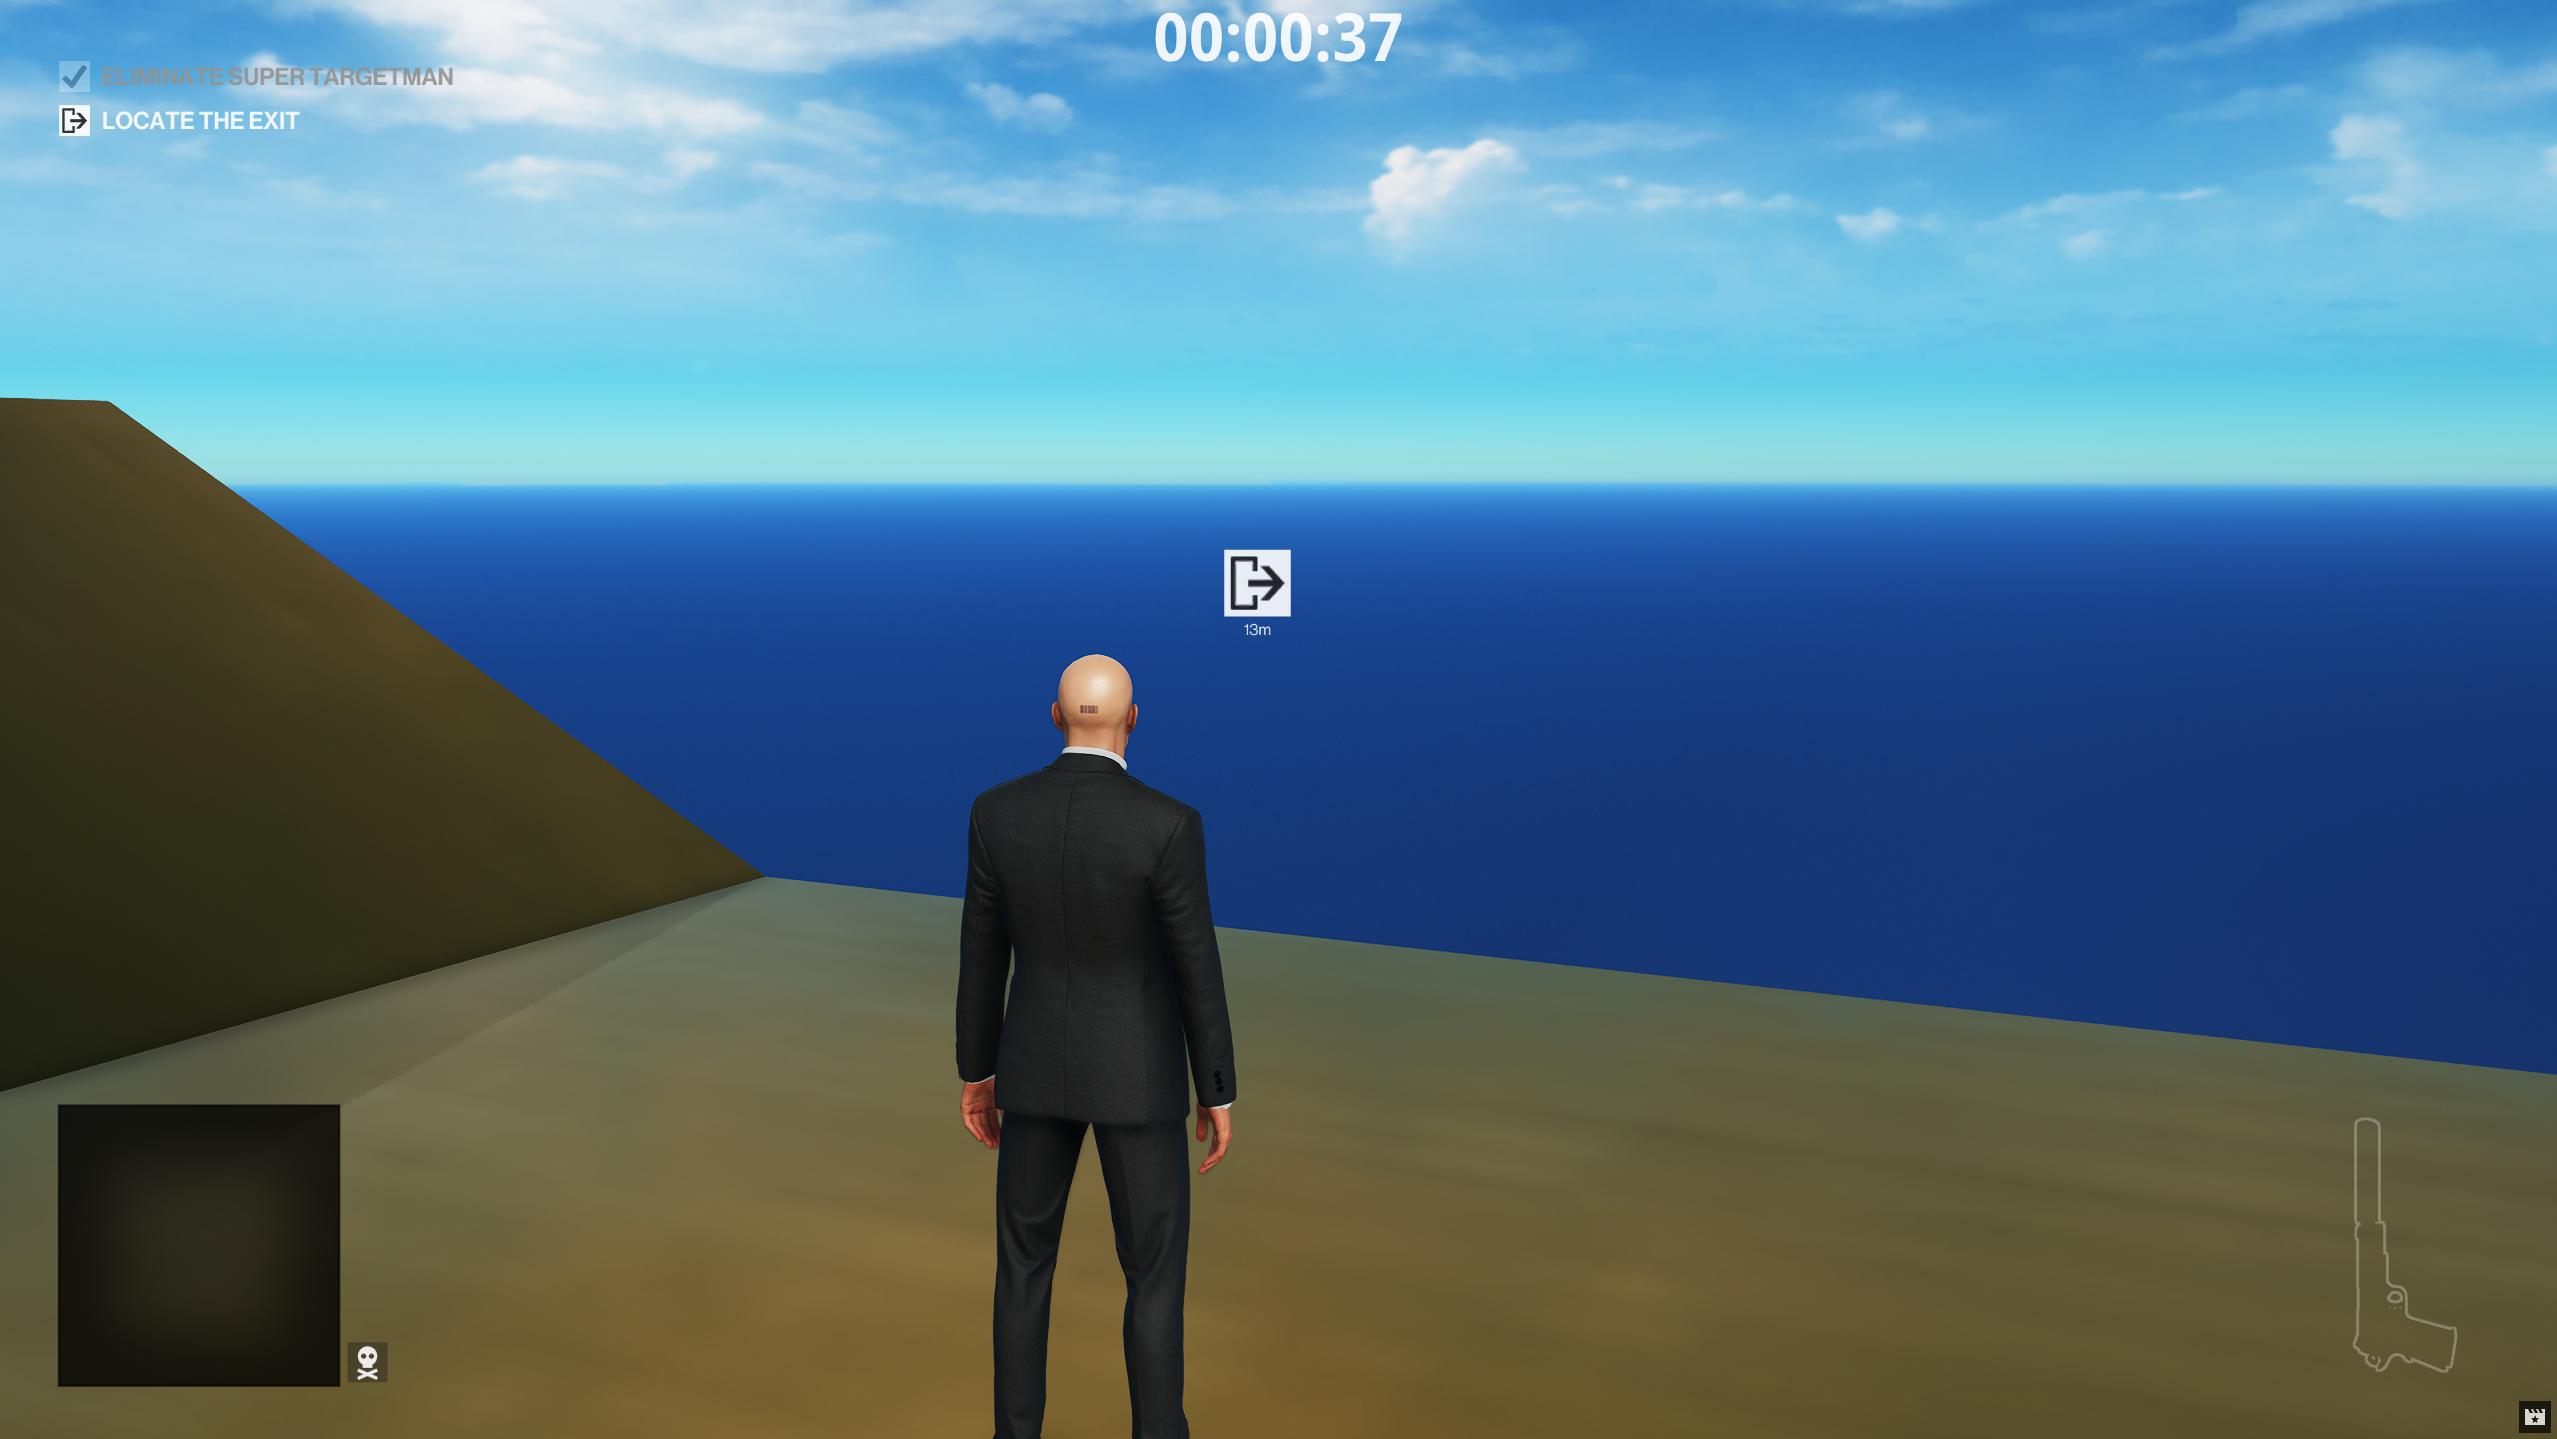
Click the Exit node in GlacierKit, and use the Gizmo in ZHMModSDK to move it to a suitable location.
Let's also delete the original Floor entity, now that we have custom geometry for our floor.
In GlacierKit, press the save button.
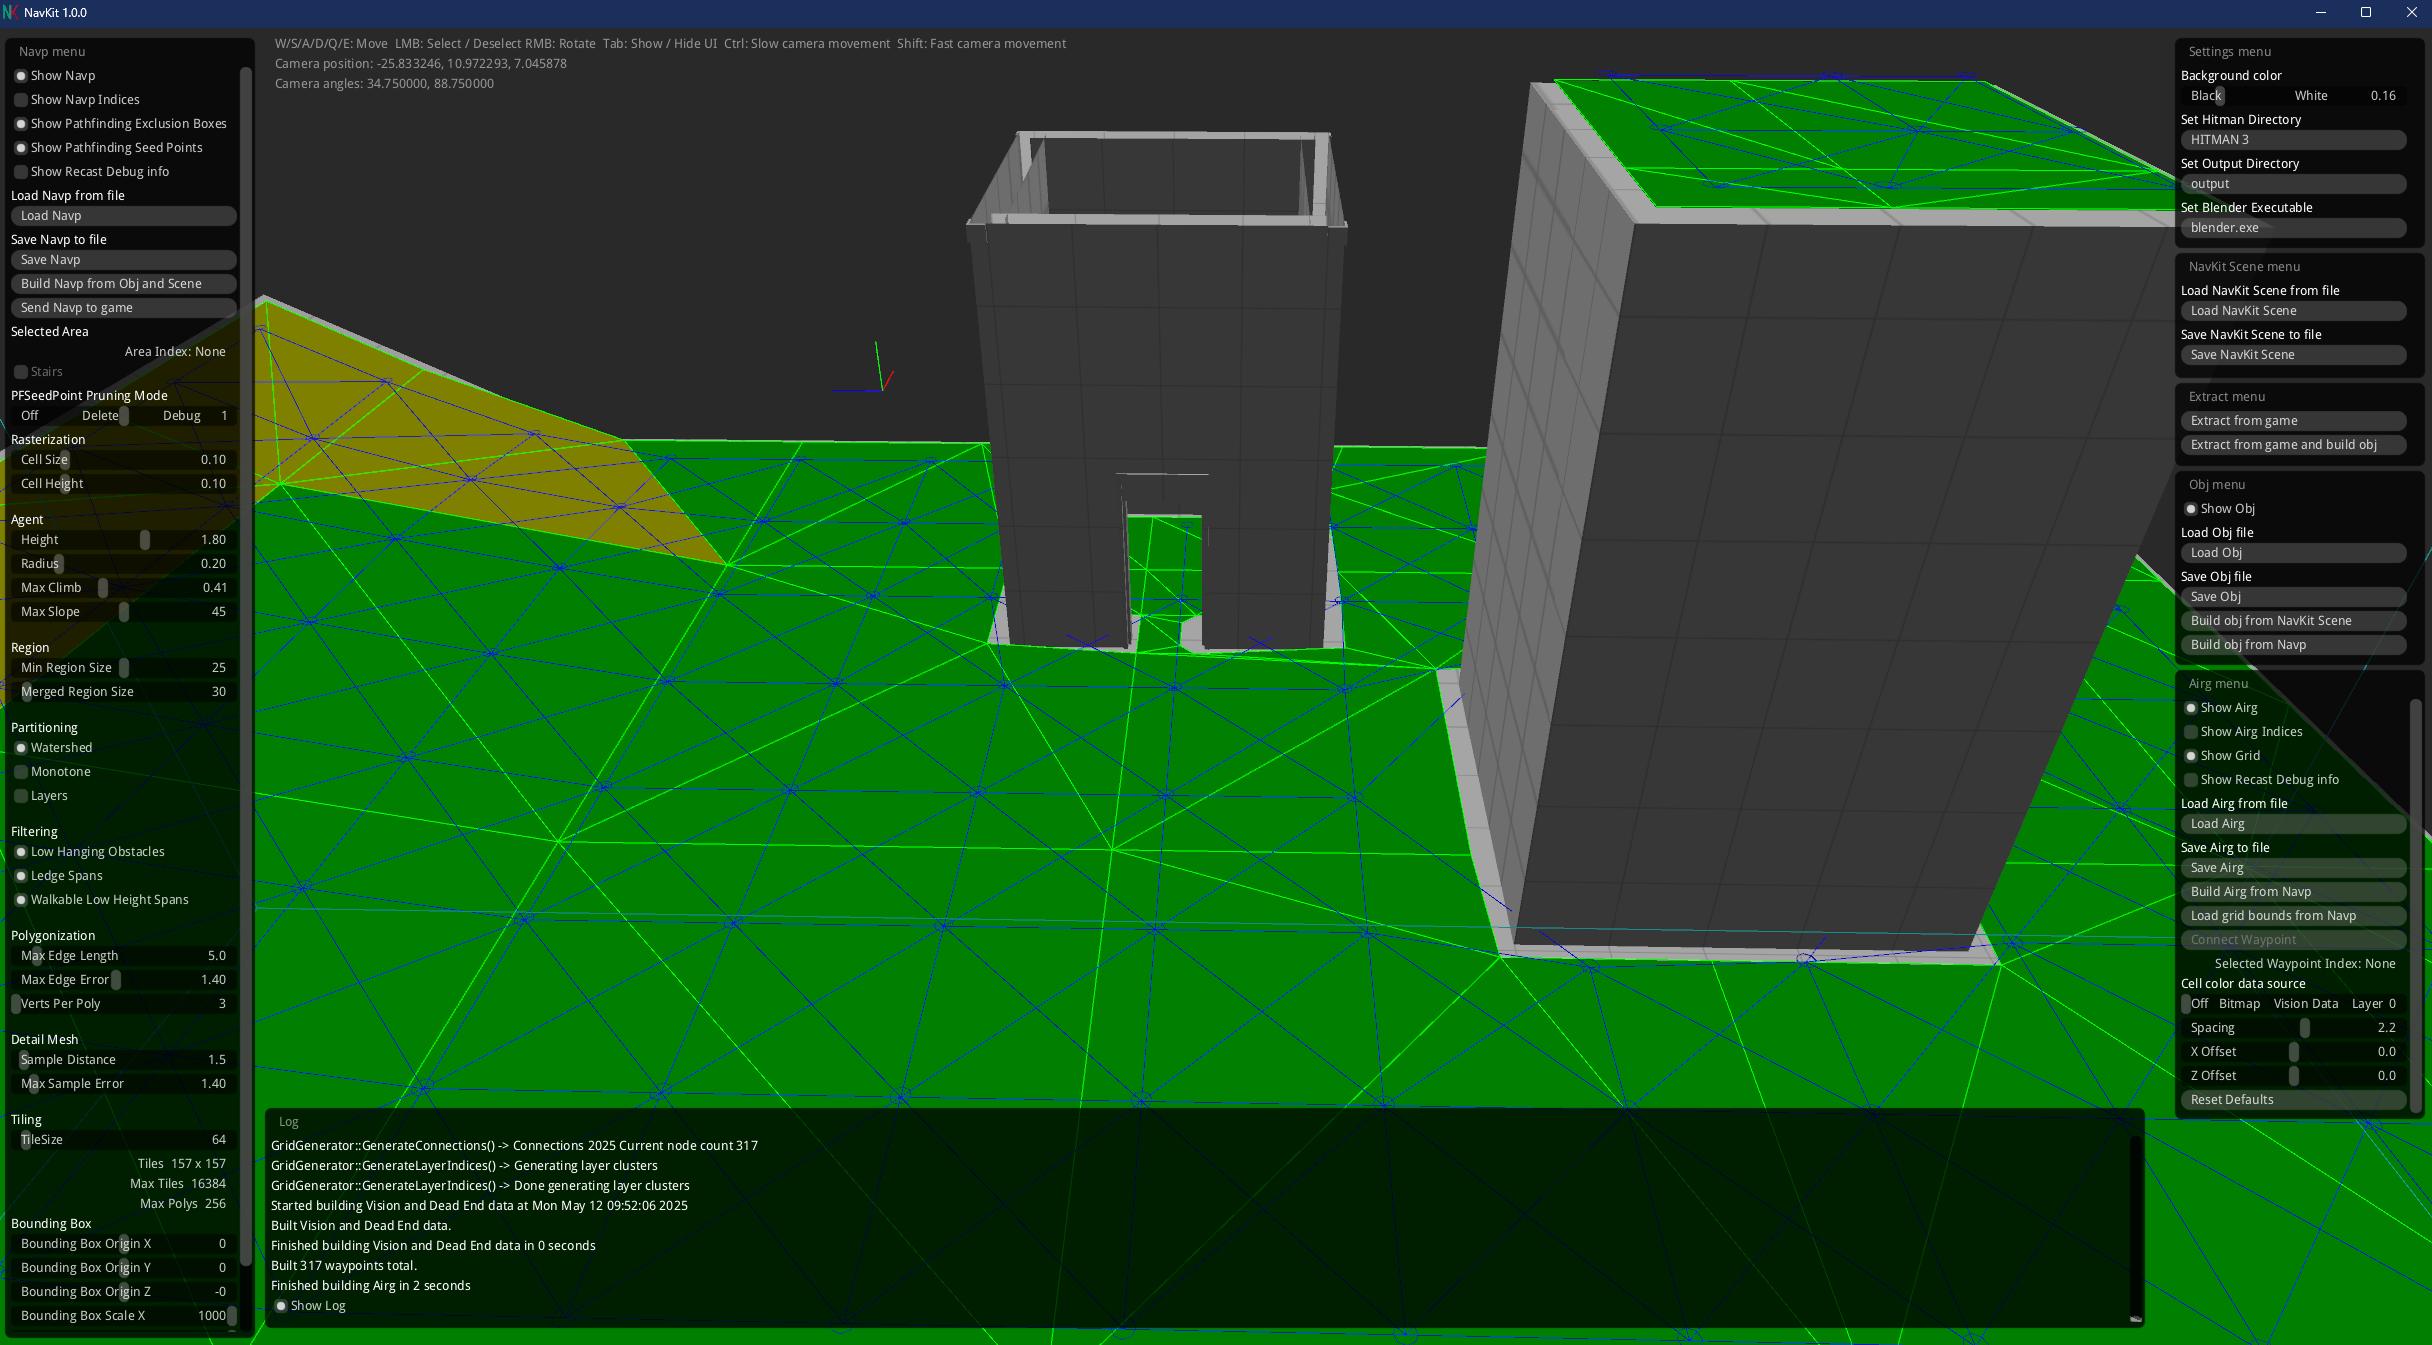
Regenerating the NAVP and AIRG again
Let's open NavKit, and just as before, extract the scene, build the obj, navp, and airg, and replace the original NAVP and AIRG files in our mod. You don't need to redeploy to do this, as it operates directly on what is in game at the moment of generation.
Redeploy, relaunch, and start the mission.
Note: If you later decide to modify the blender geometry, you'll need to:
- Recreate the Triangle Mesh in blender the same way as before
- Copy the new ALOC file into your
content/chunk2/Geometryfolder- Delete that ALOC file from the aloc folder in your NavKit output folder
Updating the images
Let's take some new screenshots for our location (Modtown), parent location (Modlandia) and mission (Modtown Throwdown) to replace our template images.
In all, we will need 6 new images:
- A background image (fullscreen) for Modtown
- A tile image (tile sized) for the Modtown Throwdown mission
- A tile image (tile sized) for the Main entrance of the Modtown Throwdown mission
- A target image (tile sized) for Super Targetman
- A background image (fullscreen) for Modlandia
- A tile image (tile sized) for the Modlandia
Here are some examples:
Modtown background
Modtown tile
Modtown entrance
Modtown Super Targetman
Modlandia background
Modlandia tile
Next Steps
We can use our campaign in offline mode only, as it can't work in online mode with the official online server, but we can make it work in online mode with the Peacock server by making a plugin. It's not as hard as it sounds. In the next step we'll make the Peacock plugin.