Patching Suits With New Parts
For this tutorial, we will go over patching new parts to an outfit, like a hat or sunglasses. In broad steps, this is what we will do:
- Start with an outfit we want to modify
- Find something interesting to add to it
- Open the outfit's entity with GlacierKit and add the new pieces
- Package it all up in an SMF mod
Before continuing, please make sure you have all the tools in the requirements section. Ideally, you should get your feet wet with basic retexturing first to acclimate yourself to these tools.
And make sure you have enabled the developer mode in Simple Mod Framework. To do this, open Simple Mod Framework, click More information, and then Enable developer mode. This will come with a few benefits, such as being able to edit the mod manifest directly in SMF, and access to SMF's internal documentation. You can consult the docs by clicking the book icon on the left in SMF.
Find a Suit to Modify
We will once again consult HMBM47's Outfit Spreadsheet for this. Bookmark it, if you haven't! For this tutorial, we will be modifying the Absolution Suit with Gloves.
Click the tab chunk0 47 Base Suits in the spreadsheet and find the Absolution Suit at the top of the spreadsheet. Write down its TEMP, which the spreadsheet tells us is 0075CC9E284E3236.
Decide What to Add
Finding accessories, clothing, and so on to use in your outfits can be as easy as finding an outfit in the game, searching for it in GlacierKit and opening its TEMP. From there, you can simply copy and paste the part entity to your own outfit. You can also look for the raw models (so-called PRIM files) in the RPKG tool.
However, that is a little advanced for your first time, so for this tutorial, we will be adding a pair of sunglasses to the Absolution Suit. The easiest way to do that would be to copy and paste from another outfit. We will be using the Italian Suit's sunglasses. Look in the outfit spreadsheet again for the Italian Suit; its TEMP is 00444A5FE5DDA137.
Open the Source Outfit
Firstly let's set up our project. We have already explained how to set up a mod project in the previous chapter, but we will reiterate it here to make sure it sticks. Navigate to your Simple Mod Framework folder and open the Mods folder. Create a new folder in here called MyName.AbsoSuitGlasses. (Good convention suggests that you name your mod folders with your username, a period, and the mod's name, no spaces.) Go into this folder and create a folder called content. In the content folder, create a new folder called chunk0. All the game's assets are segmented into chunks, it's not important to know right now but if you are curious you can see this article.
To recap, that folder structure is MyName.AbsoSuitGlasses ➡ content ➡ chunk0.
With GlacierKit started, we will need to select this mod folder. Click the big button labeled Select a project. Navigate to the MyName.AbsoSuitGlasses folder you just made and select it.
Now, we will be opening the Italian Suit to copy its sunglasses entity so we can paste it onto the Absolution suit. Go to the Game content tab, second from the top that looks like a box. Then, paste in the Italian Suit's TEMP hash in the search bar - 00444A5FE5DDA137 - and hit enter. In the tree you will find outfit_agent47_sapienza_heroa_v0.entitytemplate, buried in a bunch of folders. Click it and you will see a bunch of information about it. Click the Open in editor button.
In the tree, expand the parent entity named OUTFIT_Agent47_Sapienza_HeroA_V0. We're looking for the sunglasses, which can be found lower in the tree. In this case, the entity is named Part_Glasses. By clicking on it, the entity's details will appear in the right tab, like this:
{
    "parent": "623a89a45e4ace1f",
    "name": "Part_Glasses",
    "factory": "[modules:/zbodypartentity.class].pc_entitytype",
    "blueprint": "[modules:/zbodypartentity.class].pc_entityblueprint",
    "properties": {
        "m_pMeshResource": {
            "type": "ZRuntimeResourceID",
            "value": {
                "resource": "[assembly:/_pro/characters/assets/hero/agent47/geometry/male_reg_agent47_sapienza.wl2?/glasses.weightedprim](bodypart).pc_weightedprim",
                "flag": "5F"
            }
        },
        "m_IsHiddenInVR": {
            "type": "bool",
            "value": true
        }
    }
}
As you can see, this is a very simple and straight-forward entity with only two properties. m_IsHiddenInVR is self-explanatory; VR users shouldn't see the glasses in front of their face. m_pMeshResource dictates what model the bodypart entity should use, which in this case is the Italian Suit's aviator sunglasses. By editing the resource parameter, you can use any PRIM as a body part. The assembly path for the sunglasses has been properly decoded, so we can see it here in the resource key. If it hadn't been decoded, we would be seeing a hash instead.
Nice, this is what we're looking for.
Right-click Part_Glasses in the tree and mouse over Clipboard. Click Copy. The whole entity is now in your clipboard, and you can paste it into any text editor if you want to save it for later.
Open the Destination Outfit
Now, let's load the Absolution Suit entity. In the game content search bar to the left, enter the Absolution Suit's TEMP, 0075CC9E284E3236 and hit enter. Click outfit_agent47_absolution_gloves_heroa_v0.entitytemplate in the search results and then click Open in editor. The entity will be opened as a new tab.
With the Part_Glasses entity you copied in your clipboard, right-click the root entity OUTFIT_Agent47_Absolution_Gloves_HeroA_V0, mouse over Clipboard and click Paste. Expand the entity and look in the tree, and you should now see Part_Glasses further down.
There is one final step before we're done. The root entity has an array of body parts that it should render. We'll need to add the sunglasses to this array for the body part to show up in-game.
Right-click Part_Glasses and click Copy ID. Now, click the root entity OUTFIT_Agent47_Absolution_Gloves_HeroA_V0 and scroll down until you find m_aBodyParts. Here, you will find all the body part pieces the outfit is made of. 47's head, hands, jacket, pants, shoes, etc. Add a comma to the last body part, press enter to make a new line, and paste in the ID of the Part_Glasses entity that you just copied. Make sure it's enclosed in quotes like all the others. Finally, ensure it says Valid entity just above the editing panel and not Invalid entity.
Now that the sunglasses body part is in the array, click the diskette save button on the Absolution suit entity's tab. Navigate to your content and then chunk0 folder. Name the file absolution_glasses and save it.
Make Our SMF Mod
In GlacierKit, click the Files tab to the left, at the very top. Right click the MyName.AbsoSuitGlasses folder and click New File. Call it manifest.json and hit enter. Click the file to open it.
Paste the following info into it. If GlacierKit asks for permission to access your clipboard, click Allow.
{
    "$schema": "https://raw.githubusercontent.com/atampy25/simple-mod-framework/main/Mod%20Manager/src/lib/manifest-schema.json",
    "id": "MyName.AbsoSuitGlasses",
    "name": "Absolution Suit with Glasses",
    "description": "Makes the Absolution Suit much cooler.",
    "authors": ["My Name"],
    "frameworkVersion": "2.33.22",
    "version": "1.0.0",
    "contentFolders": ["content"]
}
If you edit the manifest with GlacierKit or Visual Studio Code, they will use the schema you imported with the first line to help you validate your manifest. That is, if you make any errors or write anything invalid, the editor can point it out to you. This is why we first recommend VSCode or GlacierKit as editors.
frameworkVersion is the version of the framework you are currently using. At the time of writing, the latest version is 2.33.22.
contentFolders in the manifest tells Simple Mod Framework what folders will be used for mod content.
When all is said and done, this should be the tree structure of your mod:
📁MyName.AbsoSuitGlasses
├── 📁content
│   └── 📁chunk0
│       └── absolution_glasses.entity.patch.json
├── manifest.json
└── project.json
That's all we need. Next, start Simple Mod Framework and click Enable/disable mods. From there, you'll want to find your mod in the list under Available mods and click Enable, then Apply, and watch it work for a minute. When it's done, close Simple Mod Framework and start up the game.
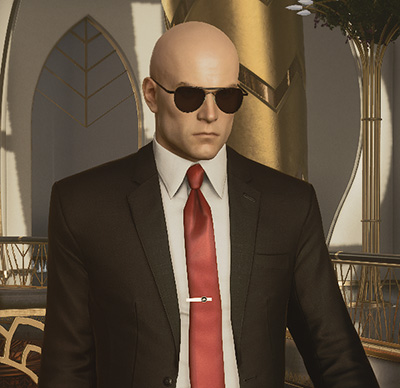
Go into pre-planning at any level you like and choose the Absolution Suit with Gloves. Finally, start the level, and if you did everything right, the fruits of your labor should be before your eyes!
And that is how to patch an outfit to add new body parts. Of course, as you can also remove body parts, the combination of these principles is the foundation for composing entirely new outfits. We will soon go over the best practices for making new and exciting outfits.
Addendum
If you have any doubts or difficulties with adding certain things to your outfits, the best question you can ask is, "how are IOI doing it?" You can learn a lot by opening TEMP files in GlacierKit and studying the makeup of the outfit. Do not be afraid to open the game content tab, search for an outfit, and study any TEMP files you find.
Something else you can do is open RPKG Tool and search for PRIM files named after articles of clothing, such as jacket, shirt, pants, shoes, etc. From there, you can select a PRIM that seems interesting, and in the 3D Viewer tab, you can see what the clothing looks like, and if you want to incorporate it into an outfit, you can see how IOI implemented the model by looking at the reverse hash depends in the Details tab. Under the reverse hash depends, you should see a list of TEMP outfit files. By opening any of them in GlacierKit and looking in the tree, you can find the clothing's entity.
In seasons 2 and 3 of Hitman, IO switched to a more templated model of building outfits. Rather than having a body part entity in the outfit pointing to a model, they will usually have an entity pointing to a jacket template, which contains the model, cloth collisions, materials, and many other things, all in one, to streamline their development of outfits.
It is also worth mentioning that seasons 2 and 3 have a different skeleton compared to season 1. So, introducing models from season 1 to an outfit built on a season 2 or 3 skeleton, or vice versa, will look completely bizarre and broken. There are ways to get around that by converting the model to a new skeleton with Rebone, but that is for advanced users.
And one final note on PRIM files: any body parts that you put into your outfit must be in chunk0 or the game will experience crashes. You can read more about how chunks work here, but the gist of it is that anything you can wear in a starter suit needs to be in chunk0 for the game to be able to use it on all maps. If you find a model that you really, really want to use for an outfit that just isn't in chunk0, there's still hope. You simply need to add a dependencies key to your manifest that tells SMF to move that file to chunk0 when you apply the mod. You just need to add all the hashes you want to move, like this:
{
    "$schema": "https://raw.githubusercontent.com/atampy25/simple-mod-framework/main/Mod%20Manager/src/lib/manifest-schema.json",
    "id": "MyName.AbsoSuitGlasses",
    "name": "Absolution Suit with Glasses",
    "description": "Makes the Absolution Suit much cooler.",
    "authors": ["My Name"],
    "frameworkVersion": "2.33.22",
    "version": "1.0.0",
    "contentFolders": ["content"],
    "dependencies": ["0049F083DC18CC1F", "00087BEFE0EFFF66"] // <----- Right here!
}
Dependencies is an array, so it can take more than one entry.