Options Patches
Introduction
Options are a way to let the user of your mod tweak their experience. For an outfit mod this might be different colors, gloves, accessories and so on. This is achieved by segmenting different entities and patches into different content folders, and by way of options, selectively applying these.
Let us take our Street Smart outfit and introduce a pair of gloves to it, with an option.
Requirements
First off you actually cannot use GlacierKit for this as it does not presently have the ability to patch custom entities, only stock game entities. You will need to download the legacy QuickEntity Editor to make options for your custom entities. So download it now and install it.
Preparing
In your mod folder MyName.StreetSmart, create a new folder called patches. In that folder, make a folder called gloves. In that folder, make a folder called leather. In that folder, make a folder called chunk0.
That's patches ➡ gloves ➡ leather ➡ chunk0.
Simple Mod Framework will apply all content folders, even those by way of options, in alphabetical order. This means that any patches you make to custom entities will need to be in a folder that is alphabetically after the base content folder. This is also good to know for patches that depend on other patches. In our case content comes before patches, if we don't take care to order the content folders properly Simple Mod Framework will error out as it cannot patch an entity that doesn't yet exist according to it.
Next, we can prepare our manifest. Open your manifest.json, and make a new array called options.

options is an array of objects, and our first option will look like this:
    {
      "group": "Gloves",
      "name": "No gloves",
      "type": "select",
      "enabledByDefault": true,
      "tooltip": "Don't use gloves."
    }
Let's break it down.
group- This option is part of the "Gloves" group.name- This option is named "No gloves".type- This is a radio button "select" type of option. Only one select type of option can be active at a time in an options group. Other options arecheckboxandconditional, conditionals are a little complicated but makes an option apply, as an example, if a particular mod is in the load order.enabledByDefault- If true, the option will, you guessed it, be enabled by default.tooltip- Some text that will display when the user mouses over the option.
Another interesting property is image which will display an image for your option. For instance "image": "leather_gloves.jpg" will show the leather_gloves.jpg file in the mod folder.
Most other base manifest keys apply to options including contentFolders and blobsFolders. You may have noticed that for this option we have not supplied one of these. This is because the base outfit doesn't have gloves, so we don't have to patch it. We only have to supply the contentFolders in our leather gloves option.
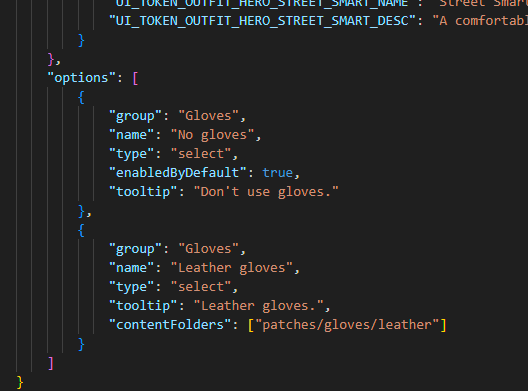
With that let's make our second "Gloves" group option:
    {
      "group": "Gloves",
      "name": "Leather gloves",
      "type": "select",
      "tooltip": "Leather gloves.",
      "contentFolders": ["patches/gloves/leather"]
    }
This is basically the same but with contentFolders, and enabledByDefault is gone. In our manifest the options will look like this.
Making the Patch
Now that the manifest is finished let's open QuickEntity Editor and patch our outfit.
This is legacy software and will no longer receive updates, as it has been superseded by GlacierKit. You should not use QuickEntity Editor for anything besides patching your custom entities. Keep GlacierKit open in another window if you need to browse game files or do anything else besides.
With QuickEntity Editor open, click Load and choose Load entity from file. Navigate to your mod folder, go into content, chunk0 and choose your outfit file.
The tree will look like you're used to with GlacierKit. Expand the root outfit and click Hands.
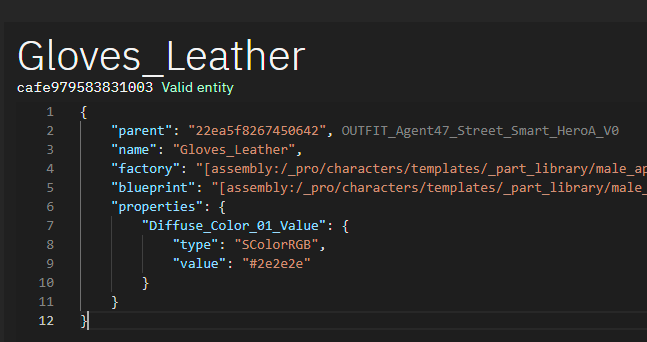
I already have a pair of gloves picked out I will show you here. Change the entity name from Hands to Gloves_Leather. Replace the factory and blueprint as below and introduce a Diffuse_Color_01_Value property with the #2e2e2e color. Feel free to copy below:
	"factory": "[assembly:/_pro/characters/templates/_part_library/male_apparel/male_reg_apparel_hands.template?/gloves_leather.entitytemplate].pc_entitytype",
	"blueprint": "[assembly:/_pro/characters/templates/_part_library/male_apparel/male_reg_apparel_hands.template?/gloves_leather.entitytemplate].pc_entityblueprint",
	"properties": {
		"Diffuse_Color_01_Value": {
			"type": "SColorRGB",
			"value": "#2e2e2e"
		}
	}
The new entity should look like below.
That's all we need to do, so click Save as and choose Save as patch file. Navigate to your mod folder, go into patches ➡ gloves ➡ leather ➡ chunk0. Save as leather_gloves.
If you want to make more patches after this it's safest to re-load your outfit by clicking Load and choose Load entity from file after you save each patch.
Applying and testing
Open Simple Mod Framework now and enable your mod in your load order if you haven't. Then go into Configure mods and make sure Leather gloves is picked. Apply your mod after this.

Now start the game and double check that the leather gloves have applied.

If you want you can try turning off the leather gloves option, re-applying your mod and double checking that you have normal hands when the option is not selected.
By leveraging the options system you can introduce wide swathes of configuration to your mods!