Basic Retexture
For this tutorial, we will go over a basic texture override for a suit. In broad steps, this is what we will do:
- Extract the texture we're looking for with GlacierKit
- Convert the texture to a workable .tga with TonyTools
- Make our changes to the texture
- Come up with a new hash for our texture (so we don't overwrite stock assets; that's bad practice!)
- Open the suit's outfit entity with GlacierKit and override the suit's stock texture with our custom texture
- Package it all up in an SMF mod
Before continuing, please make sure you have all the tools in the requirements!
And before we start, you should start Simple Mod Framework and enable the developer mode. To do this, open Simple Mod Framework, click More information, and then Enable developer mode. This will come with a few benefits, such as being able to edit the mod manifest directly in SMF, and access to SMF's internal documentation. You can consult the docs by clicking the book icon on the left in SMF.
Hitman uses a physically based rendering pipeline, and the models use 3 textures: a diffuse map, a specular map and a normal map.
The diffuse map can basically be said to be the base color of the model. The specular map is how it reflects light, and the normal map is, in essence, how shadows fall on the model. Normal maps are used to fake detail on low-polygon models in video games. In this example, we will be changing the diffuse map.
Extract Texture
Begin by opening GlacierKit. Go to the Game content tab, 2nd from the top that looks like an archive box.
Now we need to find the suit that we're looking for. You can find all of 47's outfits in GlacierKit by opening the Game content tab and searching for agent47_outfits.template?. This folder contains all of 47's outfits.
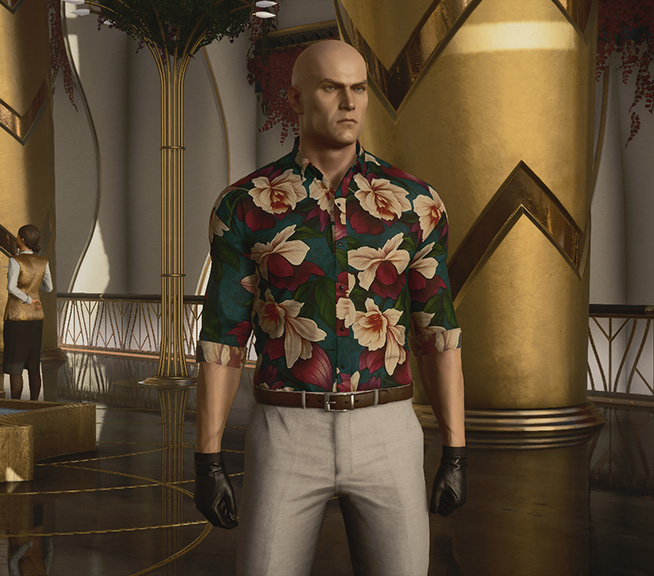
For this tutorial we will be focusing on the Casual Suit with Gloves which in the files is called outfit_agent47_bangkok_gloves_heroa_v0.entitytemplate. Scroll past all the charsets in the list to find it.
In the list, you will find two versions of the suit: one called actor and one called heroa. You will always want to edit the HeroA version; this is the suit you actually wear for gameplay. The Actor version of an outfit is used for NPCs, cutscenes and things of that nature.
In GlacierKit paste the TEMP hash into the Search game files... box. Wait for a moment, and you will find the outfit_agent47_bangkok_gloves_heroa_v0.entitytemplate file. Click it.
The References tab on the right side will show information about the file you've selected. You will find everything the template file makes use of, including the texture we're looking for.
What you are seeing is a list of obfuscated hashes and their decoded assembly paths—basically, where they are in IOI's internal filing system.
The file we are looking for is 00E99B14303AC484.TEXT 5F [assembly:/_pro/characters/assets/hero/agent47/textures/male_reg_agent47_bangkok_shirt.texture?/diffuse_a.tex](ascolormap).pc_tex, and this is the diffuse texture we want. You should find this a little more than halfway down the list. Click it when you find it.
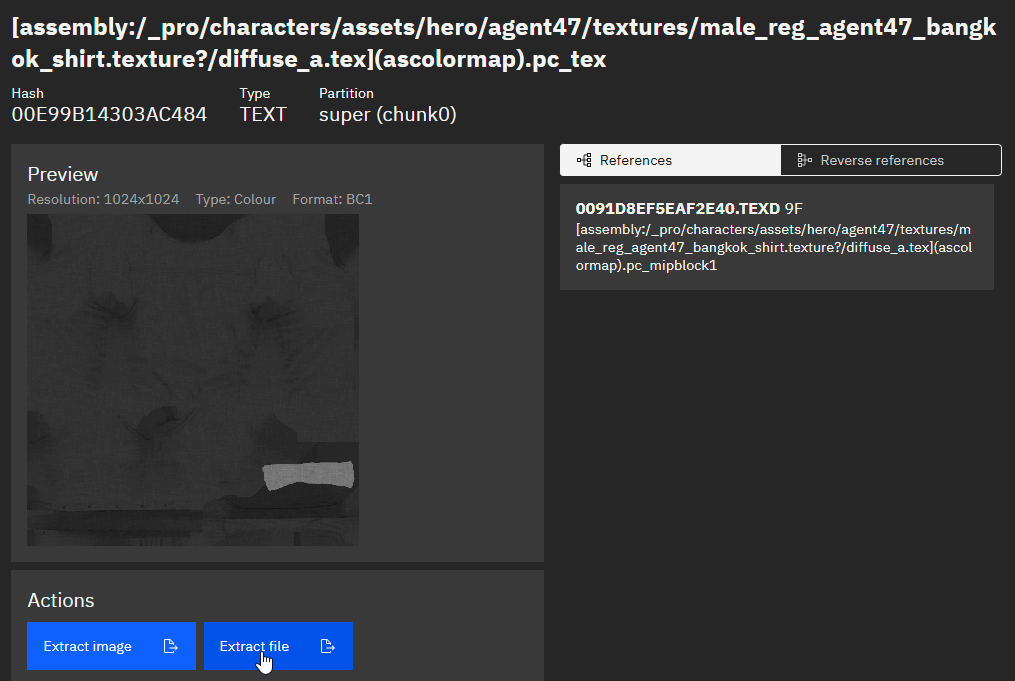
Click Extract file. Place it somewhere that's easy to get to. GlacierKit will also export a meta file along with it; you can delete that as we won't need it.
We're not completely done yet; look in the References tab, and you will find a TEXD file as well.
We will also need to export this TEXD file. Glacier 2's textures always come in pairs: the TEXT contains a scaled down version of the texture for fast streaming, and the TEXD contains the full sized texture, both files have their own mipmaps. HMTextureTools will still need both files as the TEXT file contains important metadata which the TEXD lacks. Extract this TEXD right next to its TEXT in the folder.
Convert the Texture to .tga
For this step we will be using HMTextureTools.exe from TonyTools, to convert our TEXT and TEXD to a format we can actually work with: TARGA.
HMTextureTools is a command-line interface program, meaning it does not have a user interface and simply running the .exe will do nothing. You will need to open the Command Prompt in the TonyTools folder or create a .BAT file in the TonyTools folder. This is an example of the command you should run:
HMTextureTools.exe convert H3 "c:\My Extracted Files\00E99B14303AC484.TEXT" --texd "c:\My Extracted Files\0091D8EF5EAF2E40.TEXD" "c:\My Extracted Files\00E99B14303AC484~0091D8EF5EAF2E40.texture.tga"
Please make sure to change the paths to where the files are on your system.
Here, we specify to HMTextureTools that we are converting a Hitman 3 asset. We specify first the path to the .TEXT file. Second, we flag that we also have a TEXD and give the path to that file. And finally, we specify the output, which is a TGA file.
You will notice that we name the TGA file according to this format: TEXT hash~TEXD hash.texture.tga
This will let Simple Mod Framework convert the .tga back to a TEXT and TEXD pair, using the information in the filename, which includes the .texture.tga ending. This saves us the trouble of having to do it ourselves as mod creators.
HMTextureTools will also produce a .tonymeta file. Rename this extension to .meta and we will be ready to move on.
Edit the .tga
Open the .tga in your favorite image editing program and get creative. Edit it to your hearts content and save it when you're done.
Make up New Hashes
Now we have the suit's diffuse texture and we've made our changes to it. Is it time to bring it back into the game? Not quite; simply replacing stock assets is a dirty way of doing things, and the consequences of doing so can be difficult to anticipate. If it happens that another item in the game uses the texture, things can look really crazy in ways that you didn't intend. The correct procedure is to introduce it to the game as a new texture and edit the outfit to use our new texture.
So we need to figure out a new TEXT hash and a new TEXD hash. GlacierKit has something that will help us do that, so open GlacierKit, and click the Text tools tab, the 2nd from the bottom.
Anything you enter in the Hash calculator field will be hashed, and the output will be shown in the Hex and Decimal field. We want the hex number though. Now consider the TEXT and TEXD we've extracted. Their assembly paths are, respectively:
- [assembly:/_pro/characters/assets/hero/agent47/textures/male_reg_agent47_bangkok_shirt.texture?/diffuse_a.tex](ascolormap).pc_tex
- [assembly:/_pro/characters/assets/hero/agent47/textures/male_reg_agent47_bangkok_shirt.texture?/diffuse_a.tex](ascolormap).pc_mipblock1
We can use these assembly paths to come up with some of our own. You don't have to; you can type anything into the left field to make a hash, anything at all, but why deviate from the norm that IOI has set up? So let's tweak these paths to make our own assembly paths. Here's an example:
- [assembly:/_pro/characters/assets/hero/agent47/textures/my_cool_and_awesome_shirt.texture?/diffuse_a.tex](ascolormap).pc_tex
- [assembly:/_pro/characters/assets/hero/agent47/textures/my_cool_and_awesome_shirt.texture?/diffuse_a.tex](ascolormap).pc_mipblock1
Let's put these two lines into the hash calculator, and it will give us 001F1D36FD5588E7 and 00366C40059C0978, respectively. With this, let's rename our .texture.tga and .meta files to 001F1D36FD5588E7~00366C40059C0978.texture.tga and 001F1D36FD5588E7~00366C40059C0978.texture.tga.meta.
This means that Simple Mod Framework, when applying the mod, will use this information to convert our .tga to a TEXT with the hash 001F1D36FD5588E7 and a TEXD with the hash 00366C40059C0978. Great!
Patch the Texture Change in the Outfit
Now that we have an entirely new texture, it's time to use it.
Let us first set up our mod project. Navigate to your Simple Mod Framework folder and open the Mods folder. Create a new folder in here called MyName.MyCoolShirt. (Good convention suggests that you name your mod folders with your username, a period, and the mod's name, no spaces.) Go into this folder and create a folder called content. In the content folder, create a new folder called chunk0. All the game's assets are segmented into chunks, it's not important to know right now but if you are curious you can see this article.
To recap, that folder structure is MyName.MyCoolShirt ➡ content ➡ chunk0.
Open GlacierKit. We will need to select this mod folder. In the Files tab at the top, click the big button labeled Select a project. Navigate to the MyName.MyCoolShirt folder you just made and select it.
Go to the Game content tab, second from the top that looks like a box. Remember what the Casual Suit was called? That's right, bangkok_gloves—enter that into the search box and hit enter. In the tree you will find outfit_agent47_bangkok_gloves_heroa_v0.entitytemplate. Click it and you will see a bunch of information about it. Click the Open in editor button.
Expand the root OUTFIT entity in the tree. What you see in the tree is what makes up the outfit. Model parts, material overrides, cloth collisions, and things like that.
For this tutorial, you're looking for the entity named male_reg_agent47_bangkok_shirt, it's further down in the tree. Click on it.
You'll see the entity's info on the screen on the right in standard JSON format. We're looking to place a texture override object inside properties. Feel free to copy the following:
        "Texture2D_01": {
	        "type": "ZRuntimeResourceID",
	        "value": {
	    	    "resource": "001F1D36FD5588E7",
	    	    "flag": "5F"
	        }
        },
        "Texture2D_01_enab": {
	        "type": "bool",
	        "value": true
        },
You recognize that hash in the resource parameter, right? That's right, it's our new TEXT hash! Paste the code snippet directly after the "ConstantVector1D_06_Value_op" property closes.
If you've done it right, the entity should look like this:
{
	"parent": "c3c9a53073fbca82",
	"name": "male_reg_agent47_bangkok_shirt",
	"factory": "[assembly:/_pro/characters/assets/hero/agent47/materials/male_reg_agent47_bangkok_shirt.mi].pc_entitytype",
	"blueprint": "[assembly:/_pro/characters/assets/hero/agent47/materials/male_reg_agent47_bangkok_shirt.mi].pc_entityblueprint",
	"properties": {
		"m_mTransform": {
			"type": "SMatrix43",
			"value": {
				"rotation": {
					"x": -0.0,
					"y": 0.0,
					"z": -0.0
				},
				"position": {
					"x": 0.0,
					"y": 0.0,
					"z": 0.0
				}
			}
		},
		"ConstantVector1D_01_Value_op": {
			"type": "IRenderMaterialEntity.EModifierOperation",
			"value": "eReplace"
		},
		"ConstantVector1D_01_Value": {
			"type": "float32",
			"value": 0.20999999344348907
		},
		"ConstantVector1D_05_Value_op": {
			"type": "IRenderMaterialEntity.EModifierOperation",
			"value": "eReplace"
		},
		"ConstantVector1D_05_Value": {
			"type": "float32",
			"value": 0.4699999988079071
		},
		"ConstantVector1D_04_Value_op": {
			"type": "IRenderMaterialEntity.EModifierOperation",
			"value": "eReplace"
		},
		"ConstantVector1D_06_Value_op": {
			"type": "IRenderMaterialEntity.EModifierOperation",
			"value": "eReplace"
		},
		"Texture2D_01": {
			"type": "ZRuntimeResourceID",
			"value": {
				"resource": "001F1D36FD5588E7",
				"flag": "5F"
			}
		},
		"Texture2D_01_enab": {
			"type": "bool",
			"value": true
		},
		"Clients": {
			"type": "TArray<SEntityTemplateReference>",
			"value": [
				"c3c9a53073fbca82"
			],
			"postInit": true
		},
		"m_eidParent": {
			"type": "SEntityTemplateReference",
			"value": "c3c9a53073fbca82",
			"postInit": true
		}
	}
}
These are all the changes we need to make. If you look at the open tab at the top of the window now, you have a diskette save button. Click the button, go into your content folder and then chunk0 folder, and we will save our file. You can call it myawesomeshirt. This will make a patch file for the entity.
We have our new texture, its meta file, and our entity patch. The last step is getting it into the game.
Making Our SMF Mod
In GlacierKit, click the Files tab to the left, at the very top. Right click the MyName.MyCoolShirt folder and click New File. Call it manifest.json and hit enter. Click the file to open it.
Paste the following info into it. If GlacierKit asks for permission to access your clipboard, click Allow.
{
    "$schema": "https://raw.githubusercontent.com/atampy25/simple-mod-framework/main/Mod%20Manager/src/lib/manifest-schema.json",
    "id": "MyName.MyCoolShirt",
    "name": "My Cool Shirt",
    "description": "Makes the Casual Suit totally rad.",
    "authors": ["My Name"],
    "frameworkVersion": "2.33.27",
    "version": "1.0.0",
    "contentFolders": ["content"]
}
If you edit the manifest with GlacierKit or Visual Studio Code, they will use the schema you imported with the first line to help you validate your manifest. That is, if you make any errors or write anything invalid, the editor can point it out to you. This is why we first recommend VSCode or GlacierKit as editors.
frameworkVersion is the version of the framework you are currently using. At the time of writing, the latest version is 2.33.27.
contentFolders in the manifest tells Simple Mod Framework what folders will be used for mod content.
Enter the chunk0 folder and move the textures you created earlier there. So when all is said and done, this should be the tree structure of your mod:
📁MyName.MyCoolShirt
├── 📁content
│   └── 📁chunk0
│       ├── 001F1D36FD5588E7~00366C40059C0978.texture.tga
│       ├── 001F1D36FD5588E7~00366C40059C0978.texture.tga.meta
│       └── myawesomeshirt.entity.patch.json
├── manifest.json
└── project.json
That's all we need. Start Simple Mod Framework and click Enable/disable mods. Find your mod in the list under Available mods and click Enable, then Apply and watch it work for a minute. When it's done, close Simple Mod Framework and start up the game.
Go into pre-planning at any level you like and choose the Casual Suit with Gloves. Start the level, and if you did everything right, the fruits of your labor should be before your eyes!
You can now zip up your SMF mod and release it into the world. You're a mod author now.